


-
Content Count
18 -
Joined
-
Last visited
-
Days Won
1
-

DayZ Is Getting Motorbikes: The Jana, the Enduro, and Ragdolls Are Back
DaOne posted an article in News & Updates
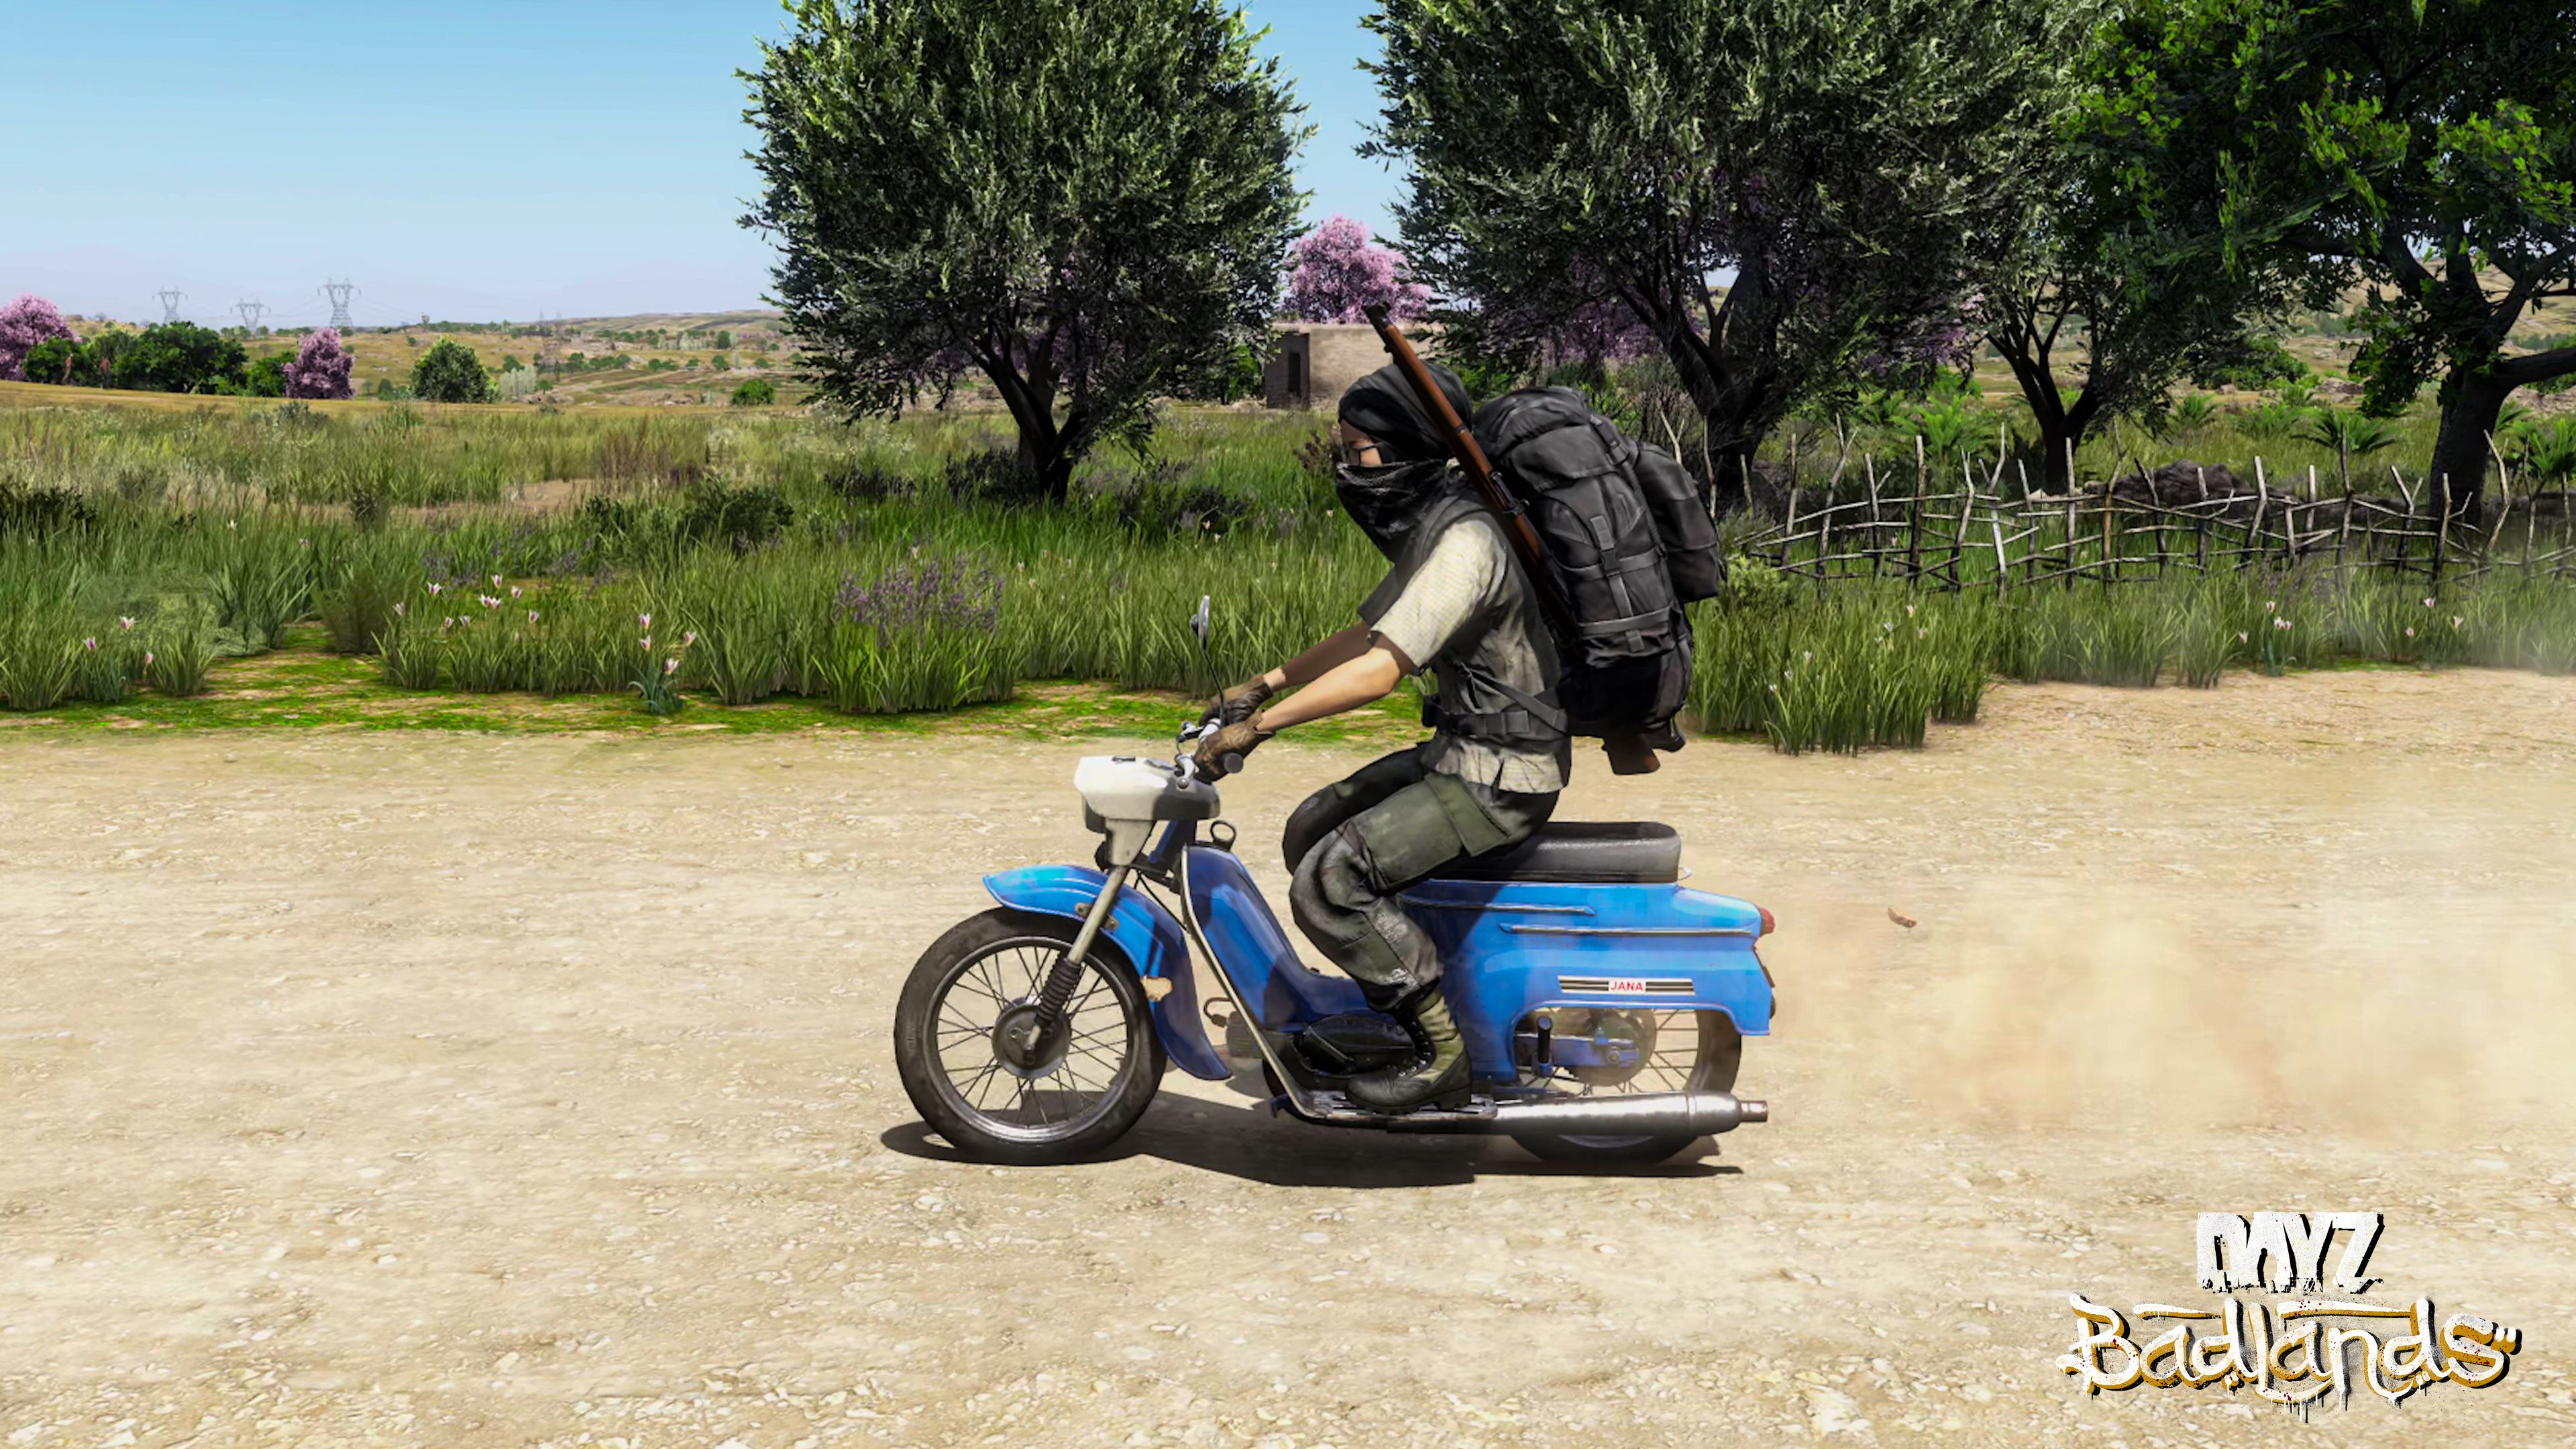
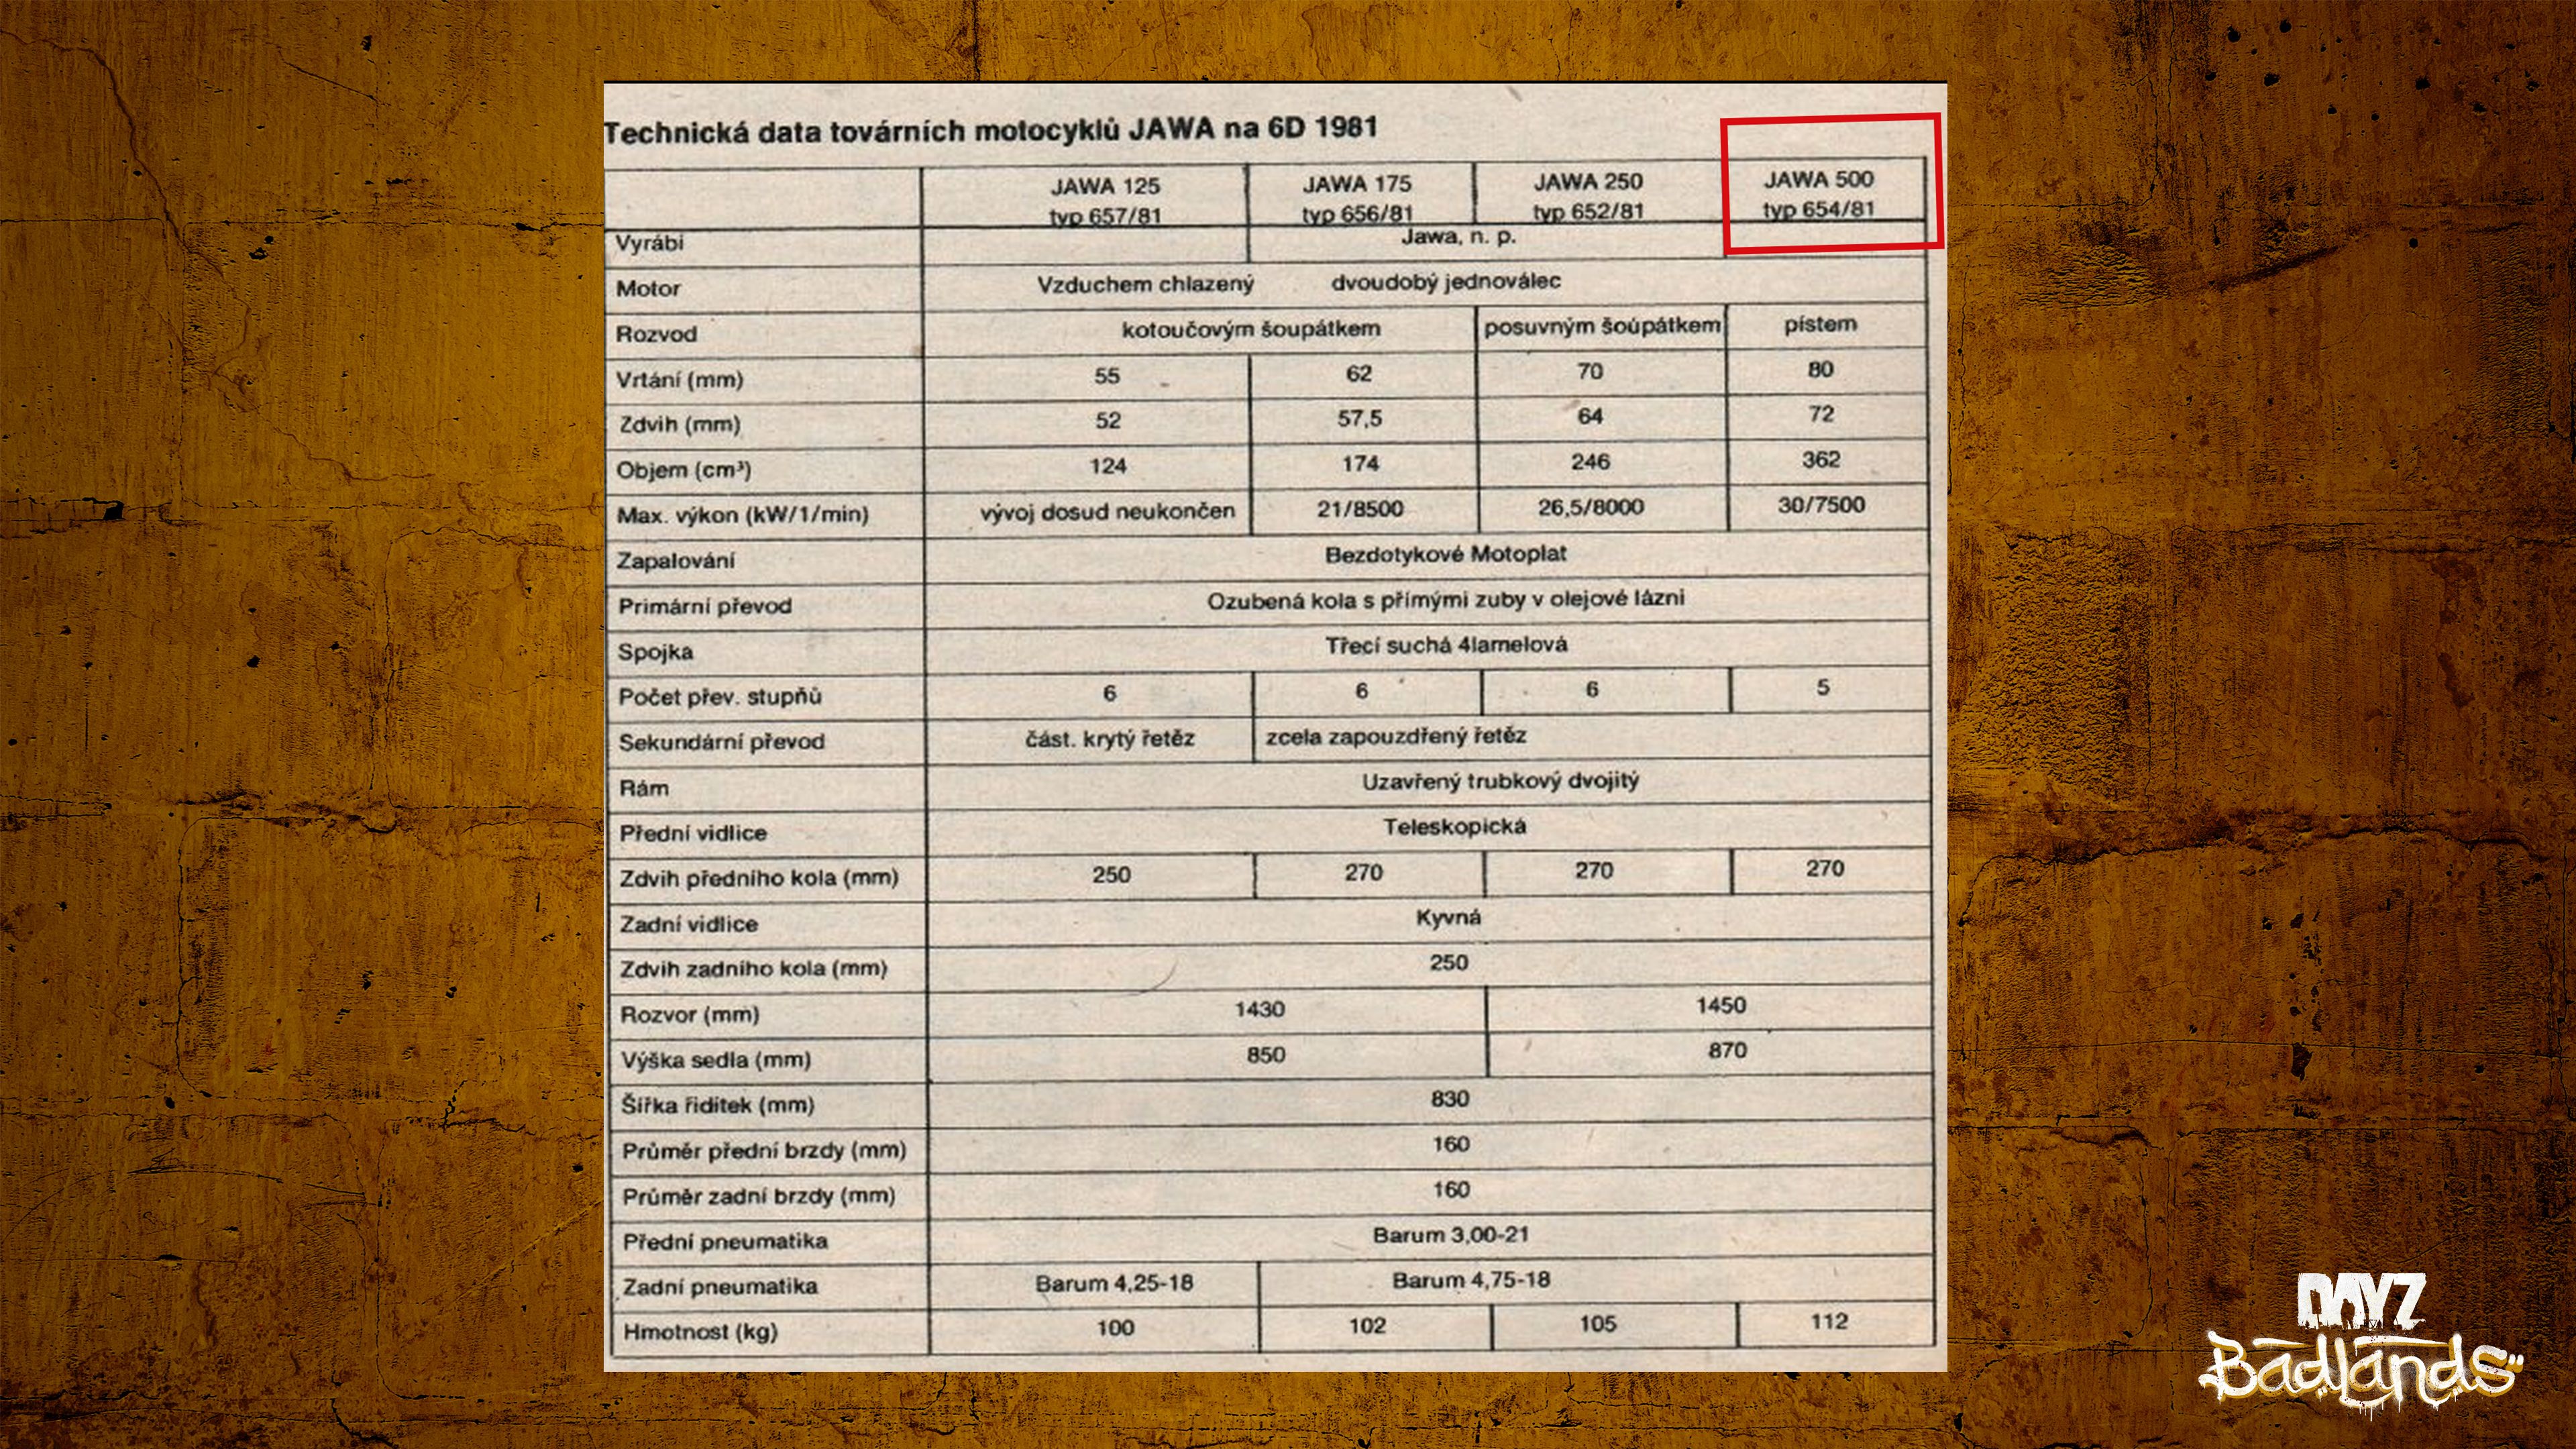 When Dev Blog 6 mentioned “the newly added motorbikes” in a single throwaway clause, it was the only detail anyone got. Dev Blog 7 is the payoff: two bikes, a two-wheeled leaning simulation, the return of ragdoll physics, and a test server coming in Experimental 1.30 so you can ride them before Badlands even launches. The best part for everyone not buying the expansion? Bikes are not exclusive to Nasdara. They are coming to all four maps. Note: Bohemia’s standing disclaimer applies: “The information shared in our development blog reflects a work in progress. The details discussed are subject to change before release.” Catching up? See our Dev Blog 6 coverage and the full Nasdara rundown. On this page Bikes on every map, and a test server before launchLeaning, steering lights, and walking your bike homeRagdolls are back, and they are for crashingThe Jana: a Czech moped with three colours and no ambitionsThe Enduro: 130 km/h and parts you can mix and matchRamps, suspension, and no air control (for now)They recorded a real oneMaintenance, and what bikes cannot doWhat is next, and where the schedule wentWhat motorbikes mean for your serverFrequently asked questions Dev Blog 7 is entirely about motorbikes — a third mode of transport for the biggest map DayZ has ever had. Image: Bohemia Interactive — DayZ Badlands Dev Blog (Week 84) Bikes on every map, and a test server before launch Motorbikes were not part of the original Badlands plan. Bohemia says they became a natural fit once the scale of Nasdara became clear — it is the biggest map the studio has ever built, and a third option between walking and driving a car makes crossing it far more interesting. Two things follow that matter well beyond the expansion: Bikes reach all terrains, not just Nasdara — though in lower numbers elsewhere. The team says they want to watch how players use them on each map. The developers’ own video for this section is titled “Motorbikes On All Four Maps,” which is about as clear as it gets.Experimental Update 1.30 will introduce “Many Bikes” servers, purpose-built so you can test them in advance. That second point is the one to circle. It means bikes land on Experimental before Badlands releases, and a dedicated high-spawn server type exists to hammer them. Bohemia calls the release date of Experimental 1.30 “the elephant in the room” and says it will be announced as soon as possible. Bikes are coming to all four maps, with Nasdara getting the highest numbers. Image: Bohemia Interactive — DayZ Badlands Dev Blog (Week 84) Leaning, steering lights, and walking your bike home This is a genuine two-wheeled simulation rather than a reskinned car. The character leans into turns, the handlebar-turning animation drives the feel, and Bohemia had to upgrade its animation systems to make it work. Even the front-mounted light follows the direction you are steering. Interestingly, the groundwork was already laid: the team credits the car networking upgrade shipped in Update 1.28 as what made motorbikes possible at all. Gears work as they do in other vehicles, but there are new animations for “walking” the bike — pushing it on foot to reposition it, or, as the blog cheerfully puts it, to drag it into the shade when your spark plug is busted. You can walk it with the engine off or in neutral. DayZ Badlands Dev Blog Week 84 - Motorbikes On All Four Maps Video: Bohemia Interactive — DayZ Badlands Dev Blog (Week 84) Ragdolls are back, and they are for crashing Here is the one that will get clipped and shared: ragdoll physics are returning to DayZ, reserved specifically for bike crashes. Crash at relatively high speed and you get ejected. The mechanics are worth reading carefully, because the two perspectives differ: PerspectiveWhat happensOther playersThe ragdoll animation triggers and plays out — and crucially, all clients see the character in the same position.YouYou briefly fall unconscious. That consistency detail matters more than it sounds. A ragdoll that lands differently on each client would be a desync nightmare in a game where your body is lootable. Everyone agreeing on where you ended up is the hard part. DayZ Badlands Dev Blog Week 84 - Ragdoll Physics For Motorbike Crashes Video: Bohemia Interactive — DayZ Badlands Dev Blog (Week 84) The Jana: a Czech moped with three colours and no ambitions Bohemia leans on its home country again. The Jana moped is directly inspired by the Jawa 50/05, one of the most commonly owned bikes in rural Czechia — in the late ’60s, as the blog puts it, either the bike every teenager had or the one every teenager wanted. Three fixed colour variations: blue, red, and yellow.Top speed around 70 km/h.Distinctive rounded bodywork, unusual proportions and a characteristic large double seat. On the art side it was built with a Sub-D workflow for the smooth curves, with hard-surface parts like the metal panels and wheels modelled in Blender and the seat sculpted in ZBrush. The texturing layers on rust, dust, dirt and grime, with fuel and oil stains around the tank and engine — a vehicle that has “seen extensive use and survived years of neglect.” The Jana is modelled on the Jawa 50/05 and comes in blue, red or yellow. Image: Bohemia Interactive — DayZ Badlands Dev Blog (Week 84) The Enduro: 130 km/h and parts you can mix and match The Enduro is the serious one, based on the Jawa 500 682 Bitrak — and it is the bike with the customisation hook. Some parts are removable for cosmetic customisation. Base colours are red, yellow, green and blue, and you can mix and match parts however you like.Top speed around 130 km/h — nearly double the Jana.Bohemia also linked an old Jawa performance test advertisement from the Jawa Yezdi Motorcycles channel as period reference. The real machine is a 362cc two-stroke single-cylinder with strong torque, complex sport suspension and large 270mm all-terrain tyres. Front shocks and the rear swing arm both have long travel, the rear riding on springs and shock absorbers. The in-game version takes a few deliberate liberties: the real bike runs two spark plugs for redundancy because fouling is a problem, but DayZ simplifies it to one. It has longer gears than a motocross setup for a higher top speed across the map, and aftermarket gauges that let you manage the bike and its optional lights at night. The modeller’s own notes are a nice touch — tracing every switch and cable line to work out where it connected, recreating the cast shape of the engine and the rear suspension linkage, and importing the frame into ZBrush to sculpt the welds. It was, they say, their first time doing hard surfaces in ZBrush. The Enduro tops out near 130 km/h and has removable parts you can mix and match across four base colours. Image: Bohemia Interactive — DayZ Badlands Dev Blog (Week 84) Ramps, suspension, and no air control (for now) Bohemia has placed ramps all over Nasdara for small jumps — but sets expectations immediately: there is no air control for now. You can get airborne; you cannot steer once you are. The suspension demonstration is worth watching for what the long-travel setup actually does under the bike. DayZ Badlands Dev Blog Week 84 - Motorbike Suspension Demonstration Video: Bohemia Interactive — DayZ Badlands Dev Blog (Week 84) Careful: Bikes are small-framed with powerful engines, and you can damage the spark plug if you push too hard. Bohemia says the balancing has been adjusted so cautious players should not need to worry — which is a fairly clear hint that reckless ones will. They recorded a real one The audio team went hunting for an actual Jawa 500 682 Bitrak, which is a rare racing variant produced in very small numbers. They were seriously considering recording a different bike with matching engine specs before they managed to get hold of the real thing. What they captured: a wide range of engine RPMs, the exhaust note (“spot-on,” they reckon), all the small incidental sounds on the bike, and several new tyre recordings. DayZ Badlands Dev Blog Week 84 - Behind The Scenes Of Recording Motorbike Audio Video: Bohemia Interactive — DayZ Badlands Dev Blog (Week 84) Aftermarket gauges let you manage the bike and its optional lights while riding at night. Image: Bohemia Interactive — DayZ Badlands Dev Blog (Week 84) Maintenance, and what bikes cannot do Bikes are deliberately simpler to keep running than cars, and deliberately limited in what they offer: AspectDetailRepairsBoth bikes are repaired with a blowtorch.BatteryNeither bike has a separate battery like cars do, so assembling one is less hassle.TyresReplaceable, as always.Spark plugA single plug on the Enduro, and damageable if you ride carelessly.InventoryNone. Neither bike has any cargo space — they are purely transport.PassengersOne character only. No passenger seats. No inventory is the big one. A car is a rolling stash; a bike is not. That makes bikes a movement tool rather than a base-building logistics solution, and it is a deliberate trade against their speed. The Jana was built with a Sub-D workflow in Blender, with the seat sculpted separately in ZBrush. Image: Bohemia Interactive — DayZ Badlands Dev Blog (Week 84) What is next, and where the schedule went Bohemia opened the blog with an apology for missing its own three-week cadence, citing two causes: it is “the final hurrah for most of the team,” and the marketing department was tied up with a Gamescom showcase. They say everyone is back and they will try to increase blog frequency as release approaches. Two topics are named for upcoming blogs: The music production behind DayZ Badlands.Animals coming to Nasdara. Combined with Dev Blog 6’s “release window just a few months away,” and an Experimental 1.30 date promised as soon as possible, the runway is getting short. Rust, dust, grime and fuel staining sell a vehicle that survived years of neglect. Image: Bohemia Interactive — DayZ Badlands Dev Blog (Week 84) What motorbikes mean for your server This is the rare dev blog where almost everything lands on existing servers rather than only the expansion. Bikes are coming to all four maps, and Experimental 1.30 gets them there ahead of Badlands. A new vehicle class means new economy entries. Two bikes, multiple colour variants and removable Enduro parts all need spawn rates, lifetimes and loot placement in your mission XML.Your vehicle caps need rethinking. Bikes are cheap, fast and disposable in a way cars are not, and a limit tuned for sedans will behave very differently once mopeds enter the pool.No inventory changes player behaviour. Bikes will not replace cars for hauling, so expect them to be used as scouting and rotation tools — which tends to mean more contested-area traffic, not less.“Many Bikes” is a preview of demand. A dedicated high-spawn server type on Experimental is the perfect excuse to test your own spawn balance before it matters. All of it runs through the same mission files and config you already manage. Our loot economy guide covers editing spawns safely with the built-in XML validator, and the serverDZ.cfg reference walks through every server setting you can tune. Not running a server yet? A new vehicle class dropping on every map at once is a good moment to start — our getting started guide takes you from order to a running server in about fifteen minutes, and the Workshop mods guide covers load order and auto-updates so a patch day does not catch you out. Note: We will cover the music and Nasdara animals blogs as they land, and the Experimental 1.30 date the moment Bohemia announces it. Frequently asked questions Are motorbikes only in DayZ Badlands? No. Bohemia confirms bikes will be found across all terrains, though in lower numbers outside Nasdara — the developers’ own video for this section is titled “Motorbikes On All Four Maps.” They arrive on Experimental with Update 1.30. What are the "Many Bikes" servers? A server type coming with Experimental Update 1.30 that lets players test motorbikes in advance. No release date for 1.30 has been given — Bohemia calls it “the elephant in the room” and says it will announce one as soon as possible. How fast are the two bikes? The Jana moped should reach approximately 70 km/h, and the Enduro dirt bike around 130 km/h. Both figures are the developers’ own approximations and could change before release. Can motorbikes carry loot or a passenger? Neither. Bohemia is explicit that neither bike has any inventory space and that both carry a single character with no passenger seats — they are designed purely as transport. Are ragdoll physics coming back to DayZ properly? They are returning specifically for bike crashes. Crash at speed and other players see a ragdoll animation — with all clients agreeing on the final position — while from your own perspective you briefly fall unconscious. How do you repair a motorbike? With a blowtorch. Neither bike uses a separate battery like cars do, tyres are replaceable, and the Enduro runs a single spark plug that can be damaged by careless riding. Related guides Dev Blog 6: dust, the Lee-Enfield and a release windowDayZ Badlands: everything we knowGetting started with the control panel
 -
 Dev Blog 6 landed on 7 August, and buried in the housekeeping is the line every DayZ player has been waiting for: the release window is “just a few months away.” That is the closest Bohemia Interactive has come to dating DayZ Badlands, and it arrived alongside two features — a dynamic dust system that reacts to wind, weight and footsteps, and the Lee-Enfield rifle. There is also a quiet bombshell in a subordinate clause: motorbikes, described in passing as “newly added,” with no fanfare whatsoever. Here is everything from the blog, including both official videos. Note: As always, Bohemia attaches a disclaimer: “The information shared in our development blog reflects a work in progress. The details discussed are subject to change before release.” New to the expansion? Start with our full rundown of everything confirmed about Nasdara. On this page The headline nobody put in a headline: a release windowWait — motorbikes?Dust that actually reacts to the worldWatch the dust system in motionGood news for every other mapThe Lee-Enfield: a Great War rifle with an Indian accentSee the rifle in actionWhat is nextGetting your server ready for BadlandsFrequently asked questions Dev Blog 6 covers dust particle effects and the Lee-Enfield rifle. Image: Bohemia Interactive — DayZ Badlands Dev Blog (Week 79) The headline nobody put in a headline: a release window Bohemia did not write a press release about this. It appears in the middle of a paragraph explaining why future dev blogs may feel less thematically tidy: Two things follow from that. First, there is still no confirmed date — “a few months” is a window, not a launch day, and we are not going to pretend otherwise. Second, a team openly describing itself as under pressure with a window in sight is a team in the back half of development. The cadence is holding regardless: a dev blog every three weeks, plus surprise recap posts in between that recap previous blogs, answer community questions, clarify details, and — in their words — “cheekily sneak in new information that didn't appear in the main dev blog.” Those recaps are worth watching, because that is exactly where the code lock news turned up last time. Wait — motorbikes? The dust section opens by listing what kicks up dust: “cars, trucks, and the newly added motorbikes.” That is the entire announcement. No section, no screenshot, no elaboration. It is a genuinely significant addition. DayZ has never had a two-wheeled vehicle in the base game, and a motorbike changes the calculus on a map Bohemia has described as large and punishing to cross on foot — fast, fuel-efficient, able to thread the alleys and dried riverbeds that a truck cannot, and almost certainly far more fragile. Careful: Beyond that one clause, nothing about motorbikes has been detailed — no handling model, no repair or fuel specifics, no screenshots. Treat everything else you read about them as speculation until Bohemia says more. Dust that actually reacts to the world The dust system splits into two vehicle effects that work together: EffectBehaviourTrail cloudA big cloud that follows the vehicle for a period. Size and duration scale with vehicle type and weight — a value the team set artificially so it can be tuned per vehicle and per event.Wheel dustA smaller ambient trail attached to each individual wheel, for immersion while driving. On foot it goes further. Footsteps kick up their own clouds, and stepping inside a building can make the floor creak and dust fall from the ceiling — potentially giving away your position to anyone listening on the floor below. That is a genuine stealth mechanic hiding inside a particle effect. Trail cloud size and duration scale with vehicle weight, and each wheel adds its own ambient dust. Image: Bohemia Interactive — DayZ Badlands Dev Blog (Week 79) Watch the dust system in motion Bohemia published a demonstration reel showing the effects across several situations — vehicles, footsteps and falling ceiling dust. DayZ Badlands Dev Blog Week 79 - Dust Particles Video: Bohemia Interactive — DayZ Badlands Dev Blog (Week 79) The performance engineering behind it is more interesting than particle effects usually are. Both dust effects are client-side only, so nothing is synchronised over the network — with one telling exception: the dust that falls from the ceiling when someone is walking overhead. That one has to be networked, because it is information about another player. Rather than simulating dust across the whole map, the system only generates particles in a localised area around you, and then predicts your direction and speed to shift that area ahead of you. Drive somewhere and the game is not wasting effort spawning dust in the space you have already left. Airborne dust uses the same trick from a different angle: particles spawn upwind of your view so they drift toward and past the camera, making dust feel omnipresent without being simulated everywhere. Weather drives all of it. Wind intensity directly controls ground-dust spawn frequency — stronger wind, more dust kicked up — while wind direction decides where airborne particles originate. Good news for every other map This is the part server owners should note. The dust effects are not locked to Badlands: Dust is a surface property with adjustable behaviour. That is the second time in two dev blogs that a Badlands feature has been confirmed to reach the wider game — the code lock was the first. Whether it gets retrofitted to Chernarus or Livonia officially is not stated, but the capability is engine-side rather than map-side, which is the part that matters for modding. Dust is implemented as an adjustable surface property rather than a Nasdara-only effect. Image: Bohemia Interactive — DayZ Badlands Dev Blog (Week 79) The Lee-Enfield: a Great War rifle with an Indian accent The second half of the blog is a deep dive into the Lee-Enfield, modelled on the most common Great War variant: the Model No. 1 Mk. III*, better known as the SMLE (Short, Magazine, Lee-Enfield). That asterisk is doing real work. In the British system it denotes a design update — here, a redesigned bridge and the removal of the volley sight, a long-range aiming device that real-world combat distances had made pointless. The woodwork was also thickened considerably after reports of cracking, producing the distinctive look where the barrel band and shroud sit sunken into the stock. The specific rifle Bohemia modelled is not a British-made example, and the details give it away: It is built from lighter teak wood, which was far more available in India than walnut — walnut being rare in that climate.It has a cross bolt through the rear of the forewood stock, known to collectors as the Ishapore screw.An extra stud sits through the wood in front of the receiver to help distribute recoil force.It is stamped “R.F.I.” — Rifle Factory Ishapore. Those modifications existed to extend the life of the stock, and the team modelled them faithfully enough that the rifle tells you where it came from. The Lee-Enfield is based on the Model No. 1 Mk. III*, the most common variant of the Great War. Image: Bohemia Interactive — DayZ Badlands Dev Blog (Week 79) See the rifle in action DayZ Badlands Dev Blog Week 79 - Lee-Enfield Video: Bohemia Interactive — DayZ Badlands Dev Blog (Week 79) The technical details are where it gets interesting for gameplay. The rifle feeds 10 rounds of 7.62×54mmR from a 10-round detachable magazine — not the .303 British you would expect from an original. That is a real-world conversion, not a liberty. Because .303 British is rare today, owners who want to shoot these rifles regularly convert them: the barrel is set back a couple of millimetres, planed down at the chamber end to restore headspace, and a new chamber is cut with a Mosin chamber-cutting reamer. The magazine already fits the cartridge and the bullet diameter is identical, so nothing else needs changing. Bohemia is explicit about why this matters in game: “This makes the gun ideal for our economy, as using a shared cartridge is better for gameplay.” A Great War bolt-action that feeds from the same ammo pool as the Mosin is far more likely to stay in your hands than a rifle with its own orphan calibre. The R.F.I. stamp marks it as a Rifle Factory Ishapore build, matching its teak stock and cross bolt. Image: Bohemia Interactive — DayZ Badlands Dev Blog (Week 79) What is next Bohemia is hedging on the next blog, but named two candidates: public infrastructure and possibly the highway. Nothing is set in stone, and they have asked the community to weigh in when the next recap drops “in a week or two.” They also acknowledged the balancing act openly — that choosing what to show has been difficult because they do not want to oversell or spoil the surprises. Dev Blog 6 was, by their own admission, a quieter one than the rebuilding system reveal that preceded it. Thickened teak furniture and the sunken barrel band are faithful to the Ishapore-built original. Image: Bohemia Interactive — DayZ Badlands Dev Blog (Week 79) Getting your server ready for Badlands “A few months away” is close enough to start preparing. A new official map resets the entire server scene — no established bases, no entrenched clans, no memorised loot routes — and the communities that are configured and running on day one are the ones that keep the players who show up looking for a home. Three things from this blog that land directly on server owners: Dust is engine-side, not map-side. A surface property with adjustable behaviour is exactly the kind of thing modders reach for, so expect it to surface on community maps well beyond Nasdara.Motorbikes change your vehicle economy. A new vehicle class means new spawn rates, new parts and new repair loops in your mission files — and a new headache for anyone running vehicle limits.The Lee-Enfield shares the Mosin's cartridge. That is a deliberate economy decision, and it will shift 7.62×54mmR demand on your server the moment the rifle spawns. All three run through the same mission XML and config you already manage. If you are setting up now, our getting started guide takes you from first login to a running server in about fifteen minutes, the serverDZ.cfg reference covers every setting you can tune, and the loot economy guide explains how to adjust spawns safely when the new weapons and vehicles arrive. Running mods on top? Our Workshop mods guide covers load order, server-only mods and auto-updates — the three things most likely to break a server the week a major expansion lands. Note: We will cover the next dev blog and recap as they land. Bohemia has asked for community input on what to showcase next, so if you want to see public infrastructure or the highway, the recap post is the place to say so. Frequently asked questions Has DayZ Badlands got a release date? Not a date, but for the first time a window. In Dev Blog 6, Bohemia wrote that “the release window is just a few months away.” No specific day, month or quarter has been confirmed. Are motorbikes really coming to DayZ? Yes. Dev Blog 6 refers to “cars, trucks, and the newly added motorbikes” when describing which vehicles kick up dust. That single mention is all the detail given so far — no handling, fuel or repair specifics have been published. Will the dust effects come to Chernarus and Livonia? The capability will. Bohemia states dust “can be applied as a property to any surface with adjustable behavior” and that a designer can apply it to existing surfaces and maps. Whether the official older maps get updated is not confirmed. What ammunition does the Lee-Enfield use? 7.62×54mmR, fed from a 10-round detachable magazine. It is modelled as a real-world calibre conversion of a .303 British rifle, and Bohemia says the shared cartridge is deliberate because it suits the game's loot economy. Do the dust particles affect server performance? Both effects are client-side only and are not networked, with one exception: dust falling from a ceiling when another player walks overhead. The system also only spawns particles in a predicted area around each player rather than across the map. Where can I watch the official videos? Both are embedded above and come from the official DayZ YouTube channel — one demonstrating the dust particle effects, one showing the Lee-Enfield. The full write-up is in Bohemia's Dev Blog (Week 79). Related guides DayZ Badlands: everything we knowGetting started with the control panelinstalling Steam Workshop mods
 -
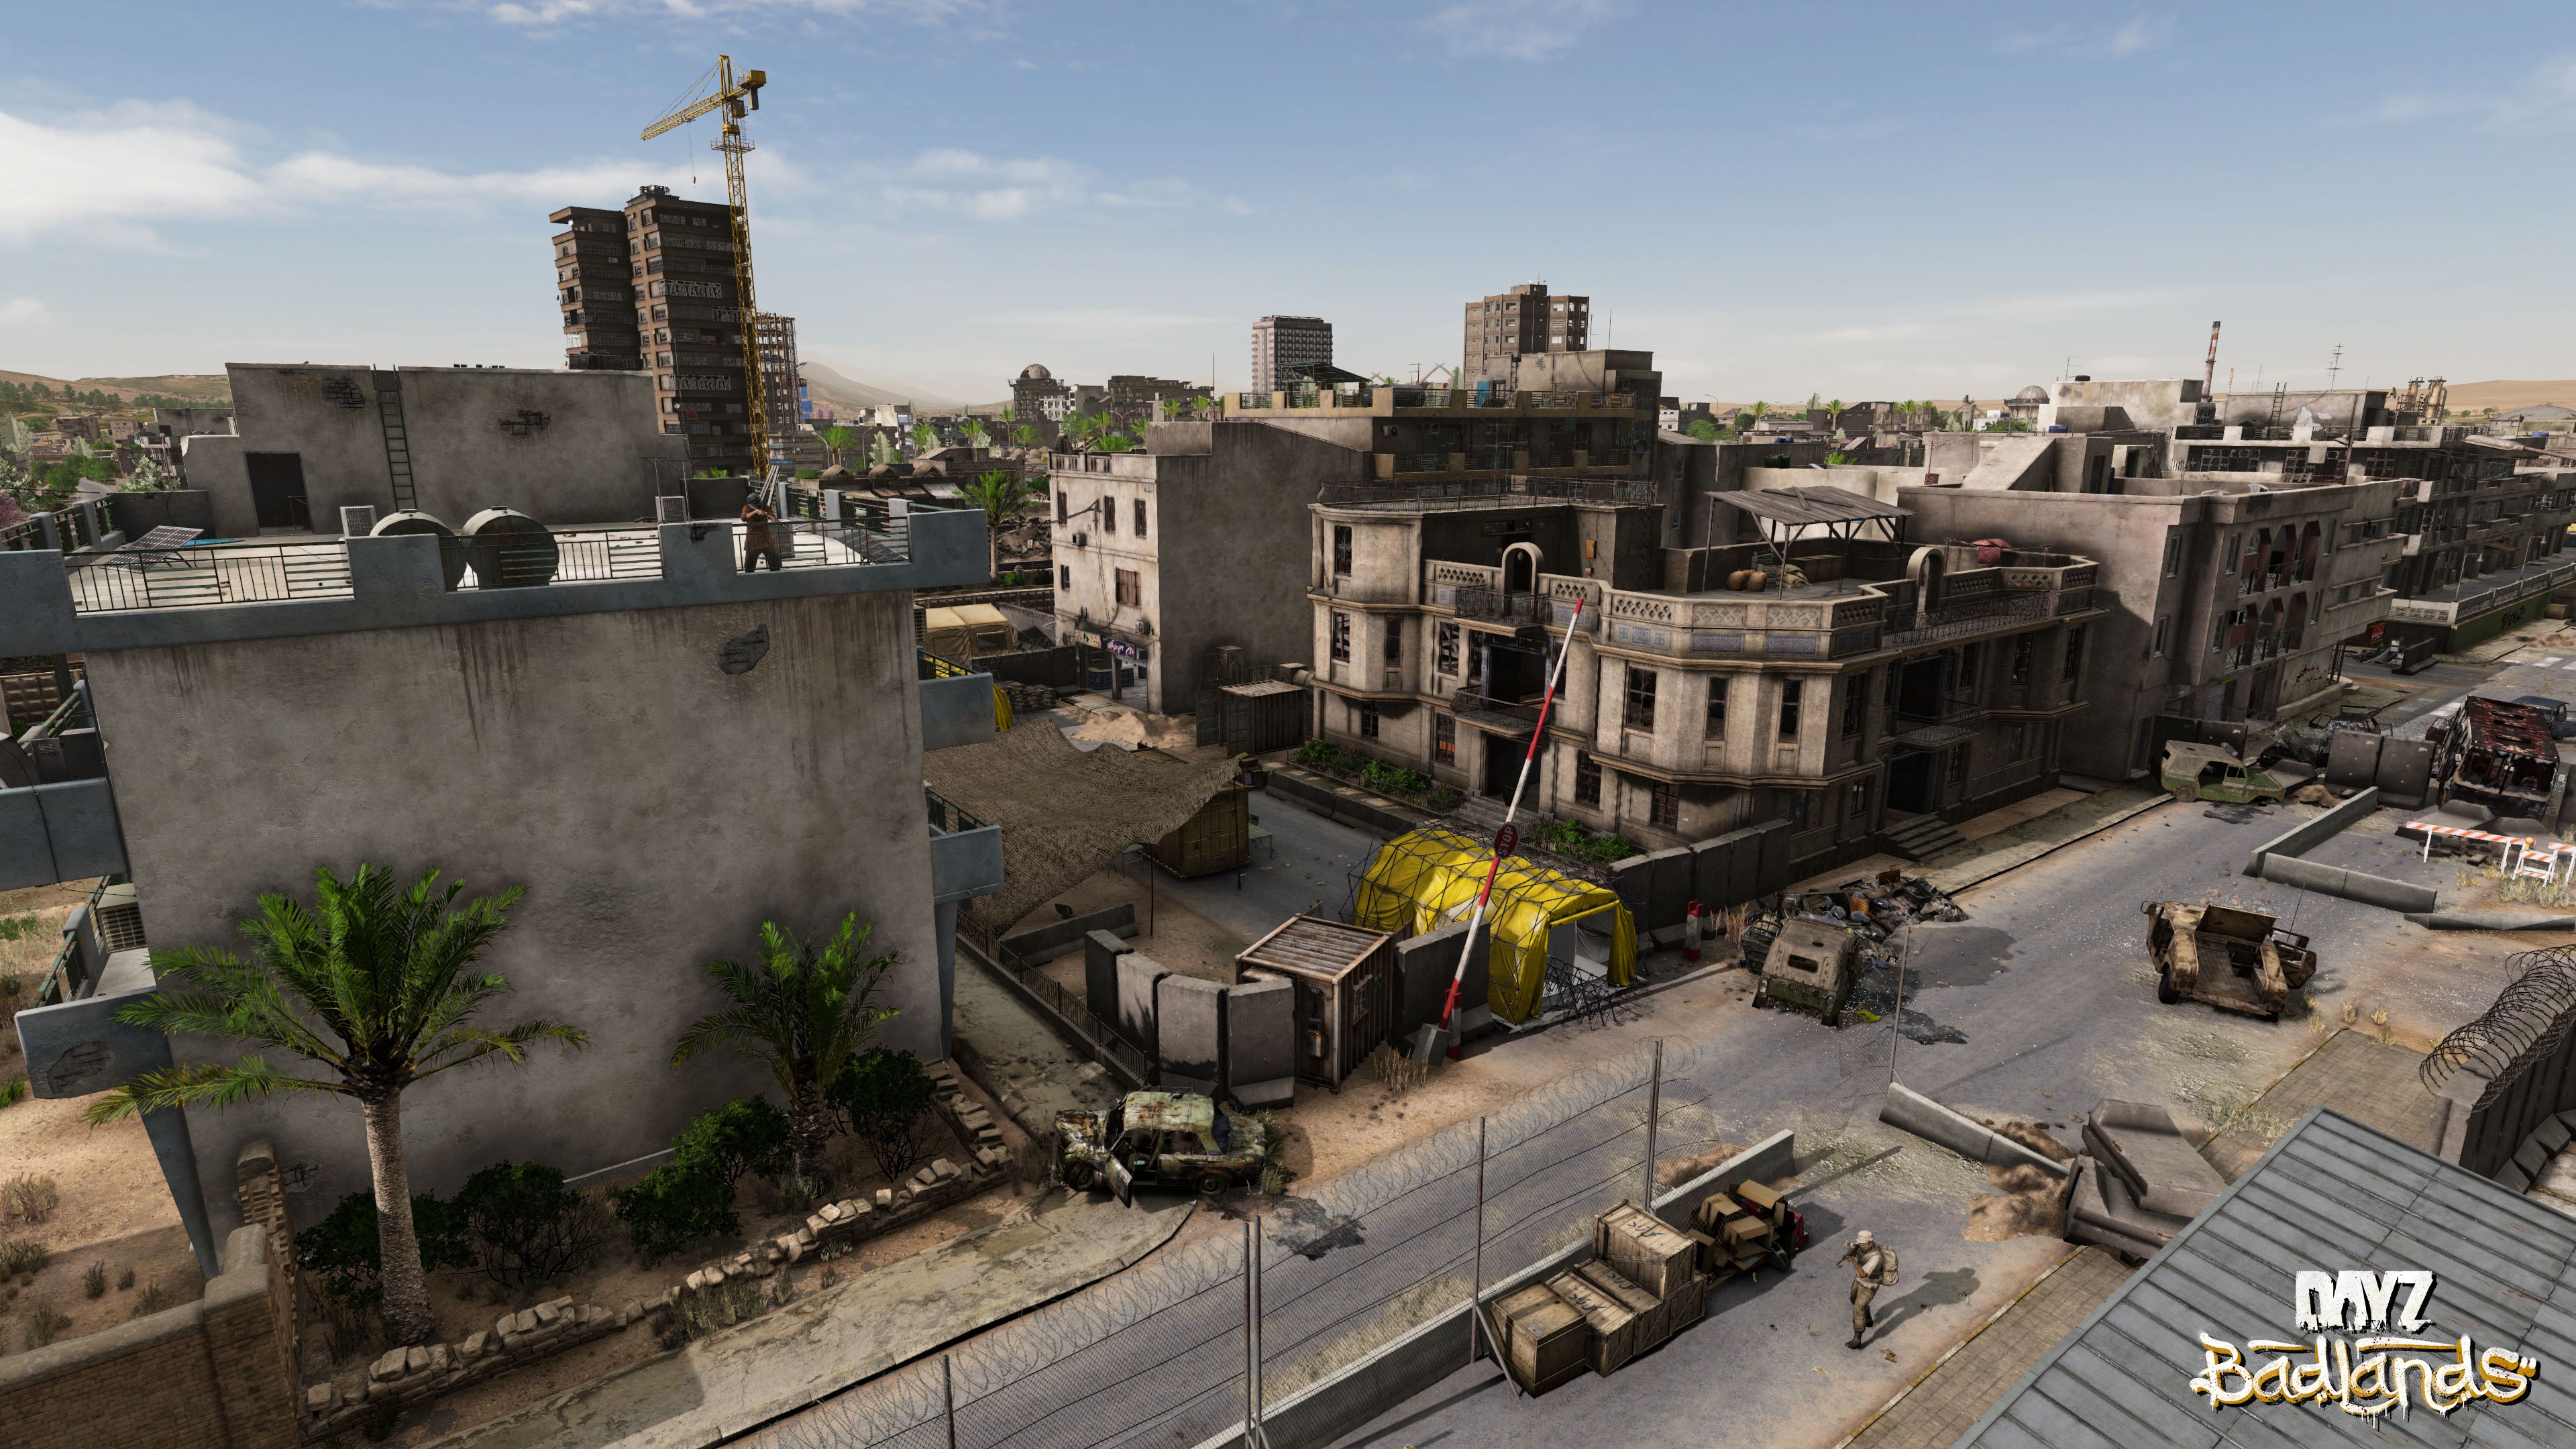 DayZ Badlands is taking survivors somewhere the series has never gone: Nasdara, a Middle-Eastern-inspired region that Bohemia Interactive calls the hottest official map it has ever built. This is not Chernarus with a sand filter. The sun itself is a threat, water is scarce enough to plan your route around, and for the first time you will be able to rebuild and lock down a ruined house instead of nailing planks to a tent. Four dev blogs are out so far. We have read all of them and pulled together everything the developers have actually confirmed — the survival mechanics, the new gear, the weapons, the rebuilding system, and what it all means if you are planning to run your own Badlands server on day one. Note: Bohemia attaches the same disclaimer to every dev blog: “The information shared in our development blog reflects a work in progress. The details discussed are subject to change before release.” Everything below is what has been shown or stated publicly, not a promise of the final game. On this page The sun is now something that can kill youYour loadout finally has a real trade-offThe infected got a ground-up reworkScimitars, jambiyas, and a 2,500-year-old bladePvP in a concrete jungleThe Bazaar: a modular market with a gun shop insideThe Rebuilding System, and the code lock everyone asked forWhen can you play it?What Badlands means if you run a serverFrequently asked questions Nasdara, the new region coming with DayZ Badlands. Image: Bohemia Interactive — DayZ Badlands Dev Blog (Week 73) The sun is now something that can kill you Bohemia has been blunt about this: Nasdara is the hottest official map ever made for DayZ, and the heat is a gameplay system rather than a colour grade. Direct sunlight will affect your character’s stats, so staying alive means paying attention to more than a hunger bar. Cover up or find shade. Staying hydrated is only part of it — keeping your body covered and getting out of direct sun both matter.Nights get cold. The developers confirm severe temperature swings between day and night, though they stopped short of freezing conditions.Dust is a hazard. Glasses, goggles, shemaghs, dust masks and face wraps become functional items, not cosmetics. As the team put it, you never know when a breeze of dust can turn into something sinister. Water is the other half of the squeeze. Nasdara has very little standing water, so the well-hopping routine from Chernarus does not transfer. Bohemia researched how water is actually distributed across Middle Eastern regions, historically and today, and built “new and more interactive ways” to drink. Ignore it and the consequences escalate — the blog spells out the ending: starting with sweating and ending with death. This is the part that should excite anyone who thinks modern DayZ has become too survivable. On Chernarus and Livonia, the environment mostly means bad weather and poor visibility. On Nasdara it is a constant tax on every decision you make. Direct sunlight will affect your character’s stats — shade and cover become tactical decisions. Image: Bohemia Interactive — DayZ Badlands Dev Blog (Week 67) Your loadout finally has a real trade-off Because heat and dust are mechanics, clothing stops being a fashion choice. The Badlands wardrobe leans regional and light: Kameez tunics — lighter shirts, with what Bohemia describes as a huge range of variantsShalwar pants, vests and sandalsDust goggles and other protective eyewearKeffiyehs, turbans and pakol hats, plus assorted face coverings The interesting design consequence is that low-insulation clothing finally has a purpose. In colder maps everyone gravitates to the heaviest, most pocket-heavy jacket available because there is no downside. In Nasdara you are weighing insulation against inventory space against how much skin is exposed to the sun. A military jacket might still win for storage — but you will feel the cost. There is regional military gear too. The OBR uniform is a standard field uniform with roll-up sleeves, epaulets and flap pockets. The FNO jacket is the specialised one: a longer field-jacket silhouette with a hood, fishtail back extension, drawcords and a night desert camouflage pattern. Police clothing rounds it out, with fictional-but-plausible local patches designed from real regional badges. The palette shifts to beige, olive, faded blue and night-desert tones, weathered with dry dust and sun-bleaching rather than the wet mud of Chernarus. Lighter regional clothing gives low-insulation gear a genuine role for the first time. Image: Bohemia Interactive — DayZ Badlands Dev Blog (Week 67) The infected got a ground-up rework This is quietly one of the most ambitious parts of Badlands. The art team rebuilt its approach around a single goal: make the infected look and feel more human. The reasoning is lore-accurate — the infected are ordinary people who caught a disease in the outbreak, not generic horror-movie undead, and the visuals should say so. Three pillars drive it: PillarWhat it means in practiceRegional InfluenceEvery scrap of clothing hints at who they were before — their home, their work, their culture.Progression of DecayEvery visual element tells a story of sickness, neglect and deterioration.Visual StorytellingSilhouette, texture and shape should express that story at a glance. The guiding principle was subtlety, and there is a line in the blog worth quoting in full: “Every stain has a source. Nothing is decorative. Everything is a clue.” A torn uniform tells you where someone worked. Bruises, vomit, cuts, sunburn and sweat show how far gone the body is. Nasdara’s infected also wear the climate. Instead of the dark, wet, mud-like dirt that suits Chernarus, they carry lighter dust, dry grime, faded fabric, sweat staining and heat-damaged skin. Because several artists worked on different models, the team built shared visual guidelines to keep skin treatment, dust, sun marks and colour grading consistent across the whole set. The Nasdara infected were reworked around three pillars — regional influence, decay, and visual storytelling. Image: Bohemia Interactive — DayZ Badlands Dev Blog (Week 70) Scimitars, jambiyas, and a 2,500-year-old blade The melee collection is the most characterful thing in Badlands so far, and it is drawn from real regional history: Shamshir-styled scimitar — one-handed, described by the team as a fearsome, damaging, long-reaching option with a quick swing.Jambiya curved dagger — given a higher condition value than regular knives, so it survives longer before needing a sharpening tool.Akinaka — a Scythian double-edged design that has existed for over two and a half millennia, recognised as a Persian weapon since ancient times. Bohemia calls it “an exceedingly rare artifact” that should signal its holder has mastered survival in Nasdara — or bested someone who did.Police Baton for knocking out assailants, and the Döner Knife, which the developers cheerfully note is ideal for slicing meats. The research came from museums, auction houses and documentaries on the region’s art heritage — in real life every jambiya is unique in its materials and decoration, speaking to its origin and its owner’s prestige. The stated hope is that players find something special enough to drop their old blades for. On the firearms side, two are confirmed with an unusual relationship. The MP-18 is a submachine gun firing 9×19mm from a 32-round drum magazine — and that drum has an indicator showing roughly how many rounds remain. Its companion is the Luger P08 pistol, and the neat part is that magazines can be freely swapped between the two. A third weapon, the SCR-17, arrived ahead of the expansion (more on that below). The Badlands melee collection draws on Persian Gulf and South Asian blade traditions. Image: Bohemia Interactive — DayZ Badlands Dev Blog (Week 70) PvP in a concrete jungle The obvious worry with a desert map is that it becomes a sniper’s paradise with nowhere to hide. The environment team went out of its way to address that, and the short version is that Nasdara is densely packed — farmland housing, small settlements, large villages and cities, many of which offer tight CQB in interiors, multi-story apartments and rooftop access. Cover comes from several directions. There is less vegetation than other maps but still plenty of bush coverage, plus trees, walls and fences across fields. The dried-up rivers Sefid-Darya and Siyah-Darya form natural protected paths through the landscape. Cities are deliberately labyrinthine — the team cites Kabul as the reference — packed with street vendors, vehicles and clutter you can break line of sight with. Verticality is the headline change. City blocks reach higher than anything on previous maps, and the developers are direct about the camping problem: taller neighbouring structures exist specifically to give attackers an angle, and certain buildings that will obviously attract campers have props placed to help you deal with them. As the blog warns, watch your back if you begin to make yourself comfortable in a building. Interconnecting rooftops are the other new toy. They overlook the busy streets below, and they let you cross into neighbouring buildings to enter from an unexpected angle — faster looting, faster hunting, and no guarantee it is safer. City housing dwarfs the streets, turning urban areas into what the team calls a concrete jungle. Image: Bohemia Interactive — DayZ Badlands Dev Blog (Week 73) The Bazaar: a modular market with a gun shop inside The Bazaar is a set of modular buildings based on traditional Middle Eastern covered markets. Six pieces connect together — an entrance, straight sections, turns and a corner — so designers can assemble markets of different sizes and shapes. Inside you get arched walkways, domed ceilings, varied shopfronts, hanging signs, carpets and scattered goods. For looters, the important detail is that one shop type is a fortified gun store that spawns military loot. You can identify it on sight: signs with guns on them, and iron bars over the windows. Regular shops carry generic loot, and some loot spawns along the corridors purely to reward exploring. Ladders provide rooftop access, and their heights were deliberately matched to neighbouring assets so you can traverse across connected rooftops. The research list reads like a travel diary — Muy Mubarak Masjid and Haji Bahudin Market in Kandahar, Taktak Street Bazar, Marko Bazar in Pakistan studied via drone footage, the famous Dara Adamkhel gun market, and Turkish street bazaars in Istanbul. An early inner-courtyard concept was scrapped because it made the space feel like a palace rather than a chaotic marketplace. Gun shops are marked by signage and iron bars — and they spawn military loot. Image: Bohemia Interactive — DayZ Badlands Dev Blog (Week 73) The Rebuilding System, and the code lock everyone asked for This is the feature most likely to change how communities play. In Nasdara you will be able to rebuild and barricade select houses — and Bohemia frames it as deliberately more forgiving than the existing base building system, because you choose the scale of the project. Rebuild an entire three-storey house for your squad, orsimply add doors and windows to a small storage building to make a stash house. Crucially, the existing base building system is not going away — the team confirms you will still be able to build compounds the way you do now. Rebuilding is an addition, not a replacement. Then there is the one the community has been requesting for years: the code lock is coming. And the detail worth shouting about — Bohemia has confirmed it will be available on all other maps, not just Nasdara. If you run a Chernarus or Livonia server, that lands on your server too. The Rebuilding System lets you scale a project from a stash house to a three-storey squad base. Image: Bohemia Interactive — DayZ Badlands Dev Blog Recap (1) When can you play it? Bohemia has not announced a release date for DayZ Badlands, and we are not going to invent one. What has been confirmed is more useful than a rumour: The SCR-17 firearm shipped to the Experimental branch on 1 July as part of the Road to Badlands update — so pieces of the expansion are already reaching live branches ahead of launch.Dev blogs now run roughly every three weeks, up from monthly, with recap posts in between that also carry new information.Dev Blog 6 (Week 79) is confirmed to cover dust particles and a firearm.Community members were flown to Prague to play DayZ Badlands hands-on — usually a sign a build is in reasonable shape. The pattern to watch is Road to Badlands. Content is landing in Experimental in pieces rather than all at once on launch day, which means server owners get a runway to test rather than a scramble. What Badlands means if you run a server Every DayZ expansion reshuffles the server scene, and Badlands looks like a bigger reshuffle than most. A brand-new map means brand-new territory: no established bases, no dominant clans, no memorised loot routes. That is the single best moment to launch a community, and the servers that are up and configured on day one are the ones that keep the players who arrive looking for somewhere to settle. A few things worth thinking about now rather than at launch: The code lock is not Nasdara-exclusive. It is coming to all maps, so your existing Chernarus or Livonia server inherits a base-security change whether or not you touch Badlands.Rebuilding changes your raid economy. Reinforced houses and stash houses behave differently from tents and fences, and your loot and raid tool settings will want revisiting.Heat and hydration are tunable survival pressure. A harsher map gives you far more room to define your server’s identity, from brutal hardcore to a friendlier ruleset.New loot means new economy files. Bazaar gun shops, regional melee weapons and the MP-18 and Luger all pass through the same mission XML you already manage. If you have never run one before, the good news is that hosting a DayZ server is no longer a weekend of batch files. On DZSERVERS.HOST your server is provisioned automatically the moment you order — our getting started guide walks you from first login to a running server in about fifteen minutes, and the serverDZ.cfg reference covers every setting you can tune, including the time acceleration and gameplay toggles you will want to dial in for a harsher map. Planning a modded Badlands server? Our Workshop mods guide covers load order, server-only mods and automatic updates — the three things most likely to break a server on patch day, which matters a great deal when a brand-new expansion is landing. Note: We will keep this article updated as Bohemia publishes more dev blogs, including Dev Blog 6 (Week 79) on dust particles and the next firearm. Frequently asked questions When does DayZ Badlands release? No release date has been announced. Bohemia is publishing dev blogs roughly every three weeks with recap posts in between, and content is already arriving in stages — the SCR-17 rifle reached the Experimental branch on 1 July as part of the Road to Badlands update. What is Nasdara? Nasdara is the new region introduced with DayZ Badlands: a Middle-Eastern-inspired map drawing on real geography from Afghanistan, Iraq and the wider Persian Gulf. Bohemia describes it as the hottest official map ever made for DayZ, with sunlight and hydration as active survival mechanics. Is the code lock only on the new map? No. Bohemia has confirmed the code lock will be available on all other maps, not just Nasdara. Existing Chernarus, Livonia and Sakhal servers get it too. Does the Rebuilding System replace base building? No. The developers have explicitly confirmed you will still be able to use the base game base building system to create compounds. Rebuilding houses is an additional option that lets you choose the scale, from adding a door to a small stash house up to a three-storey squad base. What weapons have been confirmed so far? The MP-18 submachine gun (9×19mm, 32-round drum with a remaining-rounds indicator), the Luger P08 pistol that shares magazines with it, and the SCR-17 which is already on Experimental. On the melee side: a Shamshir-styled scimitar, the Jambiya dagger, the Akinaka short sword, a Police Baton and a Döner Knife. Can I run my own DayZ Badlands server? DayZ community servers have always supported official maps, and Badlands content is already flowing into Experimental through the Road to Badlands update. Getting set up in advance is the sensible move — our control panel guide covers provisioning, configuration and your first start. Related guides Getting started with the control panelinstalling Steam Workshop modsevery serverDZ.cfg setting explained
 -
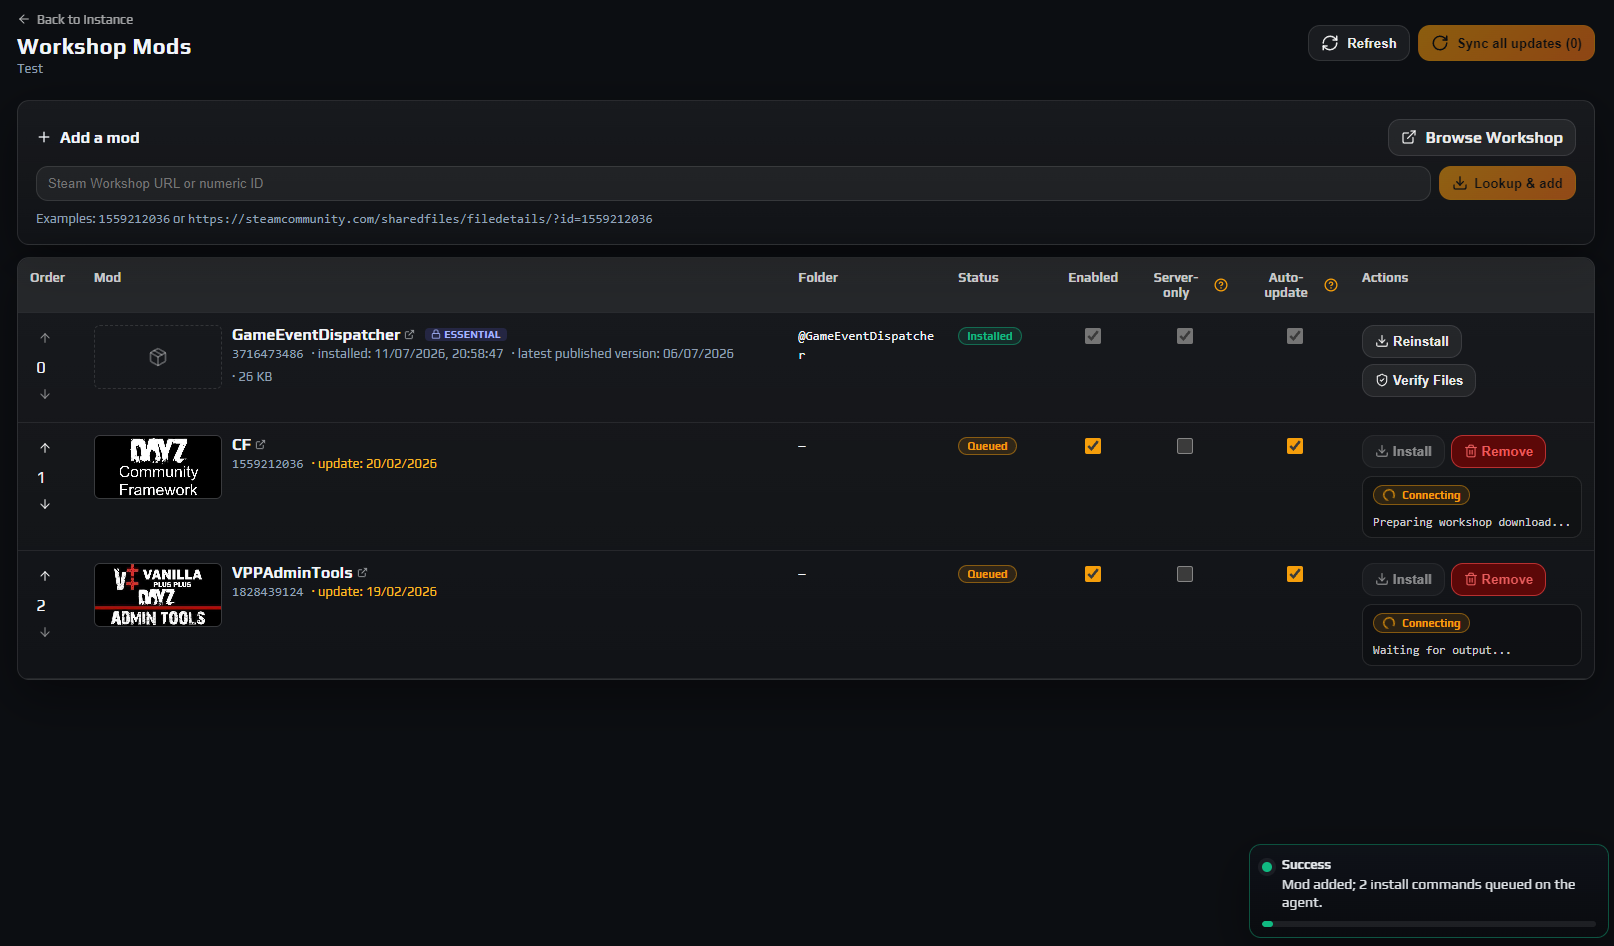 VPP Admin Tools (Vanilla++ AdminTools in the DayZ mod list) gives you an in-game admin menu for player management, item spawning, teleporting, ESP, weather and time control, bans and more. Installing it takes three things: add it alongside Community Framework in Workshop Mods, start the server once so it writes its config files, then set an admin password and add your Steam64 ID before restarting again. That two-restart sequence is not optional and it is where almost everyone gets stuck — the mod cannot read the files it created until the next boot, so the first start always ends with nobody having access. Work through the steps in order and it takes about twenty minutes. On this page Add VPP Admin Tools and Community FrameworkStart the server once to generate the config filesFind the generated filesSet your admin passwordAdd yourself as a superadminRestart and log inLearn the default keybindsGive your staff access without making them superadminsTroubleshootingFrequently asked questions Before you start A provisioned server here, stopped. If you are brand new, start with getting started with the control panel.Your own Steam64 ID — the 17-digit number beginning 7656. Find it with steamid.io or any Steam ID lookup.A password you will use to log in to the admin menu in game. It must be 32 characters or fewer.Access to the File Browser or SFTP tab, since two config files need editing by hand. 1. Add VPP Admin Tools and Community Framework Open your server, go to Workshop Mods, and add both mods. Paste each Workshop URL or ID into the box and click Lookup & add: Community Framework — search the Steam Workshop for Community Framework (often abbreviated CF).VPP Admin Tools — Workshop ID 1828439124, or search for VPP Admin Tools. Careful: Leave Load as server-only mod unchecked for both. VPP Admin Tools is not a server-only mod — it ships the admin menu, the keybinds and the client-side UI, so it has to load on players' clients too. Ticking that box loads it with -servermod=, the server starts normally, and the admin menu then never appears for anyone. Community Framework must load before VPP Admin Tools. Use the arrows in the Order column so CF sits above it in the list. Note: VPP Admin Tools depends on Community Framework but does not declare it as a required addon in its config, so a dependency checker will not always flag it for you. Add CF explicitly rather than assuming it will be pulled in — without it the mod fails to compile and the server will not finish starting. Community Framework must sit above VPP Admin Tools in the load order, and neither is a server-only mod. 2. Start the server once to generate the config files Go back to Overview and click Start. This first boot exists purely so the mod can create its folder structure — you will not be able to log in yet, and that is expected. Watch Live Logs with the Stream dropdown set to rpt. Once the mission has loaded, stop the server again. Note: If the server never finishes starting and the log shows a compile error mentioning CF_XML_Document or similar unknown types, Community Framework is missing or is loading after VPP Admin Tools. Fix the order in Workshop Mods and try again. 3. Find the generated files The mod writes everything into your server's profile folder. In the panel that is the profiles share — open File Browser and switch the Share dropdown to profiles, then open VPPAdminTools. You should see: PathWhat it isPermissions/SuperAdmins/SuperAdmins.txtFull-access admin list, one Steam64 ID per line. This is where you add yourself.Permissions/credentials.txtThe admin password used at login. Set this before the next start.Permissions/UserGroups/UserGroups.jsonStaff roles and their permissions. Managed in game later; leave it alone for now.Logging/One log file per server session.ConfigurablePlugins/Per-feature settings such as webhooks, weather and teleport presets.Backups/Copies the XML editor takes before it saves a change. Note: Prefer a desktop client? These are the same files over SFTP — see connecting with SFTP. VPP Admin Tools writes its configuration into the profiles share, under a VPPAdminTools folder. 4. Set your admin password Open Permissions/credentials.txt with View/Edit. It contains only comment lines beginning with //. Delete everything and put your password on the first line, on its own: MySecretPassword123 Data loss risk: The password must be 1 to 32 characters. On the next start the mod replaces the file contents with a hash and the plain text is gone for good, so save it somewhere safe first. A value of 33 to 63 characters is rejected and leaves the tools unusable; a value of exactly 64 characters is assumed to be an already-hashed password and is stored as-is. Everyone who logs into the admin menu uses this one password, whether they are a superadmin or in a staff group. If you ever lose it, empty the file, write a new password, and restart. 5. Add yourself as a superadmin Open Permissions/SuperAdmins/SuperAdmins.txt. It contains a single placeholder sentence. Delete that line and replace it with your Steam64 ID: 76561198000000000 Add more admins one per line, with nothing else on the line: 76561198000000000 76561198000000001 Careful: The file has no comment syntax — every line is read as an ID, including the placeholder sentence and any trailing blank lines. Leave the placeholder in and you get a junk entry in your admin list. Superadmins bypass every permission check, so keep this list to people you genuinely trust. Staff who need only some tools should get a user group instead, which you set up in game in step 7. One Steam64 ID per line, with the placeholder sentence removed. 6. Restart and log in Start the server again. This is the boot where the mod actually reads both files, hashes your password and loads your admin list. Join your server, then use the two-step login. These are separate keys and the order matters: Press End to log in. A password prompt appears — enter the password from credentials.txt.Press Home to open the admin menu. Careful: If End appears to do nothing at all — no prompt, no message, no sound — your Steam64 ID is not being recognised. That silent no-op is by design, and it is the most common problem people hit. See the troubleshooting section below. Your password is remembered on your own machine after the first successful login, so later sessions only need End then Home. The admin menu toolbar, with each button gated by the permissions of the account that opened it. 7. Learn the default keybinds Beyond the two login keys, these are bound out of the box. All of them can be changed under Options → Controls in the vpp category. KeyActionEndLog in / toggle admin toolsHomeOpen the admin menuInsertToggle god modeBackspaceToggle free cameraHTeleport to where you are lookingDeleteDelete the object under your crosshairIToggle invisibilityJHeal the player under your crosshairKRepair the vehicle under your crosshairPCopy your current position to the clipboardYToggle mesh ESP The menu itself has thirteen sections: Player Manager, Items Spawner, Teleport Tools, ESP Tools, Console, Server Settings, Weather Editor, Object Builder, Bans Manager, Permission Editor, Webhooks, XML Editor and Spectate. You only see the buttons your permissions allow. There are also chat commands, each with its own permission: /heal, /kill, /strip, /bring, /goto, /return, /tpt, /tpp, /ammo, /spawncar, /refuel, /unban and a few more. 8. Give your staff access without making them superadmins Open Permission Editor in the admin menu. A default group called Admins already exists at permission level 1. Create groups, set which of the thirteen sections each can use, and add members by Steam64 ID. Changes made here save immediately — no restart needed. Careful: Permission levels are inverted from what most people expect: a lower number means more authority. A level 1 admin can act on a level 5 admin, never the other way round, and two admins on the same level cannot act on each other — only on themselves. Two things that surprise people: You will not find yourself in the Permission Editor. Superadmins live in SuperAdmins.txt, not in the group system, and cannot be added to a group.If a group has the forced name option enabled, members are locked out whenever their in-game name stops matching the name stored on their entry. Update the entry after anyone renames. Everyone still logs in with the same password from credentials.txt; the group only decides what they can do once they are in. Troubleshooting Pressing End does nothing at all in game Why it happens. The mod only enables the login prompt for accounts it already recognises. If your Steam64 ID is not in SuperAdmins.txt and you are not a member of a user group, the key is deliberately ignored with no message of any kind. How to fix it. Stop the server and re-open profiles/VPPAdminTools/Permissions/SuperAdmins/SuperAdmins.txt. Check the ID is your Steam64 (17 digits starting 7656), that it is alone on its line, and that the placeholder sentence is gone. Start the server again — this file is read only at startup, so edits do nothing until a restart. The password prompt appears but the menu never opens Why it happens. End and Home are two different keys doing two different jobs. End logs you in; Home opens the menu. Pressing Home before logging in does nothing. How to fix it. Press End first and complete the password prompt, then press Home. If Home still does nothing, check it is not bound to something else under Options → Controls in the vpp category. The server will not start after adding the mod Why it happens. Almost always Community Framework: it is missing, or it is loading after VPP Admin Tools. VPPAT uses CF's XML functions, and Enforce Script cannot compile against types that are not loaded yet. How to fix it. In Workshop Mods, confirm Community Framework is installed and enabled, and use the Order arrows to place it above VPP Admin Tools. Then check Live Logs on the rpt stream for the compile error to confirm it is gone. Locked out after too many wrong passwords Why it happens. Failed logins are counted per Steam64 ID and capped at six. How to fix it. Both your game and the server need restarting to clear the counter. If you have also forgotten the password, delete everything in credentials.txt, write a new one on the first line, and restart — it is re-hashed on the next boot. Players are kicked for an unsigned mod after installing it Why it happens. Your server has signature verification enabled and the mod's key is not in the server's keys folder. How to fix it. Open File Browser, switch Share to config and check the keys folder contains the mod's .bikey. If it is missing, copy it from the mod's own Keys folder in the mods share. Every mod your players load needs its key present. Frequently asked questions Do my players need to install VPP Admin Tools too? Yes. It is not a server-only mod — the admin menu, the keybinds and all of the UI are client-side, so everyone connecting needs it. That is why Load as server-only mod must stay unchecked. Publish your mod list, including Community Framework, wherever you advertise the server. Why do I have to restart twice? The mod creates credentials.txt and SuperAdmins.txt during startup and does not read them again in the same session. So the first boot only writes the placeholder files, and your password and admin list are not picked up until the boot after you edit them. Where exactly are the config files? In your server's profile folder, which is the profiles share in the panel — reachable from both the File Browser and SFTP. Everything lives under profiles/VPPAdminTools/. It is not in the mission folder or next to the server executable. Do its bans replace the panel Players page? No, they are separate systems. Bans made in the mod's Bans Manager are stored in its own BanList.json and enforced by the mod when someone connects. The panel's Players page writes ban.txt and BattlEye's ban list instead. Both work; just remember a ban made in one will not show up in the other. Can I turn off the admin password? There is a serverDZ.cfg option that skips the in-game password so recognised admins get their tools automatically on connect. It also removes a verification step from the mod's internal permission checks, leaving Steam64 membership as the only thing standing between someone and full admin access. Leave the password on unless you have a specific reason not to. Does it need RCON set up? No. VPP Admin Tools works entirely in game and does not use BattlEye RCON. Your RCON password is still worth having for the panel's own RCON terminal and the Controlled Restart feature, which are separate from this mod. Related guides Getting started with the control panelinstalling Steam Workshop modsconnecting with SFTP
 -
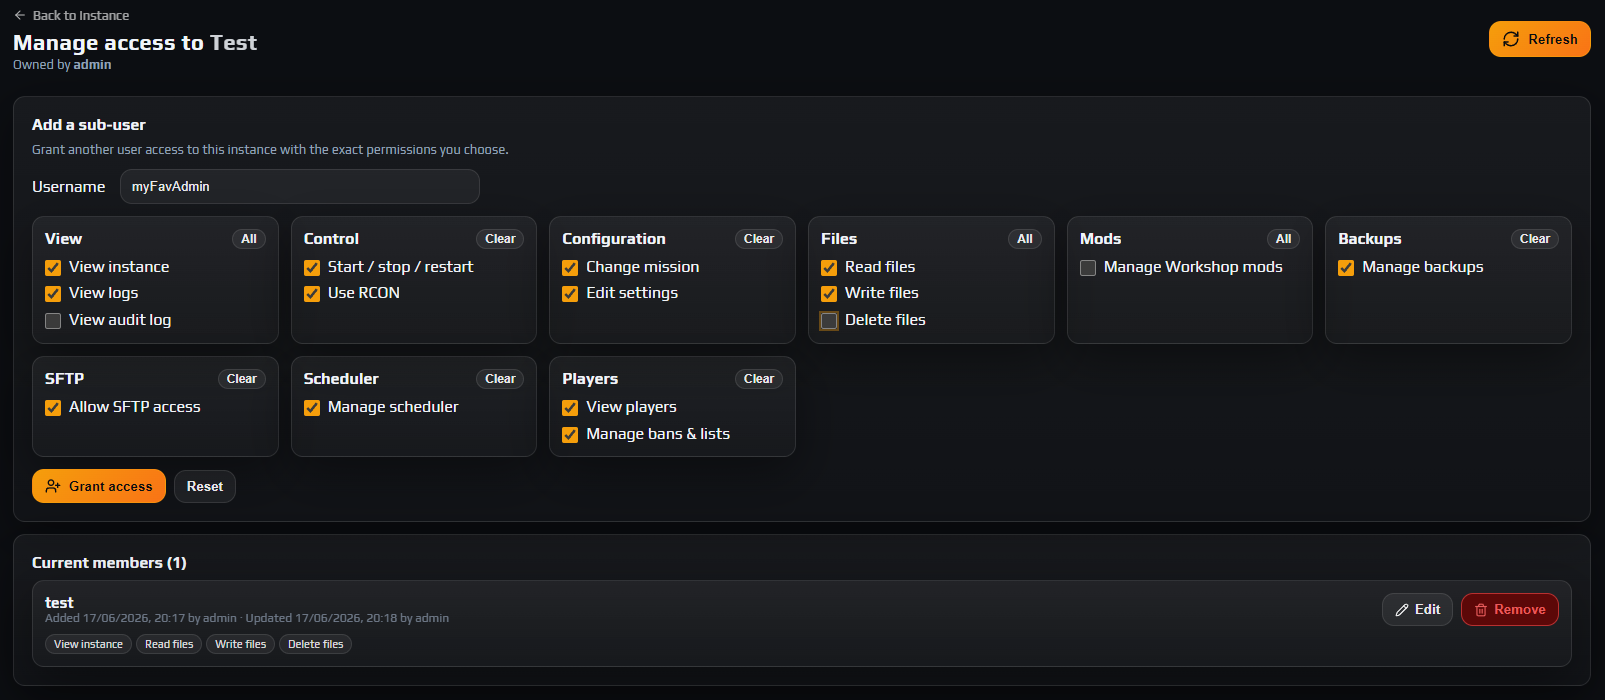 You give someone access to your DayZ server without handing over any password by adding them as a sub-user on the instance’s Members tab and ticking only the permissions they need. Open Instances → your server → Members, type their panel username, choose from the nine permission groups, and click Grant access. For scripts, bots and external tools you issue an API key instead, from API Keys in the sidebar. This guide covers both, plus how to use the Audit Log to see exactly what a staff member did. On this page Open the Members tabAdd the sub-user by usernameUnderstand the nine permission groupsStart from a role recipe rather than guessingReview, edit and remove membersVerify what staff actually did in the Audit LogIssue API keys for tools, not for peopleApply least privilege and keep it tidyTroubleshootingFrequently asked questions Before you start You must be the instance owner, or one of our administrators. Nobody else can manage members — there is no permission flag that grants it.The person you are adding needs an existing panel account. Everyone with a DZSERVERS.HOST community account already has one.Their exact panel username — which is their community account name. Not an email address, not a Discord handle, not an in-game name.For API keys: a tool or script that can send an HTTP header, and somewhere safe to store a secret. 1. Open the Members tab Open your instance and click Members in the tab bar. The page header reads Manage access followed by the instance name, with the owner’s username underneath. The tab is only rendered for the instance owner and for our administrators. If anyone else reaches the URL directly, the page returns a single line saying that only the instance owner or an administrator can manage members. Note: There is deliberately no permission flag for managing members. A sub-user you have given every other permission still cannot add, edit or remove staff, so delegation stops with you and cannot be quietly widened by someone else. 2. Add the sub-user by username In the Add a sub-user card, type their account name into Username. Matching is case-insensitive, so capitals do not matter, but the name itself has to be exact. Because every community account is mirrored into the panel, in practice you are typing their community username. If the panel tells you the user does not exist, see the troubleshooting section below rather than guessing at variations. Notice that View instance is already ticked when the card opens. Leave it ticked. Without it the sub-user cannot open your instance page at all, which makes every other permission you grant unreachable. The form also refuses to submit with nothing selected. When the permissions are set, click Grant access. Reset clears the form if you change your mind mid-way. The permission picker on the Members tab: nine groups, sixteen individual permissions, each with an All or Clear shortcut. 3. Understand the nine permission groups The picker is a grid of nine cards. Each card has an All button that becomes Clear once everything in that group is on, which is the fastest way to switch a whole area on or off. GroupPermissionsWhat it unlocksViewView instance, View logs, View audit logThe instance page with its metrics, FPS and command status, plus settings read-only. View logs adds the live log stream and its history; View audit log adds the Audit Log tab.ControlStart / stop / restart, Use RCONThe power buttons on Overview, and the RCON console tab.ConfigurationChange mission, Edit settingsThe Settings panel, which is the typed serverDZ.cfg editor, and the mission or map picker inside it.FilesRead files, Write files, Delete filesBrowsing and reading; then uploading, editing text, creating folders and moving; then deleting.ModsManage Workshop modsAdd, install, update, remove and toggle Steam Workshop mods on this server.BackupsManage backupsEdit backup frequency, restore from a backup, and delete backups.SFTPAllow SFTP accessConnecting over SFTP. File operations inside the session follow the Files permissions above.SchedulerManage schedulerCreate, edit and delete scheduled tasks — restarts, start and stop, RCON messages.PlayersView players, Manage bans & listsThe player roster, session history, playtime and connection info; then creating and revoking bans and editing the whitelist and priority queue. Permissions gate the tab bar itself. A sub-user does not see a greyed-out tab they cannot use — the tab is simply not rendered. Edit settings draws Settings, Read files draws File Browser, Manage Workshop mods draws Workshop Mods, and so on down the bar. That is why a staff member reporting a "missing" tab is almost always a permissions question, not a bug. SFTP inherits from Files. Allow SFTP access on its own is not enough: the SFTP login is rejected outright unless Read files is also granted, and whether the session can write or delete mirrors Write files and Delete files exactly. See connecting to your server with SFTP for the client setup. Data loss risk: Delete files reaches your persistence. Player characters and every built base live under mpmissions/<world>/storage_*/, so a sub-user with this flag can erase the entire server state in a few clicks. Manage backups includes deleting backups. Grant either only to people you would trust with the account itself. 4. Start from a role recipe rather than guessing Sixteen checkboxes is a lot of freedom. These three recipes cover most real staff teams and are safe starting points you can adjust afterwards. RoleTickDeliberately left offModerator / in-game adminView instance, View logs, View players, Manage bans & lists, Use RCONFiles, settings, mods, backups, scheduler. Add Start / stop / restart only if you want them able to bounce the server.Builder / config editorView instance, View logs, Read files, Write files, Allow SFTP access, Edit settings, Change missionDelete files, RCON, bans. They can edit types.xml and the mission all day without being able to wipe anything.Trusted co-ownerEvery group, using each card’s All buttonNothing you can tick — but they still cannot manage members, because that is owner-only. Note: Permissions are checked on every request against what is stored right now, not against whatever was true when the person signed in. Tightening a member’s permissions takes effect immediately; they do not need to sign out and back in. 5. Review, edit and remove members Below the add form, Current members lists everyone with access and a count. Each row shows: the username, in bold;when they were added and by whom, and once you change anything, when they were last updated and by whom;a badge for every permission they hold, so you can read a member’s access at a glance without opening anything. Edit swaps the badges for the same picker, with Save and Cancel. Saving with every box cleared is refused on purpose — the panel tells you to remove the member instead, so nobody is left as a member row with no access at all. Remove asks for confirmation, then deletes the membership. Their access ends at once: the instance disappears from their Instances list, the API refuses them, and their SFTP login for that instance stops being accepted. Careful: Removing a member does not undo anything they did. If you are removing someone under bad circumstances, read the Audit Log first and change your admin and RCON password afterwards — see getting started with the control panel for where that lives. Every sub-user carries a badge per permission, plus who granted the access and when. 6. Verify what staff actually did in the Audit Log Granting access is only half of delegating safely. Open the Audit Log tab to see what happened. The table has five columns — Time, User, Category, Action and Detail — and each timestamp is shown twice, once in your own timezone and once in the server host’s, labelled (Host). That second value is what you compare against a log line or a player complaint. The filter pills across the top narrow it to one area: Lifecycle, Configuration, Mods, Files, SFTP, RCON, Scheduler, API, Members and Players. Entries are paged fifty at a time. Two categories matter most for delegation: Members records Member Added, Member Updated and Member Removed. An update is rendered as a before-and-after diff: each permission you granted appears as a green badge with a plus, each one you revoked as a red badge with a minus. If a permission set is not what you expected, this tells you who changed it and when.API records API Key Created, API Key Revoked, API Key Linked and API Key Unlinked, each naming the key by its short prefix. Note: Reading the audit log is itself a permission — View audit log. Granting it to your senior staff is usually right; it lets them check each other’s work without coming to you. A Member Updated entry renders as a permission diff, so you can see exactly what was granted or revoked. 7. Issue API keys for tools, not for people A sub-user is for a human who signs in. An API key is for software. Open API Keys in the sidebar and fill in the Create API key card: Name — name it after the tool, not the person. You will be reading this list in a year trying to work out what is safe to revoke.Expires (optional) — accepts YYYY-MM-DD or YYYY-MM-DDTHH:mm. Blank means no expiry. Set one for anything experimental.Scopes — four checkboxes: read, action, files and logs. read stays enabled and cannot be unticked, because a key that can read nothing is useless.Instances this key can control — tick only what the tool needs. You can only attach instances you own; a server that was shared with you cannot be attached to your key. Scopes are coarser than member permissions. This is the exact mapping: ScopePermissions the key gets on a linked instanceread (always on)View instance and View audit logactionStart / stop / restart, Change mission, Edit settings, Use RCON, and the API-only file download endpointfilesRead files, Write files and Delete fileslogsView logs Careful: action is broader than its name suggests: it covers rewriting serverDZ.cfg and issuing RCON commands, not just start and stop. files always includes delete — there is no read-only file scope. If a tool only needs to poll status, leave it on read alone. Click Create key. The panel shows the raw key once, in a Copy your API key now dialog that states plainly that the value cannot be retrieved later. Copy it into your secret store before you close it; only a short prefix is kept afterwards, for identifying the key in lists and in the audit log. Send it as a header on every request. The API Docs page in the sidebar documents every endpoint: curl -H "X-Api-Key: YOUR_API_KEY" \ https://dzservers.host/api/instances The alternative form is Authorization: ApiKey YOUR_API_KEY. Your key list shows each key’s prefix, scopes, attached instance count and expiry. Edit instances changes which servers a key reaches; Revoke kills it immediately and cannot be undone. You can hold fifty active keys per account. Data loss risk: An API key bypasses the panel interface completely. There is no confirmation dialog and no "are you sure" behind the API, so a key with files scope can delete your persistence in one request. Never paste one into a Discord channel, a public repository, a pastebin or a support ticket. Creating a scoped API key: name it after the tool, set an expiry, and attach only the instances it needs. 8. Apply least privilege and keep it tidy The habits below are what turn the permission system from a checkbox exercise into actual security. Grant the least that works. Start from a recipe above, then add flags when someone hits a wall. Adding a permission takes ten seconds; recovering a wiped persistence file takes a restore and costs everyone their progress.One key per tool. Separate keys mean you can revoke the misbehaving bot without breaking your Discord integration and your backup script at the same time.Never hand out the admin or RCON password as a shortcut. It is a single 4-10 character engine password shared by everyone who has it, nothing it does is attributable to a person, and rotating it after someone leaves breaks every tool at once. A sub-user with Use RCON gets the same in-game capability, logged under their own name.Read the audit log on a schedule. Once a month, filter to Members and API and confirm the list still matches your team.Remove people the day they leave. Remove on the Members tab, then revoke any key belonging to a tool they had the credentials for. If they held Use RCON, change the admin and RCON password as well. The raw API key is displayed exactly once — the panel keeps only a short prefix afterwards. Troubleshooting The panel says that user does not exist when I try to add a sub-user Why it happens. The Username field is matched against existing panel accounts, and it never creates one. Two things cause the error: the person has no panel account yet, or the name you typed is not their account name. Panel usernames come from the community account, so an email address, a Discord handle or an in-game name will never match. How to fix it. Ask them to sign in to the control panel once from the community site — that creates or back-fills their panel account. Then confirm their exact community username and try again. If it still fails, open a ticket with the username and we will check it from our side. My staff member signed in but cannot see the Settings or File Browser tab Why it happens. The tab bar is built from their effective permissions. A tab they lack is not rendered at all, rather than shown disabled, so it looks to them as though the feature does not exist. How to fix it. Open Instances → your server → Members, click Edit on their row, tick Edit settings for Settings or Read files for File Browser, then Save. Have them reload the instance page. A sub-user gets invalid credentials over SFTP even though I ticked Allow SFTP access Why it happens. Three separate things have to line up. Allow SFTP access permits the connection, Read files is additionally required or the login is refused, and the SFTP password is a per-account secret that the sub-user sets themselves — it is not the panel password and you cannot set it for them. How to fix it. Grant Read files as well as Allow SFTP access. Then have them open the SFTP tab on that instance, generate their own SFTP password, and use the username shown there, which is their panel username followed by a dot and the first eight characters of the instance id. Full walkthrough in connecting to your server with SFTP. A server does not appear in the instance list when I create an API key Why it happens. Keys can only be attached to instances you own. Servers that were shared with you as a sub-user are deliberately excluded, so being granted access to somebody else’s server never lets you mint a key against it. How to fix it. Ask the owner to create the key and share it with you, or work through the panel with your sub-user permissions instead. If the list is empty entirely, you do not own any instance on this account. I closed the dialog and lost my API key value Why it happens. Only a hash and a short prefix are stored. The raw value exists exactly once, in the dialog shown at creation, and there is no route that can return it afterwards — which is the same reason a leaked database cannot be turned into working keys. How to fix it. Click Revoke on the old key so it cannot be used, then create a replacement with the same name, scopes and instances and update the tool. Revoking is instant. Frequently asked questions Can a sub-user add staff of their own? No. Managing members is restricted to the instance owner and our administrators, and there is no permission flag that grants it — so even a sub-user holding all sixteen permissions cannot add, edit or remove anyone. Delegation only ever flows outward from you. Can my staff see my billing or my other servers? No. A sub-user’s Instances list contains only servers they own plus servers explicitly shared with them, and each shared row is badged Shared with the owner’s name. Billing is an external link into their own community account, not yours. Should I just give my moderators the admin and RCON password instead? No, and it is the single worst shortcut available. That password is 4 to 10 characters by engine limit, identical for everyone who has it, and nothing done with it is attributable to a person. A sub-user with Use RCON gets the same in-game power, logged under their own name in the Audit Log, and can be removed in one click without breaking anything else. See RCON, bans, whitelist and priority queue. What can an API key do that a sub-user cannot, and the other way round? A key is for automation and is limited to what its four scopes map to: status, audit, power, mission, settings, RCON, files and logs. It can never manage mods, backups, the scheduler, players or members, and it cannot use SFTP or change your account. A sub-user reaches the whole sixteen-permission surface through the panel, but only for the instances shared with them. Does removing a sub-user or revoking a key take effect immediately? Yes. Permissions are evaluated per request against current data rather than cached into a session, so a removed member loses access on their very next click and a revoked key stops authenticating on its next call. Neither has to wait for a sign-out or a token to expire. How many API keys can I have, and should I set an expiry? You can hold fifty active keys per account; revoked and expired ones do not count against that. Set an expiry on anything you are testing or handing to a third-party tool, and leave it blank only for long-lived integrations you actively maintain — an expiring key that quietly stops working is far cheaper than a forgotten key that keeps working. Related guides Getting started with the control panelRCON, bans, whitelist and priority queueGetting started with the control panel
 -
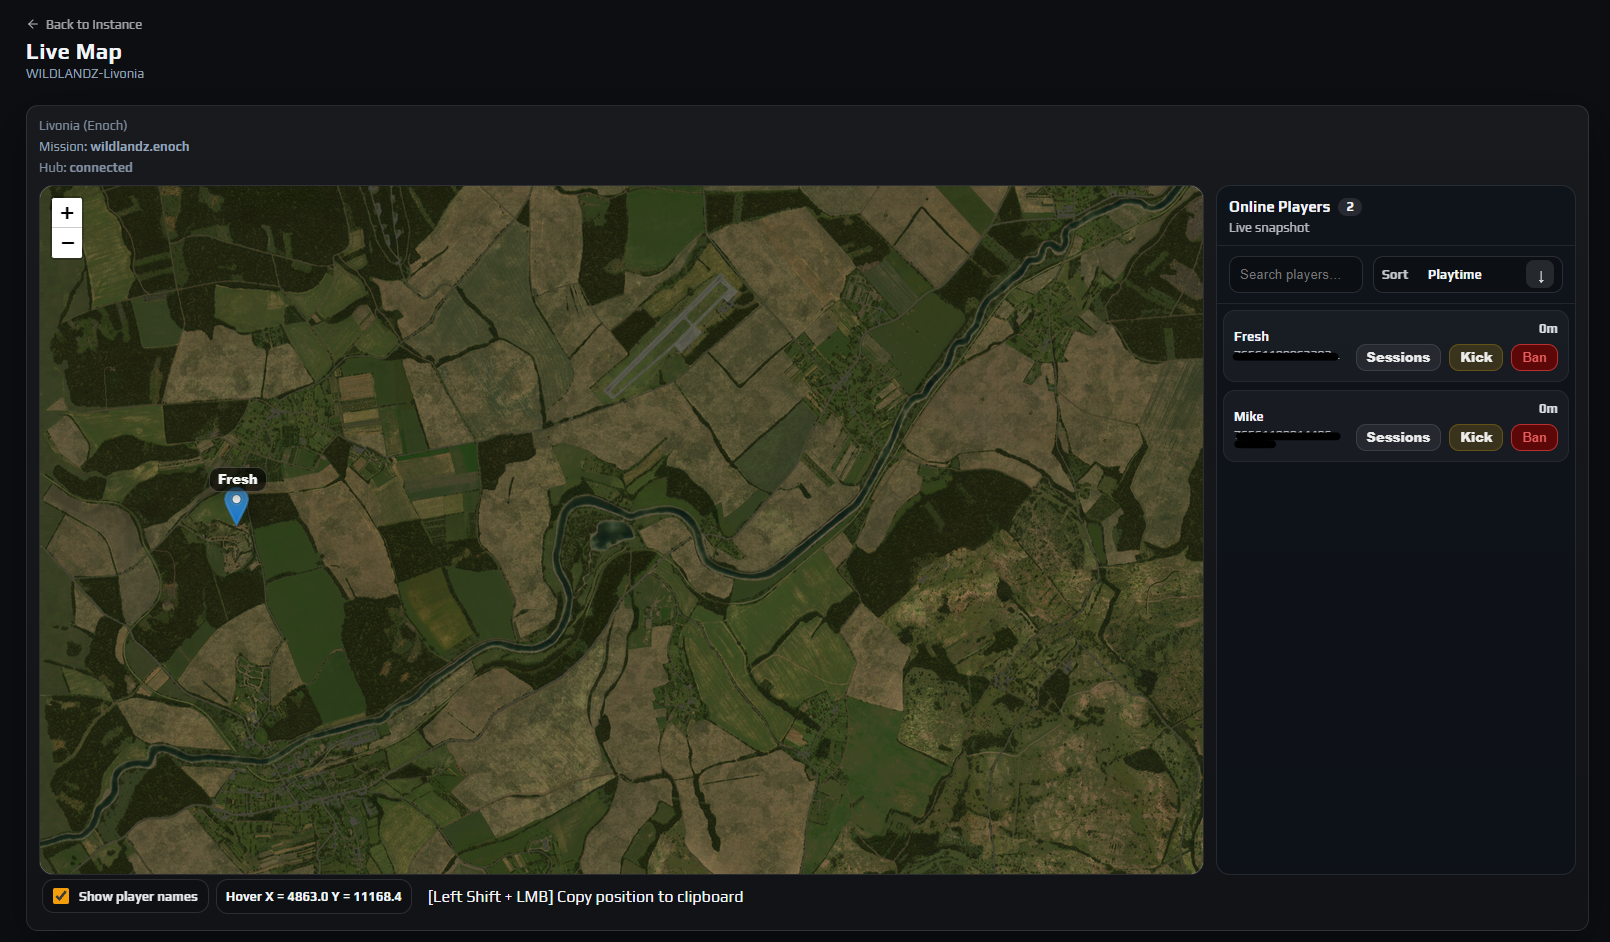 The Live Map tab plots every player currently on your DayZ server onto the real terrain of the world you are running, and refreshes roughly every two seconds. Open it from Instances → your instance → Live Map. Nothing needs installing: the positions come from a first-party server mod that ships on every instance, not from scraping log files, so the map works on a stock server from the first boot. Alongside the map sits an Online Players panel with a live count, a search box, sorting, and per-player Sessions, Kick and Ban buttons. Hovering the map reads out game coordinates, and Left Shift plus left-click copies the position under your cursor to the clipboard. On this page Open the Live Map and read the status headerUnderstand where the positions come fromCheck you are looking at the right worldWork the Online Players panelRead names, markers and coordinatesAct on a player: Sessions, Kick and BanUse it for real admin workTroubleshootingFrequently asked questions Before you start A running server with someone on it. Positions only exist while the server is up and a player is connected — there is no historical playback.Nothing to install. The GameEventDispatcher mod that publishes player positions and Server FPS is a forced prerequisite on every instance. You will find it in Workshop Mods marked ESSENTIAL with a padlock, and it cannot be removed, reordered or toggled off.Instance access. The realtime feed checks the View instance permission, so any staff member who can open the instance can watch the map. The action buttons need more: Use RCON to kick, Manage bans & lists to ban and View players to open Sessions.A mission whose world is one of the supported ones, otherwise you get Chernarus+ tiles under your players. The full list is in step 3. 1. Open the Live Map and read the status header Click Live Map in the instance tab bar. The page title reads Live Map with your instance name underneath, and Back to Instance returns you to Overview. Above the map itself are three short lines that tell you whether to trust what you are looking at: The map name the panel has chosen — Chernarus+, Livonia (Enoch), Sakhal and so on. This is derived from your mission, not picked by you.Mission — the mission folder name the instance is actually running, or (none) if the panel has not read one yet.Hub — connected, connecting or disconnected, with the error in brackets if there is one. Note: Hub describes your browser’s realtime link to the panel, not the state of your game server. connected with an empty map means the panel is listening fine and your server simply has not sent a player snapshot yet. The DayZ Live Map: player markers on the real world tiles, with the Online Players panel beside them. 2. Understand where the positions come from Your server runs a mod called GameEventDispatcher, installed on every instance as a forced prerequisite. Roughly every two seconds it posts a full snapshot of everyone online — name, Steam64 id and position — which the panel relays to your browser over a realtime connection. The same mod supplies the Server FPS figure on Overview. It is a snapshot, not a trail. Each update replaces the last, so markers step to their new position instead of drawing a path. Following someone means watching for a while.It is best-effort. On a busy server the snapshot is split into chunks before it leaves the game, and an incomplete batch is dropped rather than shown half-finished. An occasional skipped cycle is normal. A small line under the Online Players heading tells you which state you are in: Waiting for players_update… until the first snapshot arrives, then Live snapshot from then on. If it never changes, either nobody is online or the server is not running. 3. Check you are looking at the right world You do not choose the map. The panel takes your mission folder name, keeps everything after the last full stop, lowercases it, and looks for matching tiles — so dayzOffline.chernarusplus resolves to Chernarus+ and a custom mission such as hardcore.namalsk resolves to Namalsk. These worlds have tiles: Map shownYour mission name must end inChernarus+chernarusplusLivonia (Enoch)enochSakhalsakhalNamalsknamalskDeerIsledeerisleGreen CountygreencountyPripyatpripyatAntoriaantoriaIztekiztekDeadfalldeadfallBanovFrostbanovfrost Careful: An unrecognised world falls back to Chernarus+ tiles. The markers are still your real players at their real coordinates, but they are drawn over the wrong terrain, so anything you conclude from the scenery will be wrong. Compare the map name in the header against the Mission line before you act on what you see. The view is clamped to the world bounds, so you cannot pan off into empty space. After a mission change, reload the page — the map rebuilds itself around the new world. 4. Work the Online Players panel To the right of the map, Online Players carries a count badge and one row per connected player. The count reflects what is currently listed, so it drops as you type in the search box rather than always showing the server total. Search players… filters on both the player name and the Steam64 id, so you can paste an id straight from a report.Sort offers Name or Playtime, and the arrow button beside it flips between ascending and descending.Each row shows the player name with their Steam64 id underneath, then a playtime figure, then the three action buttons.Clicking anywhere on a row that is not a button flies the map to that player. This is the fastest way to find one person in a crowd. An empty panel reads No players to show. — which also appears when your search matches nobody, so clear the box before concluding the server is empty. Note: The playtime figure on this panel comes from the live position feed, which carries only names, ids and coordinates. For real session history — total playtime, session counts, first and last seen — use the Players tab, which is fed by a separate harvester. The Online Players panel: search, sort, and per-player Sessions, Kick and Ban buttons. 5. Read names, markers and coordinates Below the map are the display controls. Show player names is ticked by default and floats each player’s name above their marker. Untick it when a firefight has six people stacked in one building and the labels overlap into mush.The Hover readout shows the game coordinates under your cursor as Hover X = 7481.3 Y = 8320.6, or Hover: — before you have moved over the map.[Left Shift + LMB] Copy position to clipboard does exactly that. Clicking a marker opens a popup with the player’s name, their position as a DayZ vector in x, height, z order, and their Steam64 id underneath — which is what you copy into a ban list, a whitelist entry or a support ticket. The shift-click copy writes a three-part position with the height component set to a literal zero: 7481.3,0,8320.6 That is the shape most spawner and event tools expect. Substitute a real height if the tool you are feeding needs one. Careful: Shift-click gives you no toast and no flash — the copy is silent by design. Paste it somewhere before assuming it failed. Treat the coordinates as close-enough for placing events and spawns, not survey-grade: they are derived from the tile calibration and clamped to the world bounds. The Hover readout gives live game coordinates; Left Shift and left-click copies them to the clipboard. 6. Act on a player: Sessions, Kick and Ban Each row carries three buttons, and they behave quite differently from one another. ButtonWhat it actually doesSessionsOpens the Players tab in a new browser tab with that player’s Steam64 already searched in the All Players list. From there View Sessions gives you their connection history. Needs the View players permission.KickTakes you to the RCON tab with that player’s name pre-filled in the Players Online filter. The RCON session connects on arrival; press Kick on their row, add a reason, and confirm in the Kick Player dialog. Nothing is sent from the map itself.BanOpens the Ban Player dialog straight away, pre-filled with the player’s name and Steam64. Set the duration and a reason, then confirm. The ban is written through the panel and synced to the server, and BattlEye kicks them automatically. Careful: The Ban Player dialog opens with Permanent ban already ticked and its confirm button reading Ban Permanently. If you meant a cooldown, untick it first and set Duration (hours) or an End Date before you confirm. One limitation of banning from the map: the live feed carries only a Steam64, so the dialog has no Also ban IP address option here. To ban the IP as well, ban from Players → All Players instead, where the panel knows the player’s full identity and can offer Latest IP or All known IPs. Both routes are covered in RCON bans, whitelist and priority queue. Data loss risk: A permanent ban is easy to issue from a map row and awkward to unwind once a player has moved on. Check that the Steam64 in the marker popup matches the one in your report, and put a real reason in the Reason field — in three months it will be the only record of why you did it. Banning from a map row: the dialog arrives pre-filled with the player’s name and Steam64 id. 7. Use it for real admin work The map earns its place once you stop watching it and start using it to answer specific questions. Testing a cheat report. Search the accused player, click their row to lock the view onto them, and watch for a minute. Teleporting reads as a marker jumping kilometres between two-second updates; someone crossing open ground at a plausible pace does not. The difference is obvious at a glance.Checking whether a raid is happening. A base owner opens a ticket claiming they are being raided while offline. Look at the base coordinates: three markers clustered on them tells you one thing, an empty map another. Note the Steam64 ids of anyone parked there before they log out.Verifying someone is where they claim. Before acting on any report, confirm the position. It costs ten seconds and it is the cheapest way to avoid banning the wrong person.Finding where your players actually go. Glance at the map at peak hours across a few evenings. Persistent clusters show which towns are carrying your loot economy and which half of the map nobody visits — useful input before you touch types.xml and the loot economy.Picking coordinates for events and spawns. Hover the spot you want, shift-click, paste. Placing a trader, an airdrop or a custom event this way beats guessing numbers out of a wiki, because you can see the terrain you are putting it on. Note: The map shows position only — no vehicle, base, loot or zombie overlay, and nothing a player has built. To know what is at a set of coordinates, take them from the map and go look in game. Troubleshooting The Live Map is empty and stuck on "Waiting for players_update" Why it happens. The panel’s realtime connection is up but no player snapshot has arrived. Usually the server is stopped, nobody is connected, or it is still finishing its boot and the mod has not started reporting. How to fix it. Check Overview shows Running with a player count above zero, then give it a few seconds. If the server is running with players on it and the message never changes, open a ticket and name the instance. My server is Livonia but the Live Map shows Chernarus Why it happens. The map is chosen from the part of your mission folder name after the last full stop. If that word is not one of the worlds we hold tiles for — a renamed folder, a typo, or a community map we do not ship yet — the panel falls back to Chernarus+. How to fix it. Compare the last segment of the Mission line against the supported list in step 3. Rename the mission folder so it ends in the correct world name, restart, and reload the page. For a community map we do not carry, open a ticket and ask for the tiles. Every player on the Live Map shows 0m playtime Why it happens. The playtime figure here comes from the live position feed, and that feed carries only names, ids and coordinates. There is no session history behind the map. How to fix it. Use Sessions on the row, or go to Players → All Players directly. That list has real Playtime, Sessions, First seen and Last seen values from the panel’s own session tracker, and sorts by playtime properly. Shift and left-click does not copy the coordinates Why it happens. The copy is deliberately silent — no toast, no highlight — so success looks identical to failure. A genuine failure usually means the browser blocked clipboard access. How to fix it. Paste into any text field to check before troubleshooting further. If nothing pastes, allow clipboard access for the panel in your browser’s site permissions, or read the numbers off the Hover line and type them in. The header says Hub: disconnected and the markers have frozen Why it happens. The realtime connection dropped — a network blip, a sleeping laptop, or a panel session that expired while the tab sat open. The last snapshot stays on screen, which is why frozen markers can pass for live ones. How to fix it. It reconnects on its own and the header returns to connected; if not, reload. Being bounced to the sign-in screen means your session expired. If it reconnects but stays empty, confirm you still hold View instance on that instance. Frequently asked questions Do I need to install a mod to use the Live Map? No. The GameEventDispatcher mod that publishes player positions is installed on every instance as a forced prerequisite, so the Live Map works on a brand new vanilla server with nothing added. You will see it listed in Workshop Mods marked ESSENTIAL with a padlock, and it cannot be removed, reordered or switched off. How often do player positions update? About every two seconds. Each update is a complete snapshot of everyone online that replaces the previous one, so markers step to their new position rather than animating along a path. On a busy server an occasional cycle is dropped rather than shown incomplete, and the next follows two seconds later. Which DayZ maps does the Live Map support? Chernarus+, Livonia (Enoch), Sakhal, Namalsk, DeerIsle, Green County, Pripyat, Antoria, Iztek, Deadfall and BanovFrost. The panel matches on the part of your mission folder name after the last full stop, and anything it does not recognise is drawn over Chernarus+ tiles instead. If you run a community map that is not on the list, open a ticket and ask us to add the tiles. Does clicking Kick on the map kick the player straight away? No. Kick hands you over to the RCON tab with that player already filtered in the Players Online list, because kicking is a live RCON action. You still press Kick on their row and confirm in the Kick Player dialog. Ban is the button that acts from the map itself. Can I see where a player was yesterday? No — the Live Map is live only and keeps no position history. Session activity is recorded: the Players tab holds each player’s sessions, playtime, first and last seen, and known connection details. For where they were rather than when they were on, your server’s admin logs in profiles are the record. Can my players see the Live Map? No — only people with panel access to that instance, and the feed checks the View instance permission before sending anything. That makes it a permissions decision: any staff member you grant instance access to can watch every player’s live position, whether or not you gave them RCON or ban rights. See staff permissions and API keys. Related guides Getting started with the control panelRCON, bans, whitelist and priority queueGetting started with the control panel
 -
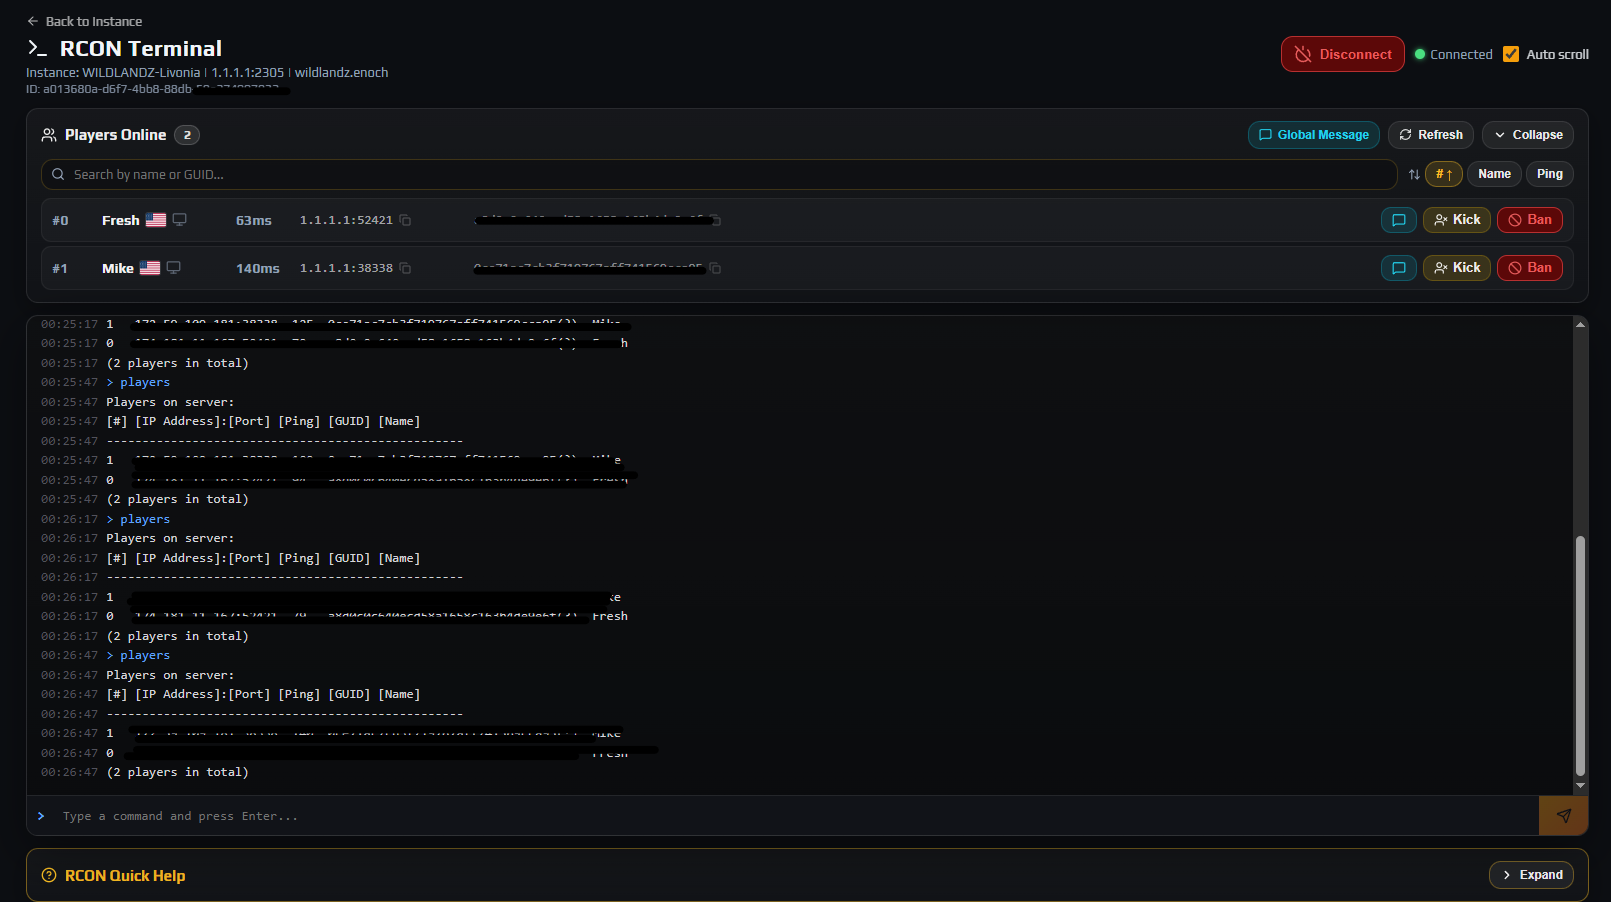 Moderation on a DZSERVERS.HOST server lives in two tabs. RCON opens a live BattlEye console with a Players Online panel, where you kick, message or ban whoever is connected this second. Players holds the durable lists — Bans, Whitelist and Priority — which the panel writes into your server’s own ban.txt, BattlEye bans.txt, whitelist.txt and priority.txt and re-applies on every sync and every start. The rule of thumb: reach for RCON when someone has to be off the server right now, and for the Players lists when the decision has to still be true after the next restart. This guide covers both halves in that order. On this page Connect the RCON Terminal and read Players OnlineKick, message or ban a connected playerType commands yourself, and know what the panel will not seeOpen the Players tab and adopt the lists already on diskWork the roster: identities, sessions and one-click actionsManage the Bans list: surfaces, status and other serversTurn on the whitelist and seed the priority queueTroubleshootingFrequently asked questions Before you start The right permissions. Use RCON renders the RCON tab, View players renders Players, and Manage bans & lists is what lets you create or revoke anything. Owners have all three; sub-users get what you grant under Members.A running instance for anything live. BattlEye’s RCON port only answers while the server process is up, and that port is always your game port plus three.An admin and RCON password already saved in Instance Settings — the node reads it back out of the server’s BattlEye config to authenticate. See getting started with the control panel. The RCON Terminal: a live BattlEye console with the Players Online panel and per-player Kick and Ban buttons above it. 1. Connect the RCON Terminal and read Players Online Go to Instances → your instance → RCON. The page is headed RCON Terminal with the instance name, its RCON endpoint and the mission underneath, and it tries to connect on its own as soon as it loads. Top right are the session controls: Connect RCON, which becomes Disconnect once a session is live, a coloured dot reading Connected or Disconnected, and an Auto scroll checkbox. A Hub: disconnected badge means your browser has lost its live link to the panel, not that RCON has dropped. Below sits Players Online with a live count, plus Refresh, Global Message and Collapse. It refreshes itself on connect, every 30 seconds, and about a second after any join or leave line scrolls past. Each row starts with the session number, shown as #12 — that is what kick and ban target, and it is reassigned every time the player reconnects. Then the name with a country flag, a platform icon (PC or Console (Xbox)), the ping, and finally IP:Port and the 32-character BE-GUID, which copy to your clipboard when clicked. Console players report no ping, so their cell reads N/A. The Search by name or GUID... box filters the list; the #, Name and Ping buttons sort it, and clicking the active one again flips the direction. Note: Connect RCON to see the player list. means there is no session. No players online, or waiting for data... means the session is up but the first response has not landed — give it a few seconds. 2. Kick, message or ban a connected player The row buttons open small panels rather than firing immediately, so there is always a moment to check you picked the right row. Kick. Kick Player confirms the name and session number and offers one Reason (optional) field, defaulting to Kicked by admin. It is instant, the reason is shown to the player, and nothing stops them reconnecting a second later — a kick breaks up a situation, it does not end one. Message. The message icon sends a private line to that session; Global Message sends one to everybody. A warning delivered in-game settles most problems without a ban. Ban. Ban Player shows the BE-GUID and IP for confirmation, then offers: Permanent ban — leave the checkbox clear and the duration controls appear.Also ban IP address — a checkbox showing the exact address it would use.Hours or End Date — Duration (hours) converts what you type into minutes and days as you go; Ban expires at will not accept a moment less than five minutes away.Reason (optional) — defaults to Banned by admin. The confirm button reads Ban Player, or Ban Permanently when the checkbox is ticked. Note: This is not the raw BattlEye ban command. It creates a tracked entry in Players → Bans, writes the enforcement files and issues a live reload so BattlEye kicks the player by itself — which is why the ban is still there, reason and expiry intact, after the next restart. It needs the Manage bans & lists permission, which the panel names in the failure message if you lack it. Careful: Think twice about Also ban IP address. Household members and anyone behind a mobile or carrier-grade NAT connection share addresses. Ban the identity first; add the IP only for someone who has already come back on a new account. The Ban Player panel from the RCON tab — permanent or timed, identity only or identity plus IP. 3. Type commands yourself, and know what the panel will not see The input bar takes anything BattlEye accepts, with Up and Down cycling your recent commands, and recent output reloads when you return to the page. RCON Quick Help at the foot of the page expands to a reference of exactly eight commands: players All currently connected players. commands All available BattlEye RCON commands. say -1 <message> Broadcast to all players. kick <playerId> <reason> Kick by session/player id. ban <player#> [minutes] [reason] Ban a connected player's BE-GUID. 0 or omitted = permanent. addBan <GUID or IP> [minutes] [reason] Ban a GUID or IP even if not connected. removeBan <ban#> Remove a ban by its number. bans List all current BE server bans. Two need care. ban takes the session number from Players Online, not a GUID, so it only reaches someone currently connected; addBan is the one that works on an absent player. removeBan takes a position in the list bans prints, and those positions shift as bans come and go, so run bans immediately before it. The real difference is bookkeeping: A typed RCON banA panel Bans entryStored inBattlEye’s own bans.txt.The panel database, then ban.txt and BattlEye bans.txt.Visible in the panelNot until you run Import existing.At once, with reason, expiry, status and time added.Undoing itremoveBan <ban#>, and the numbers renumber underneath you.An Unban button; the entry stays readable under Show revoked.Your other serversNot applied.Apply to other instances copies it across.Server offlineNothing to send.Files are still written and read at the next start. Careful: A ban you type by hand is real — BattlEye enforces and stores it — but the panel had no part in it, so it has no reason, no readable expiry and no name against it. Syncs preserve lines the panel did not write, so nothing gets clobbered; but if moderation has been happening in the console, run Import existing once to pull that history in. 4. Open the Players tab and adopt the lists already on disk Go to Instances → your instance → Players. Six tabs run across the page — Online, All Players, Sessions, Bans, Whitelist, Priority — and it opens on All Players. Above them a status band gives the active ban, whitelist and priority counts, any pending sync and failed counts, and Last sync:. Sync now rewrites the list files on the node immediately. Import existing does the opposite: it reads the server’s ban.txt, BattlEye bans.txt, whitelist.txt and priority.txt, plus the live ban list over RCON, and adopts anything the panel is not already tracking. If nothing has ever been imported, a banner says so and offers Adopt existing lists. Do that first on any instance with history — one you migrated in, or one moderated from an external tool. The confirmation, headed Import existing lists?, spells out that nothing is deleted. Note: Adoption is one-way and safe. Imported rows carry an imported: file badge so you can tell them apart, and a sync never removes a line the panel did not write. You rarely need Sync now by hand: every create, edit and revoke queues its own sync, and one is queued just ahead of every server start so the engine boots with current lists. Use it after editing a list file directly over SFTP, or when a node problem has left entries showing Pending. The Players tab: six lists, a live status band, and Import existing for adopting a server’s pre-existing bans. 5. Work the roster: identities, sessions and one-click actions All Players is everyone who has ever connected; Online is the same table filtered to who is on now. Columns are Player, Identity, Playtime, Sessions, First seen and Last seen. Search with Search name / Steam64 / GUID / IP…, sort by Last seen, Playtime or Name, and page through 25 at a time. The Player cell shows a green dot while the player is connected and a names button holding their alias history. Identity shows the strongest ID on file, correctly labelled, with an expander revealing the rest and a copy button for each: Steam64 — the 17-digit Steam ID. BattlEye’s GUID is derived from it, so this alone is enough to ban, whitelist or grant priority.Bohemia UID — what the engine writes into whitelist.txt and ban.txt. Console players may have this without a Steam64.BE-GUID — the 32-character hash BattlEye enforces on, and the only identity a raw RCON ban gives you. View Sessions switches to Sessions for that player, listing Started, Ended, Duration, IP and Ping (avg / peak) newest first. That is where you settle an argument about whether someone was online when a base was raided. With Manage bans & lists every row also carries Whitelist, Priority and Ban. Priority is greyed out for anyone the panel has not yet seen a Steam64 for, and both quick-adds confirm first, explaining what the list does before writing anything. Ban here opens the fuller panel: Permanent ban starts ticked, and instead of one IP checkbox you choose Don't ban IP, Latest IP or All known IPs — the last counts the distinct addresses across every server you manage and writes one entry per address. Careful: All known IPs can mean a lot of entries, each revoked separately afterwards. On a long-standing player, Latest IP is almost always the right answer. Note: The same ban panel opens from the Live Map, whose Kick button hands you to the RCON tab with that player already filtered in Players Online — see the live player map. 6. Manage the Bans list: surfaces, status and other servers The Bans tab is the record. Add ban opens the ban panel with a Steam64 ID field, for banning someone who has never played here — a name passed to you by another community. Filter with Filter by name / Steam64 / GUID / IP / reason…, order by Newest first or Oldest first, and tick Show revoked to read lifted bans as history. Expires reads Permanent, a countdown such as 18h left or 6d left, Expired, or revoked. Surfaces shows which files enforce it: BadgeMeaningban.txtThe server-root ban.txt, read by the engine at startup. It has no concept of duration, so it carries permanent bans.BEBattlEye’s bans.txt, with a minute count. BattlEye re-reads it on a live reload and kicks any matching connected player by itself — that is what makes a ban bite without you touching the console. A permanent ban therefore shows both badges and a timed ban shows only BE. That is expected, not a fault. Status is the sync chip: Pending until the node applies the change, Applied once the files are written, or Failed with the node’s error in the tooltip. Per-row actions, all needing Manage bans & lists: A pencil icon opens Edit ban — change the Reason, or use Expires (leave empty = permanent) to shorten, extend or make a ban permanent without recreating it.A copy icon opens Apply to other instances, which lists every instance you can manage and reports each target as created, merged, forbidden, notfound or error.Unban revokes the entry, re-syncing immediately — the player can reconnect as soon as that lands. Careful: Apply to other instances creates an independent entry on each target and there is no matching bulk unban, so lifting a network-wide ban means visiting each server’s Bans tab. Use it for cheaters, not for cool-off bans. Note: Banning the same person twice does not create duplicates: an active entry matching any of their identities is updated in place and gains any new identity you supply. That is how a ban created from a BE-GUID on the RCON tab later fills in a Steam64. A Bans row records reason, expiry, which files enforce it and whether the node has applied it yet. 7. Turn on the whitelist and seed the priority queue Whitelist. The tab opens with a banner reading Whitelist enforcement is ON or OFF; when it is off it adds that entries are written but not enforced until you enable it. Enable whitelist writes the setting into serverDZ.cfg, and the confirmation is explicit that it applies at the next server restart, because the engine reads that file at boot. Data loss risk: Enabling enforcement on an empty list locks every player, including you, out of your own server at the next restart. Add your entries first. The panel does warn you — Enabling it will lock out EVERYONE until you add players. — but it will let you proceed. If it has already happened, add yourself on this tab and restart again; there is no in-game way back in. Add a player by ticking Whitelist on their roster row, or here with the Bohemia UID or Steam64 field and an optional Label (optional). Either identity works — the panel resolves the form the file needs. Priority. Priority entries let a player skip the join queue when the server is full, which is how you keep staff, donors and event hosts able to get on at peak hours. It needs no config switch, but it is Steam64 ID only: the add field accepts nothing else, and the roster button stays disabled until the panel has seen a Steam64 for that player. Label each one, or you end up with a column of anonymous 17-digit numbers. Both tabs use the same row controls as Bans — the copy icon for Apply to other instances, and Remove to revoke. Removal re-syncs immediately, so a removed whitelist entry locks that player out on their next connection attempt. Note: These lists are per instance, not per account: running several servers as one community, add someone once and then use Apply to other instances. Who on your team may do any of this is set under Members — see staff permissions and API keys. The whitelist enforcement banner: entries are written whether or not enforcement is on, and enabling it takes effect at the next restart. Troubleshooting RCON says Disconnected and will not connect Why it happens. Usually the server is stopped, so nothing is listening on the RCON port. Otherwise the instance has never had an admin and RCON password saved, leaving the node with no RConPassword to authenticate with, or the server is mid-boot. How to fix it. Check Overview reads Running and give a fresh boot a minute. If it is up and still refusing, stop the instance, open Settings → Server & RCON Authentication, save a password (4 to 10 characters, letters and numbers only), start it and try again. I banned someone with a typed command and they are not in the Bans list Why it happens. Typed commands go straight to BattlEye, which enforces and stores them in its own bans.txt. The panel had no part in it, so there is no entry, no reason and no expiry it can show you. How to fix it. Click Import existing in the Players header and confirm Import & adopt. The ban appears with an imported: file badge and is manageable from then on. Next time, use the Ban button on the player row. I turned the whitelist on and now nobody can join, including me Why it happens. Enforcement is all or nothing: with it on, only the identities in whitelist.txt may connect, so a short or empty list locks out the whole player base at the next restart. How to fix it. Open Players → Whitelist, add yourself and your staff — a Steam64 or Bohemia UID each — and restart so the change is read. If you were only testing, click Disable whitelist and restart; the entries stay, unenforced, for next time. A ban entry is stuck on Pending, or shows Failed Why it happens. Pending means the sync has not completed on the node, which is normal for seconds and abnormal for minutes. Failed means the node could not write the files, commonly because the BattlEye directory does not exist yet on an instance that has never been started. How to fix it. Hover the Failed chip for the reason, then click Sync now to retry. On a never-started instance, start it once so the game and BattlEye directories exist, then sync. Repeated failures are worth a ticket with the tooltip text. The Priority button is greyed out and the panel refuses my entry Why it happens. The join queue is keyed on Steam64 and nothing else, so priority.txt accepts only that form. The panel refuses a Bohemia UID rather than write a line the server would ignore, and the roster button stays disabled for players it has never seen a Steam64 for — typically console players. How to fix it. Use the 17-digit Steam64. If the roster has none yet, it will after that player’s next session. There is no priority equivalent for a Bohemia-only account; whitelisting them is the nearest thing available. Frequently asked questions Does my server have to be running for a ban to work? No. A panel ban is written to the list files whether the server is up or down, and both the engine and BattlEye read those files at startup — a sync is queued just ahead of every start. The only part that needs the server up is the live reload that kicks a player who is connected right now. Should I ban on Steam64, Bohemia UID or BE-GUID? Steam64 whenever you have it. BattlEye’s GUID is derived from the Steam64, so one value covers both enforcement surfaces, and the panel fills in the other identities as it sees the player again. Ban on a BE-GUID when that is all the console gave you, and on an IP only as a supplement to an identity, never instead of one. Can I ban a cheater from every server I run at once? Yes. Open the ban on the Bans tab, click the copy icon for Apply to other instances, and pick targets or use All. Each target gets its own entry, reported back as created or merged. There is no bulk unban, so lifting it later means visiting each server. Do bans and the whitelist survive restarts, updates and map changes? Yes. The panel database is the source of truth and the list files are rewritten from it on every sync and ahead of every start, so a game update, a mod update or a mission change cannot quietly drop your bans. Lines the panel did not write are preserved rather than overwritten. Do I have to keep the RCON page open? Only for live actions. Kicks and messages travel over the open session, so the page has to be connected. Everything on the Players tab is stored server-side and applied by the node, so you can close the browser as soon as the entry is created. How do I let a moderator ban players without giving them the keys to the server? Add them under Members with View players and Manage bans & lists, and leave power, settings and file permissions off. They get the roster and the lists without being able to stop the server or touch its files, and every action is attributed in the Audit Log — see staff permissions and API keys. Add Use RCON too if they need the live console. Related guides Getting started with the control panelThe Live Map: real-time player positionsStaff permissions and API keys
 -
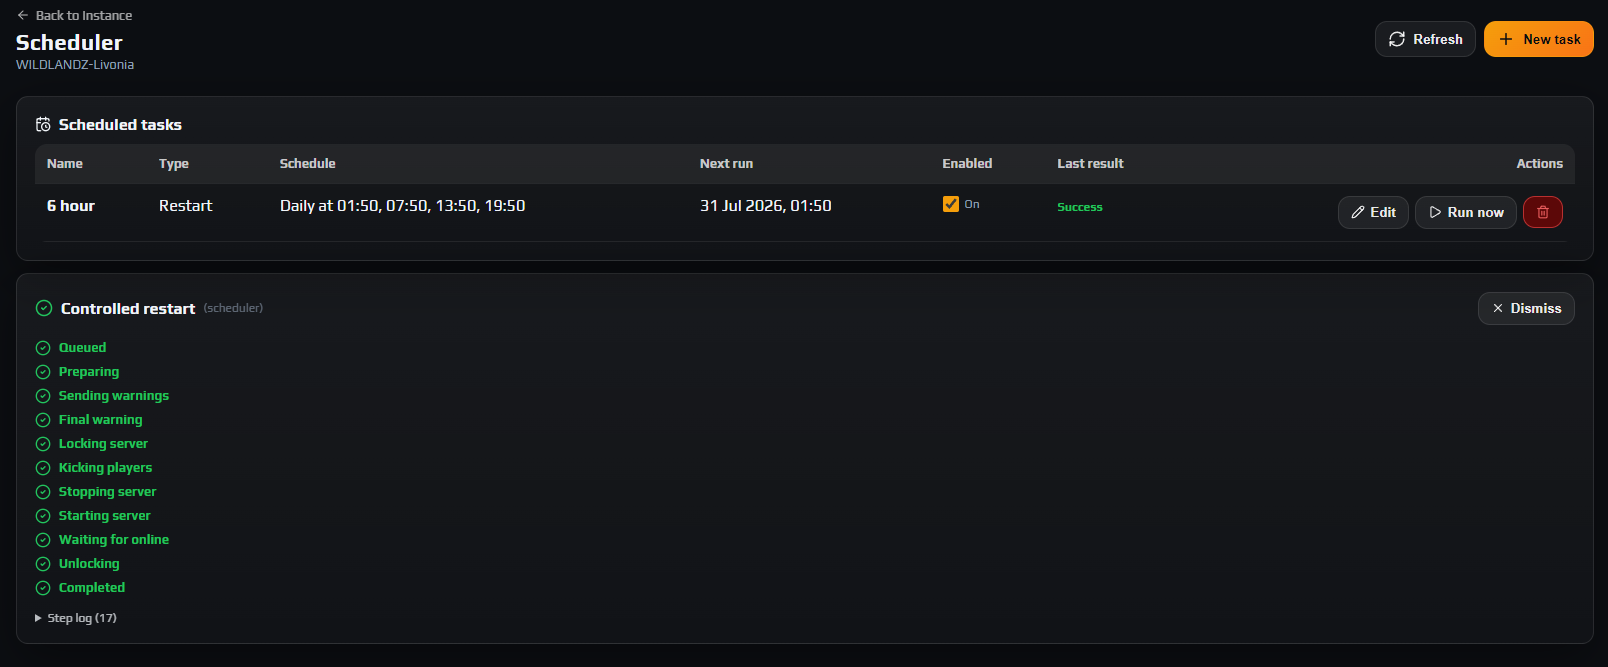 Automatic restarts live in the Scheduler tab of your instance: click New task, choose Restart (controlled), and set it to run daily at a quiet hour or every few hours. The task drives the same warning-and-kick engine as the manual Controlled Restart button, so players get a broadcast countdown before anyone is disconnected. The same tab runs Stop and Start tasks for planned downtime and RCON message tasks for repeating in-game announcements — your rules, your Discord, your wipe date. Every time you enter is in your own time zone, not UTC. On this page Open the Scheduler tab and read the task tableCreate a task and choose its typeSet the schedule in your own time zoneTune the restart warning ladderUse Stop and Start tasks only for planned downtimeAdd repeating RCON broadcastsTest with Run now, then watch Next run and Last resultUnderstand how the schedule meets automatic updatesTroubleshootingFrequently asked questions Before you start The Manage scheduler permission. Instance owners have it; a sub-user without it sees a red banner reading You don't have permission to manage the scheduler on this instance.A working admin and RCON password. Warning broadcasts, the #lock, the kick and every RCON message task travel over BattlEye RCON, so if that password is wrong the schedule still fires but nobody hears anything. Set it in Settings → Server & RCON Authentication.The server has to be running when a restart task fires. A controlled restart against a stopped server fails by design.Ideally, automatic backups already on, so a bad night is recoverable — see automatic backups and restore. 1. Open the Scheduler tab and read the task table Go to Instances → your instance → Scheduler. A fresh instance reads No scheduled tasks yet. Create one to automate restarts, start/stop, or RCON broadcasts. Once you have tasks, the Scheduled tasks card lists them all: ColumnWhat it tells youNameWhatever you called the task — also the name quoted in the Audit Log, so make it descriptive.TypeRestart, Stop, Start or RCON message.ScheduleA summary in your local time: Daily at 04:00, Every 6h, Weekly Sat at 05:00.Next runLocal date and time of the next fire. A disabled task shows a dash.EnabledAn On / Off switch. Flipping it saves at once and recalculates Next run.Last resultSuccess, Skipped or Failed from the most recent scheduled run. Hover a Failed value for the reason.ActionsEdit, Run now and a red trash button. Refresh re-reads the table; the page does not poll on its own. Deleting asks first and is blunt about it — This cannot be undone. To pause a task instead, switch Enabled to Off; its configuration survives. The Scheduler tab lists every automated task for one DayZ server, with its next run and the outcome of the last one. 2. Create a task and choose its type Click New task. The New scheduled task panel opens with a subtitle confirming that times are shown and entered in your local time, followed by the time zone your browser reports. Give it a Name — up to 128 characters; the placeholder suggests Nightly restart — then set Task type: Task typeWhat it does when it firesRestart (controlled)Queues a full controlled restart: warning broadcasts, #lock, an RCON kick of every player, then stop and start. This is the one for routine restarts.StopStops the server, optionally after a broadcast countdown. It does not kick players first.StartStarts the server. The server will be started at the scheduled time. No extra options.RCON messageBroadcasts one or more lines of global chat. Nothing else happens. Enabled is ticked by default. Finish with Create task — on an existing task the same button reads Save changes. An incomplete task is refused with the field at fault named: Name is required., Interval must be at least 5 minutes., Add at least one time of day. Careful: Task type is fixed at creation. Reopen a saved task and the dropdown is greyed out with Task type can't be changed after creation. Everything else stays editable. Wrong type means delete and recreate. The four scheduler task types — Restart (controlled), Stop, Start and RCON message — chosen once and fixed afterwards. 3. Set the schedule in your own time zone The Schedule card has one dropdown, Repeat, with three modes: Every N minutes — a rolling interval. Interval (minutes) has a floor of 5, and the hint says so. A round interval reads in hours in the table, so 360 minutes shows as Every 6h.Daily at time(s) — one or more fixed 24-hour HH:mm times, every day. Add time adds another; the trash icon drops one.Weekly on day(s) — the same time list, but only on the days you highlight with the Sun to Sat buttons. Every selected day gets every selected time. The Time(s) of day label names your browser’s time zone in brackets, and it means it: type 04:00 because you want four in the morning where you are. The panel converts to UTC for storage and back again for display. For restarts, prefer Daily at time(s). A daily schedule is anchored to the clock and never moves; an interval is measured from the last run, so it drifts across the day, and editing or re-enabling the task restarts its clock from that moment. A schedule worth copying on a populated modded server: TaskTypeScheduleScheduled restartRestart (controlled)Daily at time(s) — 04:00, 10:00, 16:00, 22:00Rules + DiscordRCON messageEvery N minutes — 30 Those four times are roughly every six hours, which suits a heavy mod list. A small or vanilla server is fine with one nightly restart at its quietest hour. Do not go shorter than four hours without a reason — every restart is real downtime. Careful: Times are converted to UTC when you save, using the offset in force that day. When your region moves on or off daylight saving, existing tasks shift by an hour in local terms — a 04:00 restart becomes 03:00 or 05:00. Open each task after the changeover and click Save changes to re-anchor it. Note: The panel checks for due tasks every half minute or so, so a task fires within about a minute of the time you set rather than on the exact second. Daily, weekly or rolling-interval schedules, entered in your local time zone and stored in UTC by the panel. 4. Tune the restart warning ladder Choose Restart (controlled) and a Restart process card appears. This is where a scheduled restart beats the button on Overview, which only offers three fixed windows. Warning broadcasts (before restart) is the countdown ladder, and it ships with five rows. These are the real defaults: Fires atDefault message10 minServer restart in 10 minutes.5 minServer restart in 5 minutes.3 minServer restart in 3 minutes.1 minServer restart in 1 minute.30 secServer restart in 30 seconds. Each row is a number, a min or sec unit and the exact text players see. Rewrite the wording, change the offsets, use Add warning for extra checkpoints, or remove rows with the trash icon. The largest offset sets the lead time for the whole run: leave 10 minutes at the top and a task set for 04:00 puts the server down at 04:10. Final warning (at restart time) — the zero-minute message. Default: Server restart is starting now. You will be kicked shortly.Kick reason — what each player is told as they are disconnected. Default: Server restart.Post-kick delay (s) — breathing room between the last kick and the stop, 0 to 60 seconds. Default 5, enough for the server to finish writing everyone out.Lock the server (#lock) before kicking players — ticked by default. Data loss risk: Leave the #lock checkbox ticked. Without it a player can connect while the server is emptying, spend thirty seconds loading in, then be cut off by the shutdown with nothing committed to persistence — exactly the lost-gear complaint you scheduled the restart to prevent. The lock does not survive the restart, so there is nothing to undo afterwards. Broadcasts are BattlEye global chat, so they land in the in-game chat box and nowhere else; that is why the ladder repeats rather than announcing once. A scheduled restart and a manual one run the same eleven-step engine and both show the same live Controlled restart card on this page — the full sequence is in restarting without rollbacks. The default warning ladder broadcasts at 10, 5, 3 and 1 minutes and again 30 seconds out before anyone is kicked. 5. Use Stop and Start tasks only for planned downtime Stop and Start are a pair, and they are not how you do a nightly restart. Use them when the server should genuinely be dark for a while — an overnight window on a private server, or a maintenance slot before a wipe. A Start task has no options. A Stop task gets a Stop warnings (optional) card: Warning lead (s) — how long before the stop the countdown begins. Default 60, and the hint is explicit: 0 = stop immediately.Broadcast every (s) — the gap between countdown lines, minimum 5. Default 30.Warning message — the template, defaulting to Server stopping in {seconds}s. The {seconds} placeholder becomes the seconds remaining, so a 60-second lead broadcasting every 30 sends Server stopping in 60s. then Server stopping in 30s. Data loss risk: A Stop task ends the game process without kicking anyone first, so any player still connected is disconnected by the process going away and reverts to the last state the server committed — position, health and inventory. Sixty seconds of warning is not much. If people might be online, schedule Restart (controlled) instead, or give the Stop task a lead of several minutes. A Stop task that fires on an already-stopped server records Skipped rather than failing, as does a Start task on a running one. Both also skip while another start, stop or restart is still in flight, which is what stops two schedules fighting each other. 6. Add repeating RCON broadcasts An RCON message task is the cheap way to put your rules and your Discord link in front of players without a mod. Pick the type and an RCON messages card appears with a single Broadcast line field. Add message gives you more lines. Interval between lines (s) — default 5 — is the gap left between them, so one task delivers a short block of announcements in order instead of dumping them at once. The schedule controls how often the block repeats. Rules and support: discord.gg/your-invite Base raiding is allowed. Griefing empty bases is not. Scheduled restarts: 04:00, 10:00, 16:00 and 22:00 server time. Three lines five seconds apart on Every N minutes with 30 briefs every player twice an hour. Keep each line to one sentence: past roughly 480 characters it is truncated before sending, and long lines scroll out of the chat box anyway. Note: A broadcast task on a stopped server records Skipped with no error — there is nobody to talk to. Run now on a stopped server refuses outright with Server is not running; cannot broadcast. An RCON message task broadcasts a block of announcement lines in order, on whatever schedule you set. 7. Test with Run now, then watch Next run and Last result Run now executes a task immediately, whatever its schedule says. It does not move Next run and it does not touch Last result — that column only reports scheduled runs. You get a toast instead: Ran "<name>" now. for a stop, start or broadcast. Careful: Run now on a Restart (controlled) task does not restart anything immediately — it queues the whole ladder, so with the defaults the server goes down ten minutes later. The toast reads Controlled restart queued for "<name>". and a live Controlled restart card appears on the Scheduler page with an Abort button. On a Stop task, Run now skips the Stop warnings countdown entirely and stops the server at once. Day to day, two columns tell you whether your automation is healthy: Next run should always be a sensible time in the future. A past time that never clears means the task cannot be picked up, almost always because the instance is mid-update.Last result should read Success. Skipped is informational, but the same Skipped every night means the task never does anything. Failed carries its reason as a tooltip — hover it. Note: On a restart task, Success means only that the controlled restart was queued. The restart itself reports separately on the Controlled restart card and in the Audit Log, so a task can read Success while the restart it started ended in Restart Failed. The full history is in Audit Log filtered to Scheduler: Task Created, Task Updated, Task Deleted, Task Run Now, Task Executed, Task Skipped and Task Failed, alongside the per-stage restart entries from Restart Queued to Restart Completed. Staff actions are attributed by name — see staff permissions and API keys. Last result and Next run are the two columns to check when you want to know your automation is still working. 8. Understand how the schedule meets automatic updates Your instance already restarts itself for reasons unrelated to the Scheduler. With Auto game updates on, a new DayZ build triggers a stop, an update and a start; mods marked Auto-update do the same when their Workshop entry changes. Those workflows send their own countdown, prefixed [Auto-update], and it is short — about a minute. The two systems stay out of each other’s way: An update workflow will not begin while a start, stop, restart or broadcast command is still in flight for that instance. It waits and tries again on its next pass, so it never lands inside your warning countdown.Scheduled tasks do not fire while the instance is mid-update. The task stays due rather than being lost, so it runs as soon as the update finishes — a 04:00 restart that collides with an update happens a few minutes late instead of not at all. So the short update countdown is no argument against scheduling your own restarts. An update-driven restart fires when Bohemia or a mod author decides; your schedule is what gives players a predictable rhythm and ten minutes of warning. Run both, and publish your restart times in your server description, your Discord and one of the RCON message lines from the previous step. Careful: Do not use Run now on a restart task while the status pill reads Updating. The scheduler would have waited; a manual queue does not, and the restart fails reporting that the instance is not provisioned. Wait for Running to come back. Troubleshooting My scheduled restart shows Skipped and the server never restarted Why it happens. A restart task will not queue a second controlled restart while one is still running on the same instance, and records Skipped noting that a restart process is already active. Two restart tasks set too close together do this to each other, and so does a manual Controlled Restart that is still counting down when the task fires. How to fix it. Open Scheduler and look at the Controlled restart card — a live run has a countdown and an Abort button, so let it finish or abort it. Then space restart tasks at least as far apart as the lead time of the warning ladder: with the ten-minute defaults, never less than fifteen minutes. The task says Success but the server did not restart Why it happens. Success on a restart task means the restart was queued, not that it completed — it then runs as its own process and can fail on its own terms. The two common causes are that the server was not running when the countdown ended, and that RCON could not authenticate, so the lock and kick step timed out. How to fix it. Read the Controlled restart card on the Scheduler tab: the failure reason is at the top and the timestamped detail is under Step log. Cross-check Audit Log filtered to Scheduler for Restart Failed. If RCON is at fault, re-check the password in Settings → Server & RCON Authentication — 4 to 10 characters, letters and numbers only. My tasks started firing an hour early after the clocks changed Why it happens. You enter times locally and the panel converts them to UTC when you save, using the offset that applied that day. UTC does not observe daylight saving, so when your region shifts, the stored time stays put and the local time you see moves by an hour. How to fix it. After a daylight-saving change, open each task and click Save changes without altering anything — that re-converts the times using the new offset, and the Schedule and Next run columns will read what you want again. Next run is a time in the past and the task never fires Why it happens. Tasks are only picked up for an instance that is fully provisioned and not mid-update. During a game or mod update the task keeps its old Next run rather than being skipped, which is deliberate — it runs when the update finishes. How to fix it. Check the status pill on Overview. Updating means wait it out; the task fires shortly after the pill returns to Running. Click Refresh to re-read the table. If the instance is Running and a task has been due for a long time, open a ticket with the task name. Nobody sees the broadcasts from my RCON message task Why it happens. Broadcasts are BattlEye global chat and nothing else, so they only appear in the in-game chat box. Skipped means the server was not running when the task fired. Success with nothing visible means the panel accepted the messages but RCON could not deliver them — nearly always a wrong RCON password. How to fix it. Open the RCON tab, confirm it connects and send a test message by hand. If it will not connect, fix the password in Settings → Server & RCON Authentication first — the scheduler uses the same one. More detail is in RCON, bans, whitelist and priority queue. Frequently asked questions How often should I restart my DayZ server? Every four to six hours suits a populated server with a heavy mod list, which is four times a day on a Daily at time(s) schedule. A small or vanilla server is usually happy with one restart at its quietest hour. DayZ servers degrade over long uptimes, but each restart is also real downtime, so anything shorter than four hours needs a specific reason. Are scheduler times UTC or my local time? Your local time. The task editor says so in its subtitle and names your browser’s time zone next to the Time(s) of day field. You type the time you want, the panel converts to UTC for storage, and the Schedule and Next run columns convert back. The one thing to watch is daylight saving — re-save your tasks after the changeover. Can I change a task from Stop to Restart after creating it? No. Task type is locked once the task exists, and reopening it shows the dropdown greyed out with Task type can't be changed after creation. Delete the task and create a new one with the right type. Everything else stays editable, including the schedule, the warning ladder and the message text. What is the shortest interval a scheduled task can use? Five minutes. Every N minutes will not accept less and rejects it with Interval must be at least 5 minutes. The floor protects you from yourself: a restart cycle tighter than its own warning ladder would leave players permanently mid-countdown. Do I need separate Stop and Start tasks for a nightly restart? No, and you should not use them for that. One Restart (controlled) task warns players, locks the server, kicks everyone cleanly and brings it back by itself. Stop and Start pairs are for genuine downtime windows, because a Stop does not kick players first and risks the rollbacks a controlled restart exists to prevent. Will a scheduled restart clash with an automatic game or mod update? No. An update workflow will not start while any start, stop, restart or broadcast command is in flight for your instance, and retries on its next pass. In the other direction, scheduled tasks do not fire mid-update; they stay due and run as soon as it finishes, so a collision costs you a few minutes rather than the restart. Related guides Getting started with the control panelRestarting without rollbacks
 -
 You can move a DayZ server from another host to DZSERVERS.HOST and keep your world, your players’ bases and their characters. What carries all of that is one directory: your mission folder, with its storage_* persistence inside it. The order of work is: set the matching mission under Settings → Edit Mission, rebuild the mod list in the same load order under Workshop Mods, re-enter your serverDZ.cfg values in Instance Settings, then upload the mission over SFTP while the new instance is Stopped. Some things do not come with you, and it is cheaper to know that now than to discover it mid-cutover: bans, whitelist and priority queue have to be re-imported, your admin and RCON password is replaced, and mods run at whatever version the Steam Workshop publishes today. This runbook covers both halves. On this page Inventory the old server while you still have accessStop both servers, then download the mission folderPoint the new instance at the same missionRebuild the mod list in the same load orderRe-enter your serverDZ.cfg values by handUpload the mission and persistence over SFTPBoot it once and read the RPT before telling anyoneRe-import your lists, rebuild your schedule, then cut overTroubleshootingFrequently asked questions Before you start File access to the old server that you still control — its panel, FTP or SFTP. Get your copy before you cancel anything; plenty of hosts delete the files the moment a service lapses.A provisioned instance here. It is created automatically when your order completes, so there is nothing to build — see getting started with the control panel.Your SFTP details from the SFTP tab: host, port 2022, the per-instance username and the SFTP password. Connecting with SFTP sets that up.The same map on both ends. Bases and characters are stored per world, so moving from Chernarus to Livonia is a fresh start, not a migration.Somewhere with room to hold the download. A long-lived server’s persistence is commonly hundreds of megabytes. 1. Inventory the old server while you still have access Write five things down first. Every later step depends on one of them, and once the old service is gone none of them can be recovered. The mission folder name, exactly. Something like dayzOffline.chernarusplus. Copy the spelling and capitalisation from the folder listing, not from memory.The mod list, in load order. The authoritative source is the old host’s startup line: the -mod= and -servermod= arguments, read left to right. Note each mod’s numeric Steam Workshop id, because folder names are not always unique or searchable.The slot count the old server ran, so you can tell whether your new plan matches.A copy of serverDZ.cfg. You will not upload this file, but you will read values out of it in step 5.The list files from the old server root: ban.txt, whitelist.txt and priority.txt, if you used them. Careful: Do not cancel the old service on migration day. Keep it paid until the new server has booted, players have confirmed their bases and characters are intact, and it has run for a day. Overlapping billing for a week is the cheapest insurance in this process. 2. Stop both servers, then download the mission folder Stop the old server first. Then download, from the old host, the entire mission folder — not a selection of files inside it. Data loss risk: Never copy persistence out of a running DayZ server. The engine holds players.db open and rewrites the storage_* folder when it shuts down, so a copy taken live is a torn snapshot: characters from one moment, base state from another, and a database mid-write. Stop the old server, wait for it to fully exit, and only then start the download. Stop your new instance too, with Stop on Overview, and leave it stopped until step 7. This is what you are after, and roughly what it looks like: mpmissions/ dayzOffline.chernarusplus/ <- take this whole folder db/ globals.xml, economy.xml, types.xml, events.xml cfgeconomycore.xml cfgspawnabletypes.xml cfgplayerspawnpoints.xml cfggameplay.json init.c storage_1/ <- the persistence: bases, vehicles, characters players.db players.db-wal players.db-shm data/ Two files are easy to miss and matter: players.db-wal and players.db-shm are the write-ahead log and shared-memory index for players.db. Take the database without them and you can lose the most recent writes — which is to say, the last session everybody played. Note: You do not need the old profiles folder. It holds logs and working files, none of which carries world state. Keep the .ADM logs if you want your admin history. 3. Point the new instance at the same mission With the instance stopped, click Settings in the tab bar and scroll to Edit Mission. The Preset dropdown offers the three stock missions: PresetMapdayzOffline.chernarusplusChernarus — also the default when the field is emptydayzOffline.enochLivoniadayzOffline.sakhalSakhal Picking a preset just fills the Value box, and that box is free text. So if your old host ran a custom or renamed mission, type its exact folder name in Value instead of using a preset. Click Save mission. Clear empties the field and falls back to dayzOffline.chernarusplus. Careful: The mission value must match a folder name under mpmissions character for character. It is used verbatim to build the launch argument -mission=...\mpmissions\<value>, so dayzOffline.chernarusPlus with a capital P is simply a folder that does not exist, and the server will not load a mission. Note: Save mission and Clear are both disabled while the server runs — the panel’s tooltip reads Stop the server to change mission. Same rule as the rest of this panel. Edit Mission sets which folder under mpmissions DayZ loads — type a custom mission name straight into Value. 4. Rebuild the mod list in the same load order Open Workshop Mods. In the Add a mod card, paste a Workshop URL or its numeric id and click Lookup & add. The Add Workshop Mod panel opens, lists any Required dependencies pre-ticked, and Add to server queues the mod and its dependencies ahead of it. Repeat for every mod on your inventory list. Data loss risk: Copying the old server’s @ModName folders across does nothing. The panel builds -mod= and -servermod= from this table alone, so a mod that is not a row here is never loaded no matter what sits on disk. Add every mod through Workshop Mods. Then fix the order. The arrows in the Order column set the sequence, lowest first, and it must match what the old server ran: frameworks and dependencies first, content mods next, override and tweak mods last. Reordering saves immediately. The Enabled, Server-only and Auto-update checkboxes are drafts instead — click Save on the row to commit them. Installing Steam Workshop mods covers it in detail. Note: Rows badged Essential with a padlock come from the node template and cannot be removed, reordered or toggled. GameEventDispatcher, which feeds Live Map player positions and server FPS, is one of them — already installed, nothing to migrate. Careful: Mods install at whatever version the Workshop currently publishes; there is no way to pin an older build, here or on any other host. If your old server ran for months without updating its mods, you are updating them all at once during the migration. That is the most common reason bases come back missing. The Workshop Mods table is the only source of the load order — rebuild it to match the old host row for row. 5. Re-enter your serverDZ.cfg values by hand Open Settings again and work down the Instance Settings fields with the old serverDZ.cfg beside you: Host Name, Description, Max Players, Password, the time acceleration values, Disable 3rd Person, the Admin Log toggles, the network ranges. Every field maps to one real config key. Every serverDZ.cfg setting explained is the reference if a value needs interpreting. Click Save and look for Changes Saved!. Data loss risk: Do not upload the old serverDZ.cfg over the new one. The panel keeps its own copy of every setting the editor exposes and writes them into the file whenever you save, so a hand-uploaded file is silently overwritten the next time anything changes — and the old one carries the old host’s IP, ports and slot count. These lines belong to the panel and are rewritten on every single start, whatever the file says: hostIp = "..."; // your instance's bind IP hostPort = ...; // your game port a2sport = ...; // your query port a2sIpAddress = "127.0.0.1"; steamQueryPort = ...; // your query port maxPlayers = ...; // clamped to the slot count you purchased passwordAdmin = "..."; // from Settings > Server & RCON Authentication Anything the editor does not cover is yours to edit directly. Keys such as instanceId, the VoN settings, the login queue values and respawnTime are left untouched by the panel, so set them in serverDZ.cfg from the File Browser (Share → config) and they will stick. Last, set your admin password. In Server & RCON Authentication, type a value or click Regenerate, then Save password — 4 to 10 characters, letters and digits only. The old host’s password does not come across, and this one value covers both the in-game admin login and BattlEye RCON, so update any external admin tool you use. 6. Upload the mission and persistence over SFTP Confirm Server Status still reads Stopped, then connect with your SFTP client and open the mpmissions folder. Data loss risk: Nothing may be written into storage_* while the instance is Running. DayZ rewrites that folder on shutdown, so an upload under a live server is either ignored or flushed away, and writing into an open players.db can corrupt every character on the server. Stopped, always. Use SFTP, not the web File Browser, for this step: the browser caps uploads at 300 MB against 2.5 GB over SFTP, and storage_* alone usually exceeds 300 MB on any server that has been played on. Create the mission folder under its final name and upload into it, rather than uploading and renaming afterwards. Then reconcile the storage folder number. DayZ picks which one it loads from instanceId in serverDZ.cfg: instanceId = 1 loads storage_1. If the old host used a different value your download arrives named storage_5 or similar, and the new server will ignore it and generate an empty world beside it. Either name the incoming folder to match the storage_* folder your instance already has, or set instanceId to the old number. Careful: Keep the original download on your own disk untouched until the migration is confirmed. It is the only copy of the old world that exists, and the first attempt does not always take. Uploading over your source folder is a mistake you make exactly once. The mission folder, storage_* included, goes up over SFTP — 2.5 GB there against 300 MB in the File Browser. 7. Boot it once and read the RPT before telling anyone Click Start on Overview. The first boot after a migration is slower than normal: mods install, and the engine reads a persistence set it has never seen. Open the Live Logs card, set Stream to rpt and actually read it. What you are checking for: The mission loads. A run that ends without reaching the mission usually means the Mission value and the folder name disagree.No mod load failures. Cross-check any complaint against the Workshop Mods table for a Failed status or a Missing dependencies card.No flood of unknown-type errors. Those are types.xml entries naming items from a mod that is not in your list — a sign the mod list is incomplete rather than that the XML is broken. Editing types.xml and the loot economy explains the file. You are up when Server Status reads Running and Server FPS reports a number. Now verify in game rather than by inspection: copy your address with Copy next to Connect, join, and check three things — your own character arrived with its inventory, a base you know the location of is standing, and vehicles are where they were. Open the Live Map tab and confirm you show up on it. Careful: If bases are missing, stop the server before anyone plays. Every minute a wrong world stays live is a minute of new player activity written on top of it, and that makes re-uploading your download messier. The RPT stream is where a migration succeeds or fails — read it before announcing the new address. 8. Re-import your lists, rebuild your schedule, then cut over Bans, whitelist and priority queue do not travel with the mission folder, and they are the last thing standing between you and an unmoderated server. Upload the old ban.txt, whitelist.txt and priority.txt into the config share, overwriting the empty ones already there.Open Players and click Import existing. The confirmation is titled Import existing lists? and explains what it reads; confirm with Import & adopt. Nothing is deleted — entries already on disk are pulled into the panel so the two agree from now on.If you ran a whitelist, enable enforcement on the Whitelist tab. It applies at the next restart. Note: BattlEye’s own bans.txt lives outside the four shares, so GUID and IP bans held only there cannot be uploaded. Re-add those through the Bans tab, which writes both files for you — RCON, bans, whitelist and the priority queue covers it. Two pieces of housekeeping do not migrate either. Recreate your restart schedule in Scheduler with New task → Restart (controlled) — see automatic restarts with the Scheduler — and pick a frequency on Backups, where Daily suits most servers and everything is kept for 30 days (automatic backups and restore). Only then cut over. Your address has changed, so update wherever players find you: your community listing, your Discord, any launcher collection, and your DNS record if you use one. Overview gives you Direct Connect and List on DZSA Launcher links to share. Announce the new ip:port clearly, and leave the old host running with a message-of-the-day pointing at it for as long as you are paying for it. Import existing adopts the ban, whitelist and priority files you uploaded into the panel’s own lists. Troubleshooting My bases are gone after the migration but my character survived Why it happens. Characters and world objects load separately. players.db is self-contained so characters almost always survive, but built structures are stored as object classes and DayZ silently drops any object whose class the loaded mod set does not define. A missing mod, a mod present but not Enabled, or a mod republished since your old server last updated will each take every structure that mod provided with it. How to fix it. Stop the server before players build anything new. Compare Workshop Mods against your inventory list row by row: every mod present, Enabled ticked, the same order, Server-only matching. Fix the list, re-upload storage_* from the download you kept, and start again. If it was a version change rather than a missing mod, the author’s changelog is the only thing that will tell you what was renamed. The server starts but loads an empty world, or the wrong map Why it happens. Three variants of one mistake. The Mission value does not match the folder name exactly; or it matches but you uploaded into a differently named folder; or the mission is right and the storage_* number does not match instanceId in serverDZ.cfg, so DayZ ignores your persistence and generates a fresh world beside it. How to fix it. Open File Browser, set Share to mpmissions and read the folder name off the screen. Stop the instance, retype it into Value under Edit Mission, and Save mission. Then look inside the mission folder: if there are two storage_* folders, one is yours and one was generated, and the generated number is the one matching instanceId. I uploaded my old serverDZ.cfg and my settings keep reverting Why it happens. Instance Settings stores its values in the panel rather than reading the file, and writes them into serverDZ.cfg on save. On top of that the panel re-patches the IP, both ports, the slot cap and passwordAdmin immediately before every start. An uploaded file is overwritten by design, not by accident. How to fix it. Open the old file as a reference and type its values into the Instance Settings fields, then Save. Keys the editor does not expose are safe to edit in the file directly — the panel only ever rewrites the keys it owns. My old bans and whitelist are not being enforced on the new server Why it happens. The panel maintains its own copies of the ban, whitelist and priority lists and rewrites the server files from them. Files dropped into config without telling the panel are not part of that picture yet, and a whitelist file with no enforcement enabled is inert. How to fix it. Upload the list files into the config share, then click Import existing on Players and confirm with Import & adopt. Check the counts in the status band afterwards, then enable whitelist enforcement on the Whitelist tab and restart. My persistence upload fails or never finishes in the File Browser Why it happens. The web File Browser accepts single files up to 300 MB, which a mature server’s storage_* folder passes easily — and a browser upload of thousands of small files is slow and fragile besides. How to fix it. Use SFTP, which takes single files up to 2.5 GB. Details are on the SFTP tab and in connecting with SFTP. Keep the File Browser for the small XML edits afterwards. Frequently asked questions Will my players keep their characters, skills and inventory? Yes, as long as you bring players.db across with its -wal and -shm companions and load it on the same map. DayZ keys characters to a player’s Bohemia account id, which does not change between hosts, so a player who logs into the migrated world finds the character they left — position, health, inventory and all. Can I change map at the same time as migrating? You can, but it is not a migration. Bases, vehicles and characters are stored per world, so pointing the instance at a different mission gives you a fresh world with nothing in it. If you want both, migrate first, confirm the old world is intact, then change map later as a deliberate wipe — the old mission folder stays on disk. Can I just copy my whole old server folder across? No, and it would not help. You get four shares — profiles, mpmissions, config and mods — and the game binaries are outside them. Mods must be added through Workshop Mods because that table is what builds -mod=, and serverDZ.cfg is panel-owned. The only folder worth copying wholesale is your mission. How much downtime should I plan for? Budget two hours for a modded server and treat the transfer as the variable. Mission, mod and settings work is about fifteen minutes of clicking; moving the persistence takes as long as your own connection needs for a few hundred megabytes, doubled because you download it first. Do all the configuration before you stop the old server, so the only real downtime is the transfer. Does my admin and RCON password come across? No. It is replaced with the value in Server & RCON Authentication on your new instance, and the panel writes it into both passwordAdmin and BattlEye’s RConPassword on every start. Set it yourself or click Regenerate, then update every external admin tool and script that held the old one. Can I migrate a custom map such as Deer Isle or Namalsk? Yes. Add the terrain mod through Workshop Mods exactly as you would any other mod, upload the mission folder into mpmissions, and type its folder name into the Value box under Edit Mission — the field is free text, so it is not limited to the three presets in the dropdown. Everything else in this runbook is unchanged. Related guides Getting started with the control panelMaking a manual backup over SFTPinstalling Steam Workshop mods
 -
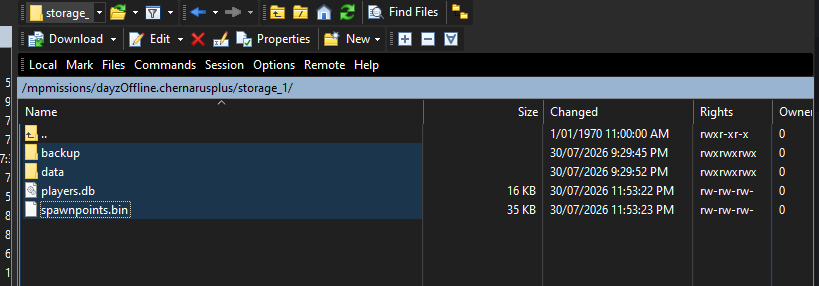 A manual DayZ backup is a copy of your mission folder pulled down over SFTP with the instance stopped: open the SFTP tab for the credentials, connect on port 2022, then download mpmissions/<world>/ including the whole storage_* folder and all three of players.db, players.db-wal and players.db-shm. That is the entire persistence set, and once it is on your own disk it is yours indefinitely. The Backups tab cannot do this for you. It has no create-now button and no download button, and its history is only 30 days, so an off-site archive, a snapshot taken minutes before a risky change, or a copy to load onto a test server is a job you do by hand. This guide covers doing it correctly — and the one mistake that turns the whole exercise into a corrupt file. On this page Stop the instance before you copy anythingConnect over SFTP and find your world folderDownload the whole world folderTake serverDZ.cfg and a record of your mod list tooVerify the copy before you start the server againDecide how many copies you keep, and for how longPut your own copy back when you need itTroubleshootingFrequently asked questions Before you start Your SFTP details: the Host, Port (2022) and Username from the SFTP tab, plus your SFTP password. Connecting with SFTP covers getting them and setting up a client.The Start / stop / restart permission as well as Read files. A copy taken while the server is running is not a backup, so you need to be able to stop it.A maintenance window. The instance stays down for the length of the copy — usually a few minutes, longer on a mature world.Free disk space locally, and somewhere sensible to keep the copy. A mature storage_1 folder is commonly a few hundred megabytes. The persistence set on a stopped DayZ server: players.db with its -wal and -shm siblings, plus the world data beside them. 1. Stop the instance before you copy anything This is the whole guide in one instruction. Do it first, and everything else is straightforward. Data loss risk: players.db is an SQLite database running in write-ahead log mode. Copy it while the server is running and you get a torn, stale or outright unreadable file — and copy players.db without its -wal sibling and you silently lose every write that had not yet been folded into the main file. Either mistake produces a backup that looks fine in your file manager and destroys your world the day you restore it. Stop the instance, wait for Server Status to read Stopped, and only then start the transfer. Click Stop on Overview. If players are online, run a Controlled Restart first so they are warned and can log out somewhere safe, then stop the instance once it is back up — restarting without rollbacks explains what an abrupt kill costs them. Wait for the status pill. DayZ flushes persistence as it shuts down, so a copy started while the process is still exiting can catch the world mid-write. Stopped means the handles are closed and the files on disk are the truth. Note: The panel’s own scheduled backups genuinely do not need downtime, and that is not a contradiction: the node takes a Volume Shadow Copy snapshot of the disk before it reads anything, so it gets a consistent point-in-time image while DayZ holds the database open. Your SFTP client has no equivalent trick — it reads live files one at a time. Wait for Server Status: Stopped before you begin the transfer — a hot copy of players.db is worthless. 2. Connect over SFTP and find your world folder Go to Instances → your instance → SFTP and take the Host, Port and Username from the Connection card — each has its own Copy button. The username is your panel username, a dot, and eight hexadecimal characters identifying this instance, so copy it verbatim rather than retyping it. Your session lands in a root holding exactly four folders: profiles, mpmissions, config and mods. Open mpmissions. Inside is one folder per mission world. The one you want is the value shown as Mission on Overview — dayzOffline.chernarusplus on a default Chernarus instance. If you have ever switched maps you will see more than one, and only the current mission is live; the others are old worlds sitting dormant. Open your world folder and you will find the mission configuration alongside a storage_* folder, normally storage_1. That storage folder is your persistence. Note: Nothing else on the server matters for a persistence backup, and the game binaries and BattlEye working directory are outside the four shares anyway — they cannot be reached over SFTP at all. 3. Download the whole world folder You can cherry-pick, but the reliable move is to drag the entire world folder to your local machine in one transfer. That captures all three of the things a restore might need, in the same layout the server expects them back in: What you are copyingWhat it holdsMatches the restore categorystorage_*/players.db plus -wal and -shmEvery character: inventory, position, health, stats.Players DBEverything else inside storage_*Built structures, vehicles, tents, buried stashes and other persisted world state.World DataThe world folder outside storage_*Your economy and mission config — the db folder, cfgeconomycore.xml, cfgspawnabletypes.xml and the rest.XMLs & JSONs & other(s) Laid out on disk it looks like this: mpmissions/ dayzOffline.chernarusplus/ download this whole folder db/ types.xml, events.xml, globals.xml cfgeconomycore.xml cfgspawnabletypes.xml storage_1/ players.db characters and inventory players.db-wal writes not yet folded into players.db players.db-shm data/ bases, vehicles, tents, stashes Drop it into a local folder named for the instance and the moment you took it — myserver-chernarus-2026-07-30-0300 — and leave the structure exactly as it came down. Do not rename anything, and do not delete the -shm file because it looks like scratch data. A copy that mirrors the server is one you can put back with a plain overwrite. Note: There is no size limit on SFTP downloads. The 2.5 GB ceiling applies to uploads only, so pulling a large world down is never the problem — pushing it back is where limits bite. Careful: Do not start the instance part-way through the transfer to “check it still works”. The moment DayZ boots it reopens the database and begins writing, and the second half of your copy no longer matches the first. Downloading the entire mission world folder in one transfer captures persistence and economy config together. 4. Take serverDZ.cfg and a record of your mod list too Persistence is the part you cannot recreate, but two more things are worth five seconds each while you are connected. serverDZ.cfg. It lives in the config share. The panel writes this file for you from the typed Instance Settings editor, so it is reproducible — but a copy is a plain-text record of every value you tuned, and it is the first thing another host or a local test server will want. Grab whitelist.txt, ban.txt and priority.txt alongside it if you use them. All of these are protected files: you can download and overwrite them, but not delete or rename them over SFTP. Your mod list. There is no export button, so make your own record. The Workshop Mods tab shows an Order column and each mod’s numeric Workshop ID — a screenshot of that table does the job, and the mods share gives you the same list as one @ModName folder per installed mod. Note: Record the mod set with the backup, not separately. Persistence written while a mod was installed contains that mod’s items, and restoring it onto a server that no longer runs the mod is how you get a world full of errors. Mods marked ESSENTIAL come from the node template and are always present, so you only need to note the ones you added. Careful: Do not plan on backing up and restoring mod payloads themselves. Mods are re-downloaded from the Steam Workshop when you add them by ID, and the upload filter rejects executable and script types outright (.exe, .dll, .bat, .cmd, .ps1, .sh, .msi, .scr, .com), so pushing a whole mod folder back does not end well. Re-add by ID and let the panel resolve dependencies — see installing Steam Workshop mods. A screenshot of the Workshop Mods table is your mod list of record — load order and Workshop IDs in one frame. 5. Verify the copy before you start the server again The instance is still stopped, which means this is the only moment you can re-take a bad copy for free. Spend a minute on it. Compare counts and sizes. Put the remote and local panes side by side on the same folder; the file count and total size should match. Most clients flag a transfer that finished with skipped files — treat any skip as a failed backup, not a warning.Confirm all three database files. players.db, players.db-wal and players.db-shm must be present locally if they are present on the server. After a clean shutdown the -wal may be zero bytes or absent, which is fine — what is not fine is it existing on the server and not in your copy.Check the storage folder is not empty. storage_1/data should hold real files. An empty storage folder means you copied a shell.Open one of the XMLs. db/types.xml in a text editor proves the text files came down intact rather than truncated.If you zip it, open the zip. Confirm the archive lists the storage_1 folder and the database files. An archive nobody has opened is not a backup. Careful: You find out a backup is bad on the one day you need it. Verifying now costs a minute; discovering it after a griefing incident costs your players their progress. Once you are satisfied, click Start on Overview and confirm Server Status reads Running and Server FPS reports a number before you tell anyone the server is back. A verified manual backup: the dated folder, the storage folder intact, and all three players.db files accounted for. 6. Decide how many copies you keep, and for how long The Backups tab is your short window — 30 days of node-side history, restored in place. Your own copies are the long window, and they only help if taking them is a habit. A rolling set. Three recent copies suits most communities. Take one, delete the oldest, keep moving.One before every risky change. An economy rewrite, a mod that writes to persistence, a map change, a version upgrade. Take it minutes before, not last night — the value is that it predates the change by as little as possible.One a month, kept. The copy that outlives the 30-day retention, and the one you will be glad of when something went wrong six weeks ago and nobody noticed.One before you leave. Moving hosts means taking a full copy while you still have SFTP access — see migrating a DayZ server to a new host. Store them in two places, one of which is not your gaming PC, and label each copy with the date, the world and the mod set. Sizes are modest — even a large world is usually a few hundred megabytes zipped — so a year of monthly archives fits on any cloud drive. Note: Automatic and manual backups are complements, not alternatives. Leave the Backups tab on a real frequency for the fast, frequent, category-level rollbacks it is good at — automatic backups and restore covers those — and keep your own copies for depth, portability and anything older than a month. 7. Put your own copy back when you need it Restoring your copy is the download in reverse, with the same rule at the front of it. Data loss risk: Stop the instance and wait for Stopped before you upload a single file. A running DayZ server holds players.db open and rewrites the storage folder as it goes and again on shutdown, so an upload under a live server is either refused on a locked file or flushed away the next time the server saves — and a partial write into an open database can corrupt every character on it. Stop the instance on Overview and wait for Server Status to read Stopped.Connect over SFTP and navigate to mpmissions/<world>/ — the same world folder you took the copy from.Upload your saved folder over the top, letting your client overwrite. Take players.db, players.db-wal and players.db-shm together, from the same copy, in the same transfer.Click Start and check the thing you restored actually looks right in game before you announce that you are back. Data loss risk: Never mix files from different copies. A players.db paired with the -wal from another snapshot describes a state that never existed, and SQLite will either refuse it or apply writes that do not belong to it. One copy, all three files, one transfer. Two limits shape the upload. SFTP takes single files up to 2.5 GB; the web File Browser stops at 300 MB, and a mature storage folder routinely exceeds that, so the browser uploader will reject exactly the files you most need to put back. And nothing on the server unpacks archives — there is no extract feature in the File Browser or over SFTP — so upload the unzipped folder tree, not the zip. Careful: An upload overwrites what it matches and leaves everything else alone, so files that exist live but not in your copy survive the restore. For a true replacement rather than a merge, delete the files inside storage_* first — that needs the Delete files permission and is irreversible, so only do it when you mean to discard the live world. Note: If the copy you want is one the panel took rather than one you took, you do not need SFTP at all — use Restore on the Backups tab, which lets you put back Players DB, World Data and XMLs & JSONs & other(s) independently. Automatic backups and restore walks through it. Restoring a manual backup: upload the unzipped folder over the top with the instance stopped, overwriting in place. Troubleshooting My downloaded players.db is a different size to the one on the server, or it will not open Why it happens. It was copied while the instance was running. SQLite in write-ahead log mode is being written to continuously, so a live read catches the file mid-transaction and produces something torn or stale. Your file manager has no way to tell you this — the file looks perfectly normal. How to fix it. Delete the bad copy so you never restore it by accident, stop the instance, wait for Stopped, and take it again. If you cannot stop the server right now, use the Backups tab instead: the node snapshots the disk first, so its automatic backups are consistent even with players online. I restored my own backup and players lost the last few hours of progress Why it happens. Almost always a missing players.db-wal. The write-ahead log holds committed changes that have not yet been folded into players.db, so a copy of the main file alone rolls back to whenever the last checkpoint happened. Copying while the server was running produces the same symptom. How to fix it. Restore again from a copy that includes all three files, taken after the instance reported Stopped. Going forward, download the whole storage_* folder rather than picking files out of it — then there is nothing to forget. The File Browser will not upload my storage folder back Why it happens. The web uploader caps a single file at 300 MB and oversized files are skipped and reported in the upload summary. A mature storage_1 folder frequently contains files past that, and there is no extract feature to work around it by uploading a zip. How to fix it. Use SFTP, which takes single files up to 2.5 GB. This is exactly the case SFTP exists for — see connecting with SFTP. Upload the unzipped folder tree; nothing on the server can unpack an archive for you. Downloading a file in the File Browser fails with File too large to read Why it happens. The web file manager reads a file into memory to serve it, and that path is capped at 50 MB — the error reads File too large to read (>52 MB). players.db on a busy server passes that within weeks, and the world data usually already has. How to fix it. Take it over SFTP, where downloads have no size cap at all. Use the File Browser for reading logs and editing XML, and SFTP for anything binary or bulky. The transfer finished but some files were skipped or refused Why it happens. Three limits look alike from the client. Downloads need Read files on your Members grant, uploads additionally need Write files, and the upload filter rejects .exe, .dll, .bat, .cmd, .ps1, .sh, .msi, .scr and .com outright. How to fix it. Read your client’s transfer log and find the first failure rather than the last, then check the extension and your permissions under Members. Never treat a partially completed transfer as a backup — delete it and start over. Frequently asked questions Do I really have to stop the server to copy players.db? Yes, if you want the copy to be usable. players.db is an SQLite database in write-ahead log mode that DayZ holds open and writes to continuously, so reading it live gives you a torn or stale file. The panel’s scheduled backups avoid the problem a different way — the node takes a Volume Shadow Copy snapshot of the disk before reading, which is why those need no downtime and a hand-made copy does. Which files exactly are the persistence? Everything under mpmissions/<world>/storage_*/. That is players.db with its players.db-wal and players.db-shm companions, which hold every character and inventory, plus the rest of the folder, which holds built structures, vehicles, tents and buried stashes. Your economy and mission config — db/types.xml and friends — sits one level up in the world folder and is worth taking in the same pass. Can I download one of the panel’s automatic backups instead? No. Automatic backups live on the node and are only ever restored in place, so the Backups tab has no download button and no create-now button. A copy on your own disk has to be taken over SFTP, which is also what removes the 30-day retention limit — a file you have already downloaded is yours for as long as you keep it. Can I zip the folder on the server before downloading it? No — there is no compress or extract feature in the File Browser or over SFTP, in either direction. Download the folder as it is and compress it locally afterwards if you want a single tidy archive. The same limitation is why a restore has to be an upload of the unzipped folder tree rather than a zip you unpack on the server. How often should I take a manual backup? Immediately before anything risky, and on a light routine otherwise — three rolling copies plus one a month kept as an archive covers most communities. The automatic Backups tab already handles frequent, recent rollbacks, so your manual copies exist to cover the two things it cannot: getting the data off the node, and keeping it longer than 30 days. Can I load my copy onto a local DayZ server to test something? Yes, and it is one of the better reasons to keep manual copies. A DayZ server you run yourself uses the same mpmissions/<world>/storage_* layout, so the folder drops straight in with the local server stopped. Match the mod set as closely as you can — persistence written with a mod installed expects that mod to still be present — and treat the result as a sandbox, not a mirror. Related guides Getting started with the control panelAutomatic backups and restoreconnecting with SFTP
 -
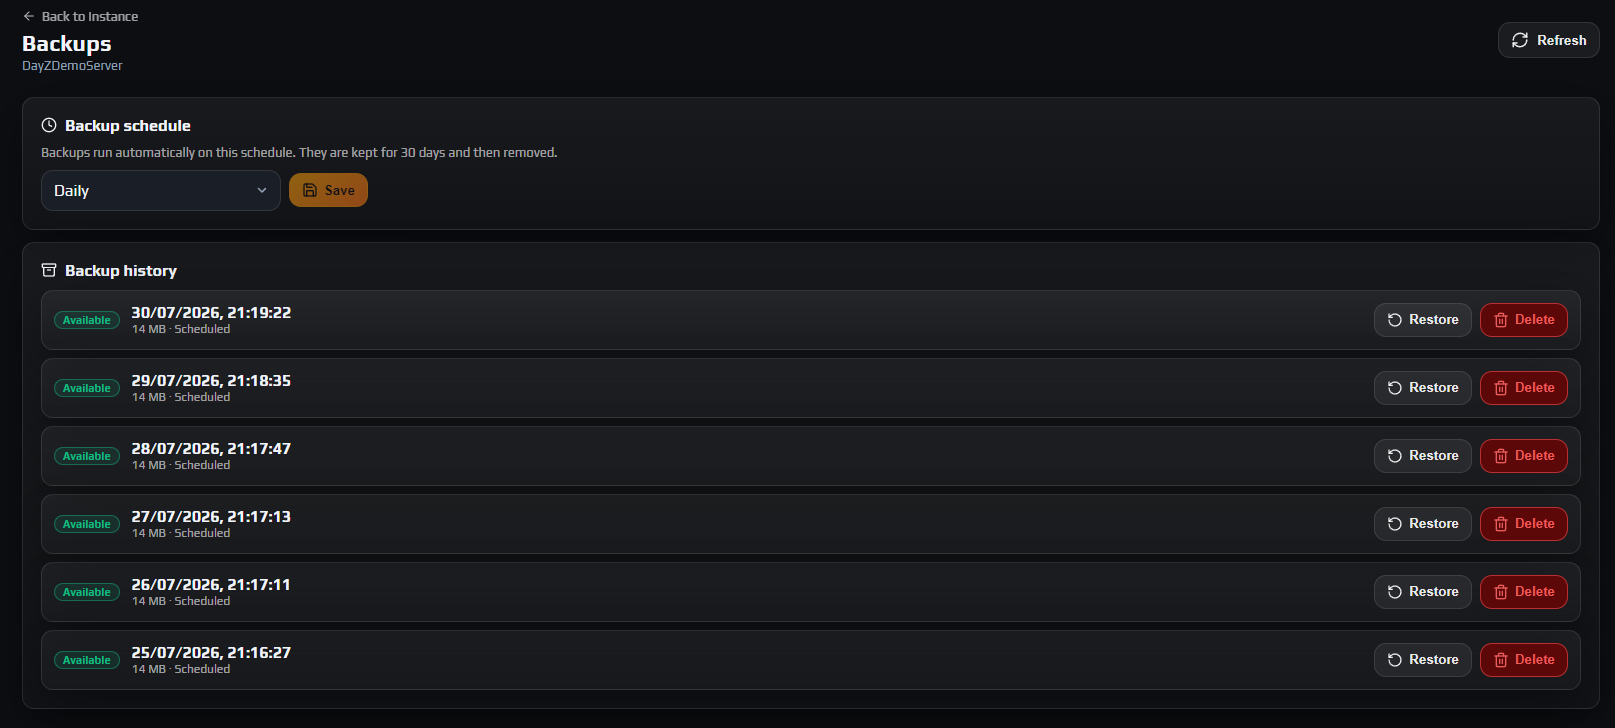 Backups on your DZSERVERS.HOST server run automatically on a frequency you choose, are kept for 30 days, and restore one category at a time — so you can roll back a griefed base without resetting a single player’s character, or put back only your economy XMLs after a bad edit. Everything lives on the Backups tab of your instance: a Backup schedule card, a Backup history list, and a restore panel where you tick which parts of which world to put back. This guide covers that automatic side. There is no create-now button and no download button on the tab, which is deliberate: a copy on your own disk is a separate job over SFTP. On this page Open the Backups tabChoose a backup frequencyKnow what is in a backup, and what is notRead the backup historyStop the server before you restoreRestore only the parts you needWatch it finish, then start the serverKeep your own copy for anything older than 30 daysTroubleshootingFrequently asked questions Before you start An instance and the Manage backups permission. The Backups tab only appears in the tab bar if you have it.The Start / stop / restart permission too if you intend to restore — a restore needs the server stopped, and both the panel and the node refuse otherwise.A rough idea of when the problem started, so you pick the right entry. History timestamps are shown in your own local time. The Backups tab: an automatic schedule at the top, 30 days of restorable history underneath. 1. Open the Backups tab Go to Instances → your instance → Backups. The page opens with two cards, Backup schedule and Backup history. Refresh re-reads both; Back to Instance returns you to Overview. A message reading You don't have permission to manage backups on this instance. means you are a sub-user without the Manage backups permission, which the owner grants under Members. Note: One permission covers the whole tab: anyone who can change the schedule can also restore and delete, so grant it only to people you trust with the persistence data. Every schedule change, restore and delete is attributed in the Audit Log — see staff permissions and API keys. 2. Choose a backup frequency The Backup schedule card holds one dropdown. Pick a value and click Save; a toast confirms it, such as Backup frequency set to Daily. Discard appears beside Save while a change is unsaved. OptionWhat it doesOffNo backups at all. Existing entries stay until retention removes them.Every 6 hoursFor a busy server where six hours of base building is a lot to lose.Every 12 hoursA good default for most community servers.DailyEnough for a low-population or PvE server.WeeklyOnly useful alongside your own manual copies. The interval runs from the last backup attempt, not against the clock, so Daily means about every 24 hours and drifts slightly forward each day; there is no field to pin it to a set hour. Backups need no downtime either: the node takes a Volume Shadow Copy snapshot first, so players.db is captured cleanly while DayZ holds it open and players are online. Careful: Off means exactly that. Turn backups off and there is nothing on the node to restore from when someone gets griefed three days later. Note: A banner reading Backups are not fully configured on this node yet. means your choice is saved but will not produce entries until an administrator finishes enabling backups on that node. Open a ticket if it persists. The five backup frequency presets. The interval runs from the last backup, not from a fixed hour. 3. Know what is in a backup, and what is not A backup captures your mission folder under mpmissions — persistence and mission config — split into three independently restorable categories: Players DB — player characters and inventory: players.db plus players.db-wal and players.db-shm.World Data — built structures, vehicles and other persisted world state. Everything else in the storage_* folder.XMLs & JSONs & other(s) — mission-level config: types.xml, events, spawn configs and the rest of the mission folder outside storage_*. mpmissions/ dayzOffline.chernarusplus/ one "world" in the restore tree db/ XMLs & JSONs & other(s) cfgeconomycore.xml XMLs & JSONs & other(s) cfgspawnabletypes.xml XMLs & JSONs & other(s) storage_1/ players.db Players DB players.db-wal Players DB players.db-shm Players DB data/ World Data Every mission folder under mpmissions is captured separately, so if you have switched maps you will see more than one world in the restore tree. Careful: Not in a backup: your mods, your logs under profiles, and serverDZ.cfg. The config is safe anyway because the panel writes it from the typed Instance Settings editor, but a mod that keeps its state under profiles is outside the backup’s scope — copy that folder down yourself over SFTP. 4. Read the backup history Backup history lists entries newest first. On a new instance it reads No backups yet. They'll appear here once the schedule runs.; the first arrives after one interval has elapsed. Each row shows a status pill, the creation time in your local timezone, the compressed size, and whether it was Scheduled or Manual. Everything the schedule produces is Scheduled; Manual only appears on an entry created from our side, for instance while a support ticket is being worked. StatusMeaningAvailableFinished and restorable. The only status Restore accepts.CreatingSnapshotting and zipping now. Becomes Available on its own.RestoringA restore from this entry is running. The backup file is not modified, so the row returns to Available either way.DeletingRemoval is queued, either because you asked or because retention aged it out.FailedCould not be created. The reason is appended after the size. Restore opens the restore panel — greyed out unless the entry is Available and the server is stopped, and hovering it names the blocking condition. Delete removes the backup file from the node. Entries are deleted automatically 30 days after creation, so Every 6 hours carries roughly 120 restore points and Weekly roughly four. Data loss risk: Delete is permanent, and the confirmation says so: This cannot be undone. There is no recycle bin and we cannot bring a deleted backup back. Use it to clear Failed entries, not to tidy up. Backup history rows: status pill, local timestamp, size, trigger label and the per-entry Restore and Delete buttons. 5. Stop the server before you restore While the instance is up, Backup history shows a banner reading The server is running. Stop it before restoring a backup. and every Restore button is disabled with the tooltip Stop the server first. That is not a formality. A running DayZ server holds players.db open and flushes persistence as it goes and again on shutdown, so restoring underneath it either fails on a locked file or gets overwritten the moment the server next saves — burning the outage without fixing anything. The panel and the node both refuse outright. Click Stop on Overview. If players are online, use Controlled Restart first so they are warned and can log out somewhere safe — restarting without rollbacks explains what an abrupt kill costs them. Back on Backups, the banner clears a few seconds after the instance reports Stopped. Careful: Plan the outage. The server stays down until you start it again, and a large World Data category on a long-lived server takes a while to unpack. While the instance is running the Restore buttons stay disabled — restoring live persistence would be refused or overwritten. 6. Restore only the parts you need Click Restore on the entry you want. A panel headed Restore backup opens, subtitled with that backup’s timestamp, and states plainly: Choose which parts to restore. Existing files will be overwritten. Below is a checkbox tree, one group per world. The group header is the mission folder name — dayzOffline.chernarusplus — with (Persistence) beside it, and ticking it toggles all of its categories. Each category shows its size and file count, so you can see that Players DB is a few megabytes while World Data may be hundreds. Data loss risk: Everything starts ticked. Untick what you want to keep, because whatever stays ticked is overwritten from the backup and the live copy is gone. Leaving Players DB ticked when you only meant to fix a base rolls every character back to that timestamp — inventory, position, health, all of it. That separation is the whole point: A group blew up someone’s base overnight. Tick World Data only: structures and vehicles go back to last night, and everyone keeps the character and gear they have now.A bad types.xml edit broke your economy. Tick XMLs & JSONs & other(s) only: loot config reverts, no base or character is touched. Editing types.xml and the loot economy covers avoiding the next one. The confirm button counts your ticks — Restore 1 part for one category, Restore 3 parts for three — and stays disabled until a box is checked. Cancel changes nothing. Note: A restore overwrites the files that are in the backup and leaves anything else alone; it is not a wipe-and-replace of the directory. A genuinely clean slate is a wipe, which is not a panel operation — open a ticket. The restore panel: tick one world’s World Data alone to undo griefing without rolling back player characters. 7. Watch it finish, then start the server Confirming queues the work on the node. The pill switches to Restoring and a progress strip appears under that row, polled every second or two until it settles on Done or Failed; Dismiss clears it. The backup file is never modified, so the row returns to Available either way — and if it failed, the reason is appended after the size. Read that before retrying. Now click Start on Overview and verify before announcing you are back: Server Status reads Running, Server FPS reports a number, and the thing you restored looks right in game. If you restored Players DB, tell players first — a silent character rollback reads as a bug. 8. Keep your own copy for anything older than 30 days This tab is 30 days of node-side history, not an archive, and its entries are only ever restored in place. Two situations need more: A copy off the node. Pull mpmissions/<world>/storage_* down over SFTP. That is the whole persistence set, and it is yours to keep — see making and downloading a manual backup over SFTP.Something risky right now — an economy rewrite, a mod that touches persistence, a map change. Do not wait for the schedule: stop the server, copy the mission folder down, then make the change. Connecting with SFTP covers credentials and clients. Note: SFTP is the route for anything large either way: the web File Browser caps uploads at 300 MB against SFTP’s 2.5 GB, and a mature storage_1 folder can be well past the smaller limit. A restore here only reads backups this panel created, so an archive from another host goes in over SFTP too — see migrating a DayZ server to a new host. Troubleshooting The Restore button is greyed out and I cannot click it Why it happens. Only two things disable it: the entry is not Available, or the instance is running. Restoring into live persistence would be blocked by open file handles or silently overwritten. How to fix it. Hover the button — the tooltip names the reason, either Stop the server first or Backup not available. Stop the instance on Overview and wait for the banner to clear, or pick an entry whose pill reads Available. My backup history is empty and no backups are being created Why it happens. In order of likelihood: the schedule is Off; the first interval has not elapsed on a new instance; or the node has not finished having backups enabled, which the panel says with a banner reading Backups are not fully configured on this node yet. How to fix it. Check the dropdown is not Off and Save if you change it. On a new instance give it one full interval — Daily means waiting a day for the first entry, so choose Every 6 hours if you want one sooner. If the node banner is showing, open a ticket; your schedule is already saved. A backup entry says Failed and it is still sitting in the list Why it happens. The node could not complete the snapshot or the zip, and the reason is appended after the size. Retention only prunes entries that reached Available, so a Failed row is never aged out. How to fix it. Read the note, then Delete the row to keep the list readable. The schedule carries on and tries again at the normal interval, so one failure needs no action. If several in a row fail, open a ticket with the note text. I restored a backup but players say their bases and stashes are still gone Why it happens. Almost always an unticked category. Bases, vehicles, tents and buried stashes are World Data, not Players DB — restoring only the players database brings characters back without touching a structure. How to fix it. Stop the server again, open Restore on the same entry and tick World Data this time. Take both categories from one backup rather than mixing timestamps, or you end up with characters from one moment and a world from another. The Backups tab is missing from my instance tab bar Why it happens. The tab bar is permission-gated per instance, and without Manage backups the tab is not rendered at all — which is why it looks absent rather than locked. How to fix it. If you own the instance, check you are signed in to the right account. Otherwise ask the owner to add Manage backups to your grant under Members. Frequently asked questions Can I take a backup right now, on demand? Not from the Backups tab — the schedule is the only trigger and there is no create-now button. For a snapshot at a specific moment, such as just before a risky edit, stop the server and copy mpmissions/<world>/storage_* down over SFTP instead; making a manual backup over SFTP covers it. Can I download a backup from the panel? No. Automatic backups live on the node and are only ever restored in place, so there is no download button. For a copy on your own disk, take it yourself over SFTP — which also removes the 30-day limit, since a file you have downloaded is yours indefinitely. Does my server have to be offline for a backup to be taken? No. The node takes a Volume Shadow Copy snapshot before it reads anything, so players.db is captured consistently while DayZ holds it open and players are online. Scheduled backups need no downtime; restoring is the operation that requires the server stopped. How long are backups kept, and can I keep them longer? Thirty days from the moment each backup was created, after which it is deleted automatically. The window is set per node and is not adjustable per instance, so anything you need beyond a month has to be downloaded over SFTP and stored yourself. Does the Daily option run at a fixed time of day? No — the interval runs from the last backup attempt rather than against the clock, so Daily means roughly every 24 hours and drifts a little forward each day. There is no field to pin it to a particular hour, and the Scheduler tab offers no backup task either; it handles restarts, start/stop and RCON messages only. Will restoring roll back player characters as well as bases? Only if you tick Players DB in the restore panel. Every category starts ticked, so untick it deliberately when you want to fix the world and leave characters where they are — that separation is the main reason to use category-level restore rather than putting a whole backup back. Related guides Getting started with the control panelMaking a manual backup over SFTPRestarting without rollbacks
 -
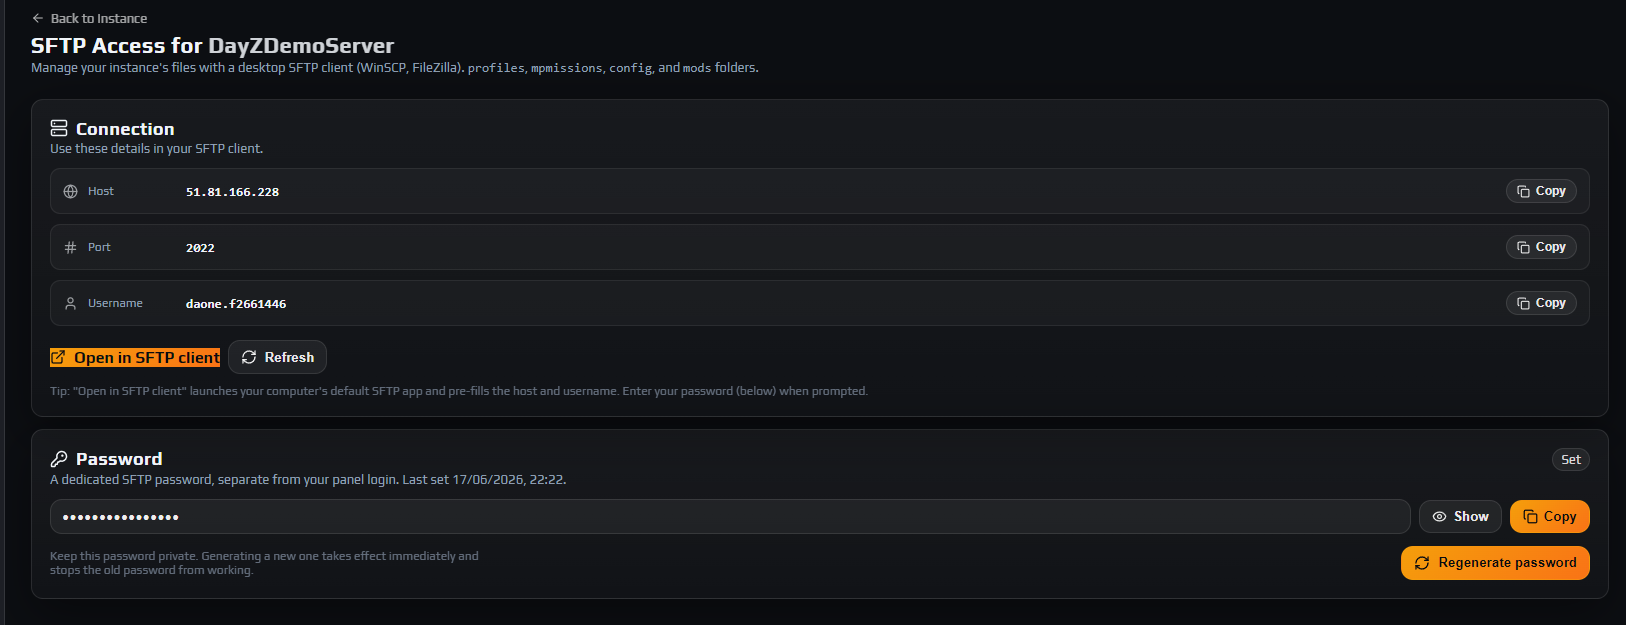 Everything you need to connect to your DayZ server over SFTP sits on one page: open your instance, click the SFTP tab, and the Connection card gives you the Host, the Port (2022) and your Username, each with a Copy button. The Password card below holds a dedicated SFTP password, separate from your panel login. This guide sets up WinSCP and FileZilla step by step, explains the unusual username format, and covers the two mistakes that cost real time: editing files while the server runs, and regenerating the password without updating saved sessions. On this page Open the SFTP tab and read the Connection cardGenerate or copy your SFTP passwordConnect with WinSCPConnect with FileZillaFind your way around the four foldersUpload and download without breaking anythingGive staff SFTP access without sharing your passwordTroubleshootingFrequently asked questions Before you start A provisioned instance and a panel account with the Allow SFTP access permission on it. Instance owners have it automatically.An SFTP client. This guide uses WinSCP and FileZilla, both free on Windows.Outbound TCP on port 2022 allowed by your own network — some corporate and school networks permit only 80 and 443. The SFTP tab holds every value your client needs — host, port 2022, username and a dedicated SFTP password. 1. Open the SFTP tab and read the Connection card Go to Instances → your instance → SFTP. The header reads SFTP Access followed by your instance name, and the Connection card lists three values, each with its own Copy button: Host — the machine your instance runs on. Depending on the node this is either a hostname or the same IP you connect to in game.Port — 2022, not the usual 22. Leave your client on the default and it will fail to connect.Username — your panel username, a dot, and eight hexadecimal characters, for example yourname.4f2a91c0. That trailing block is the first eight characters of the instance’s internal id, and it is how the SFTP server knows which instance you want. One account with three servers therefore has three different SFTP usernames. Copy it verbatim — a login built from your panel username alone is rejected. Note: Open in SFTP client hands the host, port and username to your computer’s default SFTP application, so you only type the password. If nothing happens when you click it, set the client up manually as below. 2. Generate or copy your SFTP password Scroll to the Password card. Its badge reads Set or Not set, and the subtitle gives the date it was last set. The first time you open this tab with no password on file, the panel generates one immediately and confirms with SFTP password generated. — so usually there is nothing to do but reveal it. Use Show to unmask the value and Copy to take it, then store it in your password manager. For a fresh one, click Regenerate password. Careful: This password belongs to your panel account, not to one instance. Regenerating takes effect immediately and stops the old password working on every instance at once, so saved sessions in WinSCP or FileZilla and any script that pulls backups fail until you update them. Two other states exist. Not set with an empty field means none exists yet — click Generate password. The message This password was set before it could be shown here. Generate a new one to view and copy it. means yours predates the panel storing a displayable copy: it still works if you know it, but cannot be shown. Note: This is not your admin or RCON password. The SFTP tab is the only place it lives. The SFTP password is per panel account — regenerating it invalidates the old one everywhere at once. 3. Connect with WinSCP WinSCP opens its Login dialog on launch; if it does not, use Session then New Session. Fill in four fields: FieldValueFile protocolSFTPHost namethe Host from the Connection cardPort number2022User namethe full Username, dot and eight characters includedPasswordyour SFTP password Click Save if you want the session kept, then Login. The first connection asks you to accept the server’s host key fingerprint — normal, and once per machine. You then land in a directory holding your four folders. Note: If WinSCP fails without ever prompting for a password, an SSH agent is offering keys and burning the five attempts the server allows. Under Advanced → Authentication, clear the public-key and agent options. WinSCP configured for a DayZ server: protocol SFTP, port 2022 and the per-instance username. 4. Connect with FileZilla FileZilla’s Quickconnect bar defaults to plain FTP, which will not work here, so use the Site Manager: Open File → Site Manager and click New site. Name it after your instance.Set Protocol to SFTP - SSH File Transfer Protocol.Paste the panel’s Host into Host, and 2022 into Port.Set Logon Type to Normal, then paste the full Username into User and your SFTP password into Password.Click Connect and accept the host key when prompted. To avoid storing the password, choose Ask for password as the logon type instead. 5. Find your way around the four folders SFTP shows the same four shares as the panel’s File Browser, and nothing else: profiles — server logs (.ADM, .RPT, script_*.log) and profile data: full log history, rather than the live tail.mpmissions — the mission folder, holding both your economy XMLs and your persistence.config — serverDZ.cfg, the BattlEye keys directory, and the whitelist.txt, ban.txt and priority.txt lists.mods — installed Workshop mods. Persistence lives at mpmissions/<world>/storage_*/. players.db (with its -wal and -shm companions) holds every character and inventory; the rest of the folder holds built structures, vehicles and other world state. Pull these down before anything risky — see taking a manual backup over SFTP. Loot and economy editing happens one level up, in mpmissions/<world>/: types.xml, events.xml, cfgspawnabletypes.xml. There is no GUI for these, so SFTP plus a text editor is the workflow — editing types.xml and the loot economy covers them. Note: The DayZ server executable and the BattlEye working directory are deliberately not exposed — your session root holds only the four shares. Every SFTP session lands in a root holding just four folders: profiles, mpmissions, config and mods. 6. Upload and download without breaking anything SFTP exists mainly to lift the size ceiling: the web File Browser accepts uploads up to 300 MB, SFTP up to 2.5 GB. Data loss risk: Never write to storage_* while the instance is Running. DayZ holds players.db open and rewrites the storage folder on shutdown, so an upload under a live server is either ignored or flushed away, and a partial write to an open database can corrupt every character. Stop the instance, wait for Stopped, then upload. The same logic applies more gently to configuration: serverDZ.cfg and the economy XMLs are read once at boot, so a mid-session edit does nothing until the next start. Careful: Executable and script types are rejected outright: .exe, .dll, .bat, .cmd, .ps1, .sh, .msi, .scr and .com. If a mod ships a helper program, open a ticket rather than renaming the file to get it past the filter. Two structural limits round it off. Renaming is blocked in config and mods, which hold template-managed files, so upload under the final name instead. And serverDZ.cfg, the keys directory, whitelist.txt, ban.txt, priority.txt and the top-level mod folders cannot be deleted at all — overwrite those. 7. Give staff SFTP access without sharing your password Because the password is tied to a panel account, handing yours to a helper gives them your whole account. Add them under Members instead and let them generate their own. Two layers apply. Allow SFTP access decides whether they can log in; the Files permissions decide what they can do once in. Read files is the floor — SFTP access without it is refused at login — while Write files adds upload, overwrite and folder creation, and Delete files adds deletion. The rights match the File Browser exactly, so SFTP is not a back door. A member without access sees You don't have SFTP access to this instance. Ask the instance owner to grant it from the Members page. Successful logins are recorded in the Audit Log under the SFTP category with the account and the file rights it was granted; client IP addresses are deliberately kept out. Note: API keys cannot read the SFTP details or set the password — both endpoints reject key authentication. These credentials are for humans signed in to the panel. Troubleshooting My SFTP client says authentication failed or invalid credentials Why it happens. One of three things: the username was typed without the dot and eight characters, the panel login password was used instead of the SFTP password, or the account lacks Allow SFTP access or Read files. The server returns the same generic failure for all three. How to fix it. Use Copy on the Username row and the Password card rather than retyping. If both are right, check those permissions in Members. The server allows five authentication attempts per connection, so a client offering SSH keys first can exhaust them first. SFTP worked yesterday and now the password is rejected on every server Why it happens. Someone clicked Regenerate password. The SFTP password belongs to the panel account, not one instance, so regenerating invalidates it everywhere at once — every saved session, plus any backup script using it. How to fix it. Open any instance’s SFTP tab, Show and Copy the current password, and paste it into each saved site. If nobody knows the current value, regenerate once more and update everything from that one value. The panel says my password was set before it could be shown here Why it happens. The password predates the panel keeping a displayable copy, so only the stored hash exists. It still works — the panel just cannot tell you what it is. How to fix it. Click Regenerate password, then Show and Copy the new value and update your clients. The old one cannot be recovered. Uploads fail with permission denied, or the file never appears Why it happens. Three limits look alike: the account lacks Write files, the file exceeds the 2.5 GB SFTP ceiling, or its extension is blocked (.exe, .dll, .bat, .cmd, .ps1, .sh, .msi, .scr, .com). A failed rename in config or mods is separate: those hold template-managed files. How to fix it. Check the extension first, then Write files in Members. For a rename, upload under the final name. Split any archive over 2.5 GB and reassemble it on the server. I edited types.xml or serverDZ.cfg over SFTP but the server has not changed Why it happens. The engine reads those files once, at boot, and a running server keeps the values it loaded for as long as it is up. How to fix it. Restart the instance — use Controlled Restart if players are on. For persistence the rule is stricter: stop the server before touching storage_*, because a running server rewrites that folder on shutdown and discards your upload. Frequently asked questions Is my SFTP password the same as my panel password? No. It is a separate credential, generated and shown only on the SFTP tab, and changing one has no effect on the other. Accounts that sign in through the community site with no local panel password get one the same way, so single sign-on never locks you out of file access. Why does my SFTP username have a dot and eight characters after it? Those eight hexadecimal characters identify the instance. The SFTP server has no other way to know which of your servers you want, so it reads the instance out of the username at login — hence a different SFTP username per instance, and the need to copy it exactly. Can I connect with plain FTP or FTPS? No. Only SFTP is offered, on port 2022, and the account is restricted to that protocol at the server, so FTP and FTPS fail even against the right host. This matters in FileZilla, whose Quickconnect bar assumes FTP: use Site Manager and select SFTP - SSH File Transfer Protocol. Can I use an SSH key instead of a password? No — authentication is by password only, and there is nowhere in the panel to register a public key. If your client tries keys first, turn that off in its site settings so it does not waste the five attempts the server permits per connection. Why can I only see four folders, and not the DayZ server files? Your session is confined to profiles, mpmissions, config and mods — the same shares the File Browser exposes. The game binaries and the BattlEye working directory sit outside that boundary, which is why the session root looks nearly empty. How large a file can I upload, and when should I use SFTP over the File Browser? SFTP takes single files up to 2.5 GB, against 300 MB in the web File Browser. Use the File Browser for quick XML tweaks and log reading, and SFTP for anything bulky — custom maps, large mod payloads, whole-folder uploads, and pulling your persistence down to your own disk. Related guides Getting started with the control panelMaking a manual backup over SFTPEditing types.xml safely
 -
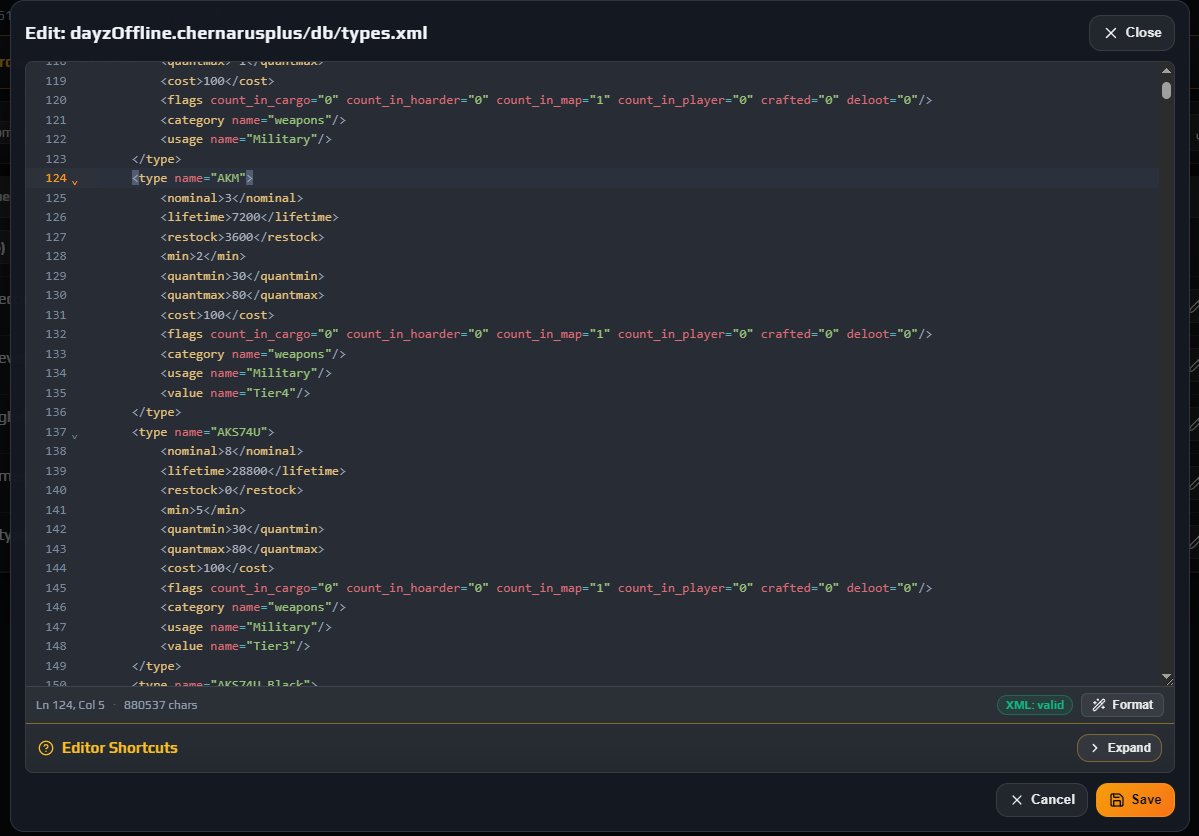 Everything that decides what spawns on your DayZ server lives in the mission’s XML files, and you edit them from the File Browser tab: set the Share dropdown to mpmissions, open your mission folder, then db, and click View/Edit on types.xml. The editor checks your XML as you type and refuses to save a file with a syntax error, which is the main thing standing between a small loot tweak and a server that boots with no loot at all. This guide takes the safe route: keep a copy, understand what each attribute actually does, save clean, then restart to apply. Budget twenty minutes for your first edit. On this page Keep a copy before you change anythingOpen the File Browser on the mpmissions shareFind the right mission folder, then open dbOpen types.xml in the editorRead the entry before you change itLet the validator clear you before you saveRestart to apply, then confirm the economy loadedKnow when to stop using the browser and use SFTPTroubleshootingFrequently asked questions Before you start An instance you can restart. The central economy is read once when the mission loads, so nothing you save takes effect until then.Read files and Write files permission on the instance. Owners have both; sub-users need them granted under Members.Somewhere to keep a copy of the file before you change it — your own disk is fine.A rough idea of which item you are changing. Class names in types.xml are exact and case-sensitive. 1. Keep a copy before you change anything The editor writes straight over the file. There is no version history, no diff, and the moment you click Save the modal closes and the editor’s Ctrl + Z history goes with it. Data loss risk: Once you save, the previous types.xml is gone. If your edit turns out to be wrong, the only ways back are a copy you kept yourself or a backup restore, and a restore needs the server stopped. Pick whichever of these fits the size of the job: One file. Click Download on the types.xml row before you open it. That gives you the exact bytes you started from, and you can paste them back into the editor if you need to.The whole mission. Pull mpmissions down over SFTP — see taking your own backup over SFTP. This is what you want if you are about to work through several economy files.Rely on the automatic backups. Mission XML is captured in the XMLs & JSONs & other(s) category and kept for 30 days. It works, but a restore rolls the whole category back and the server has to be stopped for it — see automatic backups and restore. A downloaded copy costs you one click. Take it. 2. Open the File Browser on the mpmissions share Go to Instances → your server → File Browser. The page opens on the profiles share, which is not where you want to be. Use the Share dropdown at the top right and choose mpmissions. The badge under it changes to Share: mpmissions and the breadcrumb resets to (root). Switching shares always returns you to that share’s root, so you never end up looking at a path that belongs to a different share. Four shares are exposed, and each one holds something different: ShareWhat lives thereprofilesServer logs and the profile directory — .RPT, .ADM, crash and script logs.mpmissionsYour mission folders. Economy XML, spawn configs and persistence all live under here.configserverDZ.cfg, the BattlEye keys folder, whitelist.txt, ban.txt and priority.txt.modsThe installed Workshop mod folders. You can edit files inside a mod, but the folders themselves are owned by Workshop Mods. Note: Some entries are protected: the panel will not delete or rename serverDZ.cfg, the keys folder, whitelist.txt, ban.txt, priority.txt or a top-level mod folder. You get This file and or directory cannot be deleted or renamed instead. Editing their contents is still allowed — it is only the file itself that is pinned in place. Worth expanding once: the File Browser Help & Tips card at the top of the page lists every action the browser supports, including drag-to-move and folder uploads. The Share dropdown switches between profiles, mpmissions, config and mods — mission XML lives in mpmissions. 3. Find the right mission folder, then open db The mpmissions root holds one folder per mission, and a stock instance usually ships with more than one. Only the folder named on the Overview tab’s Mission pill is actually loaded — typically dayzOffline.chernarusplus. Careful: Editing the economy inside a mission your server is not loading produces no error and no effect. It is the most common wasted hour in DayZ server admin. Check the Mission pill on Overview first, then open that exact folder. Click into the mission folder. What you are looking at: PathWhat it controlsdb/types.xmlEvery item’s spawn rules: how many, how long they last, where they are allowed.db/events.xmlDynamic events — vehicles, helicopter crashes, animals, infected hordes.db/globals.xmlEconomy-wide variables such as cleanup and idle timers.db/economy.xmlWhich economy subsystems the mission initialises and persists.db/messages.xmlScheduled in-game broadcasts and the shutdown countdown.cfgeconomycore.xmlSits at the mission root. Registers extra economy files, which is how most mods add their own types.storage_1/Persistence. Your players and their bases. Never hand-edit anything in here. Data loss risk: storage_* folders are live save data, including players.db. Opening one in a text editor and saving it will corrupt characters. If you need to roll persistence back, use a backup restore, not the editor. Open db. The economy files are all there, all small, and all editable in the panel. Inside the mission folder: db holds the economy XML, storage_1 holds live persistence. 4. Open types.xml in the editor Find the types.xml row and click View/Edit. A modal opens, titled Edit: followed by the file’s path inside the share, with a real code editor in it: line numbers, code folding, syntax colouring and a lint gutter down the left. Two things about the editor that save time: types.xml is long — several thousand lines on a vanilla mission. Do not scroll. Press Ctrl + F, type the class name, and press Enter to jump straight to it.The Editor Shortcuts card sits under the editor, collapsed. Click Expand once and you have the full keymap: Ctrl + H for find and replace, Ctrl + Alt + G to jump to a line number, Alt + Up and Alt + Down to move a line, Ctrl + Z to undo. The status bar under the editor shows Ln 1, Col 1 and a character count, then the validation pill on the right. When the file parses, the pill reads XML: valid in green. A JSON file such as cfggameplay.json gets exactly the same treatment and reads JSON: valid. Note: Only text formats the panel recognises can be saved: .cfg, .txt, .xml, .json, .rpt and .log. Anything else has to be replaced by uploading a new copy. Files of about 50 MB and up will not open in the editor at all — that limit exists to keep a giant .RPT from being pulled through your browser. types.xml open in the File Browser editor, parsing cleanly — the green XML: valid pill is your go-ahead to save. 5. Read the entry before you change it Each item is one <type> block. Here is a rifle entry, and every number in it is doing a specific job: <type name="AKM"> <nominal>15</nominal> <lifetime>7200</lifetime> <restock>0</restock> <min>10</min> <quantmin>-1</quantmin> <quantmax>-1</quantmax> <cost>100</cost> <flags count_in_cargo="0" count_in_hoarder="0" count_in_map="1" count_in_player="0" crafted="0" deloot="0"/> <category name="weapons"/> <usage name="Military"/> </type> AttributeWhat it doesnominalHow many the economy tries to keep in the world at once. A target, not a promise — it is also capped by how many eligible spawn points exist.minThe floor. When the counted number falls to this, the economy starts producing more, aiming back at nominal. Keep it at or below nominal.lifetimeSeconds an untouched item survives before it is cleaned up. 7200 is two hours. The clock resets when a player handles it.restockSeconds the economy waits before topping this type back up. 0 means as soon as it can.quantmin / quantmaxFor items that hold a quantity — magazines, drinks, food, fuel — the percentage range they spawn filled to. -1 means the item has no quantity.costRelative priority when several eligible types compete for one slot. Almost every vanilla entry uses 100; lower it to make a type rarer without touching nominal.categoryThe loot class — weapons, clothes, food, tools, containers, explosives, vehiclesparts.usageWhich areas may spawn it: Military, Police, Town, Village, Farm, Industrial, Hunting, Medical and so on. Repeat the line to allow several. The flags block is the part people miss. Each count_in_* flag decides whether copies in that place count towards nominal. In the entry above only count_in_map is set, so the economy counts AKMs lying in the world — and ignores every AKM in a player’s hands, backpack, tent or stash. That is why a heavily looted server keeps producing rifles: the hoarded ones are invisible to the count. count_in_cargo — count copies inside containers and bags on the ground.count_in_hoarder — count copies stashed in tents, barrels and other hoarder storage.count_in_map — count copies lying loose in the world. Set on virtually everything.count_in_player — count copies in players’ inventories.crafted — the item only exists through crafting, so the economy never spawns it.deloot — the item comes from dynamic events only, not from ordinary loot points. Turning count_in_hoarder and count_in_player on for high-value gear is the standard way to stop a server drowning in hoarded rifles. It is also the change most likely to surprise you, so make it on one or two types first and watch what happens over a couple of days. Careful: Never change the name attribute to something the game does not know. Class names are exact and case-sensitive, and a modded class only resolves while that mod is installed. An unknown class is logged and skipped, so the item you were expecting simply never appears. 6. Let the validator clear you before you save As you type, the editor parses the file. Two things react: The lint gutter on the left marks the line the parser choked on, and the offending text is underlined in the body.The status pill flips from XML: valid to XML: 1 error, and a red bar appears above the buttons naming the problem, for example Cannot save: this XML file has a syntax error followed by the parser’s own message. XML parsers stop at the first fault they hit, so fix that one and the next hidden one appears. While the pill is red, Save is disabled. That is deliberate. Format at the bottom right re-indents the whole file at two spaces per level, which makes an unbalanced block obvious at a glance. It only works on a file that already parses, so treat it as a tidy-up rather than a repair tool — on a broken file it just tells you it cannot format. When the file is broken, a Save anyway (ignore format errors) checkbox appears next to the buttons and ticking it re-enables Save. Data loss risk: Do not tick Save anyway to get out of a syntax error. The only check it bypasses is the panel’s. DayZ’s own parser is stricter, and a malformed types.xml means the central economy fails to load — the server boots, players connect, and nothing spawns anywhere on the map. You will not find out until the next restart, by which time you have forgotten what you changed. The one defensible use is deliberately parking a half-finished edit that you will fix before the server next starts. Once the pill is green, click Save. A Saved. toast confirms it and the modal closes. Note: A green pill means the file is well-formed XML. It does not mean DayZ will accept it — the panel has no way to know that Milatary is not a real usage value. Well-formed but wrong is still wrong, which is why the next step is not optional. A syntax error blocks Save outright — the lint gutter points at the line and the status pill turns red. 7. Restart to apply, then confirm the economy loaded The central economy is read once, while the mission loads. Saving types.xml on a running server changes nothing that players can see, and a running server will happily keep going for days on the old numbers. Back on Overview: Nobody online? Restart is fine.Players on? Use Controlled Restart and pick 5, 10 or 15 minutes so they are warned and can log out somewhere safe. See restarting without rollbacks. When the status pill returns to Running, open the Live Logs card, set Stream to rpt and read the first part of the boot. Economy complaints are logged there, and an unknown class name or a bad usage value shows up as a named error you can search for. A clean boot ends with the mission loaded and no economy errors. Then check it in game. If you raised nominal, give the economy a few minutes — it feeds items in gradually rather than dumping them the instant the server starts. Careful: If loot is missing everywhere rather than just for the type you touched, the economy did not load. Go straight back to the file: something is well-formed but invalid. Reverting to your saved copy and restarting again is faster than hunting it live. 8. Know when to stop using the browser and use SFTP The web File Browser is the right tool for one file at a time. Past that it starts to fight you. JobUseTweaking a handful of <type> entriesView/Edit in the browser. Fastest route, validator included.Replacing a whole db folder or a full loot overhaulSFTP. Edit locally in your own editor, keep it in version control, push the folder up.Anything over 300 MBSFTP. The web upload cap is 300 MB per file; SFTP takes up to 2.5 GB.Pulling logs or persistence down to inspectSFTP. The browser refuses to read a file of about 50 MB or more, and .RPT files get large fast. Careful: Uploads through the browser never overwrite. If types.xml already exists and you upload another one, that row comes back Failed in the upload summary. Rename or delete the existing file first, or just edit it in place. An SFTP client, by contrast, will overwrite without asking. SFTP runs on port 2022 with a username derived from your panel account and a separate SFTP password, and it exposes the same four shares. Full setup is in connecting to your server with SFTP. Note: Upload folder in the browser does recreate a folder’s structure for you, which is handy for adding a new subfolder of custom XML. It still will not overwrite files that already exist. Troubleshooting The Save button is greyed out and the editor says the XML has a syntax error Why it happens. The editor parses the file on every keystroke and blocks Save while it will not parse. Almost always it is a missing >, a closing tag that does not match its opener, an unescaped & in a name, or a <type> block that lost its </type>. How to fix it. Look at the lint gutter for the marked line and read the message in the red bar — it is your browser’s own XML parser talking, and it usually names the line and column. Fix that one fault; the parser stops at the first, so another may appear behind it. Once the pill reads XML: valid, Save re-enables. Do not tick Save anyway (ignore format errors) to escape this. After editing types.xml there is no loot anywhere on the server Why it happens. The central economy failed to load, so nothing spawns at all — not just the type you edited. The file is well-formed enough for the panel to accept but invalid to DayZ: a misspelled usage or category value, min above nominal, or a duplicated <type> name. How to fix it. Open Live Logs, set Stream to rpt and read the start of the boot — the economy names what it rejected. Fastest recovery is to paste your downloaded copy back into the editor, save, and restart. Then reapply the change one entry at a time. My types.xml changes had no effect after a restart Why it happens. Either the server has not actually reloaded the mission since you saved, or you edited a mission folder the server does not load. mpmissions usually contains several mission folders and only one is live. How to fix it. Check the Mission pill on Overview and confirm it matches the folder you opened. Then confirm the restart completed: the status pill should have gone through Stopped and back to Running, and the Audit Log records the action. My uploaded replacement file comes back as Failed in the upload summary Why it happens. The File Browser never overwrites on upload. A file of that name already exists in the target folder, so the operation is refused rather than silently replacing your live config. How to fix it. Rename the existing file — types.xml.old is fine, the mission only reads types.xml — or delete it, then upload. For routine changes, View/Edit in place avoids the problem entirely; for bulk work, use SFTP, which does overwrite. The panel says editing is not allowed for that extension, or that the file is too large to read Why it happens. Text editing is restricted to .cfg, .txt, .xml, .json, .rpt and .log, and files of roughly 50 MB and up are not pulled into the browser at all. Both limits exist to stop the panel trying to stream binary or enormous files through a web request. How to fix it. For an unsupported extension, edit the file on your own machine and put it back over SFTP. For an oversized log, use SFTP to download it, or clear it out with Purge logs on the profiles share if you only wanted it gone. Frequently asked questions Do types.xml changes need a server restart? Yes. DayZ reads the central economy once while the mission loads, so a saved change sits inert until the server restarts. Use Controlled Restart on Overview if players are online so they get warning broadcasts first. Does the panel check my types.xml against DayZ’s rules? No — it checks that the file is well-formed XML, nothing more. Tags have to balance and attributes have to be quoted, but the panel has no idea whether Milatary is a valid usage or whether AKMM is a real class name. That is why you restart and read the rpt stream in Live Logs afterwards. Will lowering nominal delete loot that is already on the map? No. Nothing is removed when you save. The economy simply stops replacing that type as existing copies are picked up or reach the end of their lifetime, so the count drifts down to the new target over hours rather than instantly. Where do I add types for a modded item? Usually not in types.xml at all. Most mods ship their own types file that you register in cfgeconomycore.xml at the mission root, which keeps your changes separate from the vanilla file and survives a mission reset. Check the mod’s Workshop page — and remember a modded class only resolves while the mod is installed, so add it through Workshop mods and load order first. Can I restore just types.xml from a backup? Not on its own. Restores are category-level: mission XML lives in XMLs & JSONs & other(s), so restoring brings that whole category back to the snapshot and the server must be stopped for it. This is exactly why downloading the single file before you edit it is worth the click. See automatic backups and restore. How big a file can I upload through the File Browser? 300 MB per file through the web browser, and 2.5 GB over SFTP. Economy XML is nowhere near either limit, but mod folders and log archives are, which is why anything bulky should go over SFTP. Related guides Getting started with the control panelconnecting with SFTPAutomatic backups and restore
 -
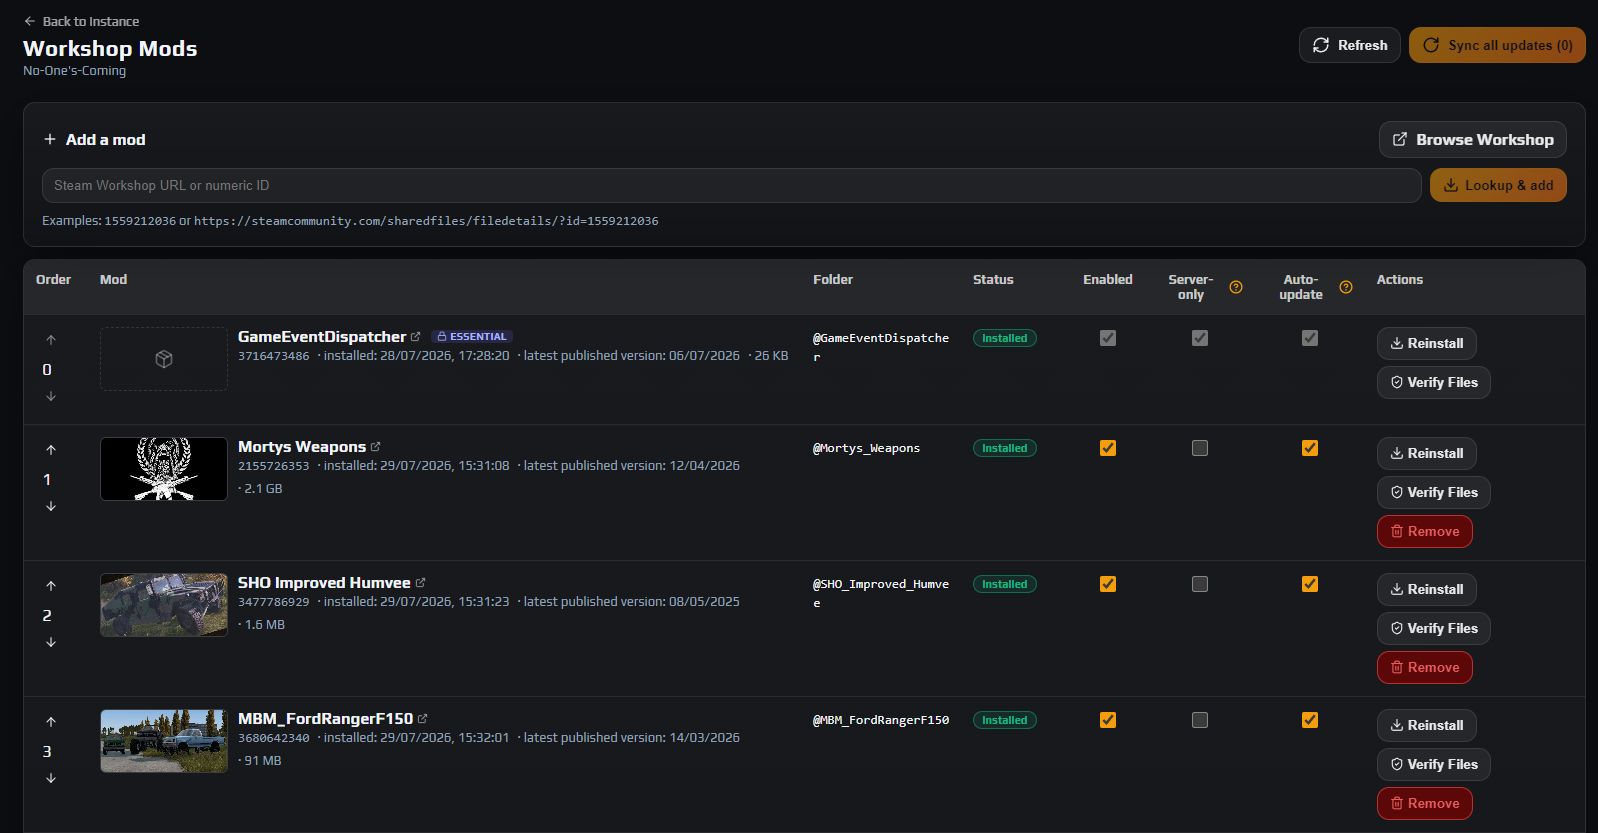 You install Steam Workshop mods on a DZSERVERS.HOST server from the Workshop Mods tab: paste the mod’s Workshop URL or numeric id, click Lookup & add, accept its required dependencies, then restart. The panel builds the -mod= and -servermod= launch arguments from that list on every start, in the order the rows appear — so the order in that table is what decides whether a modded server boots. This guide covers the tab end to end: dependencies, load order, server-only mods, auto-update, Verify Files and safe removal. New here? Start with getting started with the control panel. On this page Look the mod up on the Workshop Mods tabChoose how the mod loadsAccept the required dependenciesRead the mod table while it installsSet the load order, then save your row changesRestart, then publish your mod listKeep mods up to dateRemove a mod safelyTroubleshootingFrequently asked questions Before you start An instance you can manage mods on. The tab is permission-gated; without it the page tells you to ask the owner for the Manage Mods permission.The Workshop page or numeric id of each mod. Browse Workshop on the tab opens the DayZ Workshop in a new tab.A current backup if players are already on the server — mod changes can invalidate stored objects. See automatic backups and restore.Ideally a stopped server. You can add mods while it runs, but the install waits for the next restart and reinstall, update, verify and remove are all disabled. The Workshop Mods table is the source of truth for your DayZ server’s mod list and its load order. 1. Look the mod up on the Workshop Mods tab Go to Instances → your instance → Workshop Mods. The Add a mod card takes either identifier: the numeric id on its own, such as 1559212036, or the full address, https://steamcommunity.com/sharedfiles/filedetails/?id=1559212036. Paste one into the Steam Workshop URL or numeric ID box and click Lookup & add. The panel fetches the item’s title, size, last-updated date and declared dependencies from Steam and opens the Add Workshop Mod panel. Nothing has been added yet — this is a preview. Note: Every mod name in the table below links back to its own Workshop page, so you never have to hunt for an id twice. Paste a Steam Workshop URL or numeric ID, then use Lookup & add to fetch the mod’s metadata. 2. Choose how the mod loads The Add Workshop Mod panel shows the thumbnail, title, Last updated date and Size, and flags two things worth stopping for: a banned Workshop item, and a mod already in this server’s list. Then three decisions: Load as server-only mod (uses -ServerMod=) — passes the mod in -servermod= instead of -mod=, so players do not need it to join. Leave it off unless the mod’s description says it runs server-side only.Install immediately after adding — on by default. While the server is running the same checkbox reads Download now, install on next restart: the download starts against the node’s Workshop cache at once, and the mod is copied into your instance automatically at the next start.Auto-update this mod when new versions are published — the panel watches Steam and applies new versions unattended. If the server is up it broadcasts a short warning, stops, updates and starts again, recording each step in the Audit Log. Then click Add to server. Careful: Server-only is a property of the mod, not a preference. Ticking it on a mod that ships client content produces a server nobody can join correctly — if the Workshop page does not say server-side only, leave the box clear. The Add Workshop Mod panel: server-only, install timing and auto-update are all decided before the mod is added. 3. Accept the required dependencies If the mod declares required items, a Required dependencies card lists each with a pre-ticked checkbox. Anything already in your list is greyed out and marked (already added). Leave them ticked. Checked dependencies are added and installed before the main mod — the panel puts their rows ahead of the parent in load order and queues their downloads first, so the files DayZ needs exist before the mod that reads them is parsed. Getting this wrong is the most common reason a modded DayZ server will not boot, and it is handled for you. If the mod declares nothing, the panel says so. That is not a guarantee: plenty of authors document dependencies in prose and never declare them, so read the Workshop description before assuming a mod stands alone. Careful: Skipping a dependency you do not already have does not fail silently. It reappears on the tab as a Missing dependencies card naming the id and how many of your mods need it, with an Add it button. Clear that card before starting the server. 4. Read the mod table while it installs Rows with queued work grow a progress strip and refresh themselves when the command finishes; Refresh in the header is there if you want it sooner. The table has eight columns: ColumnWhat it meansOrderLoad order, lowest first, with up and down arrows. This is the sequence used to build -mod= and -servermod=.ModThumbnail, title and Workshop id, all linking to Steam, plus install date, published version, size and dependency count. Errors print here in red.FolderThe @ModName folder it installed into, derived from the mod’s own meta.cpp. A dash means nothing is on disk yet.StatusThe lifecycle pill — see below.EnabledWhether the mod is in the launch arguments at all. Untick to park it without deleting it.Server-onlyWhether it goes into -servermod= rather than -mod=.Auto-updateWhether the panel updates it unattended.ActionsInstall / Reinstall / Update, Verify Files and Remove. NotInstalled — in your list, nothing on disk. Queued then Installing — the agent is working on it.Installed — on disk and current. Update available — the author published a newer version.Installs on restart — added while the server ran; downloaded and waiting for the next start.Removing — a removal is in flight. Failed — the last install did not complete, with the reason under the mod name. Note: A mod with an empty Folder column is left out of the launch line even when Enabled is ticked — the panel will not name a folder that does not exist. Signature keys need no attention: each mod’s .bikey files are copied into the server’s key directory for you. 5. Set the load order, then save your row changes DayZ reads its mod list left to right and resolves each mod against what is already loaded. Anything a later mod builds on — a framework, a shared library, a base mod whose classes get extended — must appear earlier. The same rule settles conflicts: when two mods define the same thing, the one loaded later wins. So: frameworks and dependencies first, content mods next, override or tweak mods last. Use the arrows in the Order column to move a row. Reordering is written immediately, with no save step, and takes effect at the next start. Your list becomes launch arguments shaped like this: "-mod=@Dependency;@BigContentMod;@TweaksThatOverrideIt" "-servermod=@AdminToolsServerSide" The three checkbox columns behave differently. Enabled, Server-only and Auto-update are drafts: clicking one outlines the box and adds the row to a banner counting your unsaved rows. Nothing reaches the server until you click Save on that row. Reset discards one row, Discard all discards every pending change. Saved toggles apply at the next launch and can be saved even while the server is running. Note: Rows badged Essential with a padlock come from your service template. They cannot be reordered, toggled or removed — your server needs them. GameEventDispatcher, which feeds the Live Map and server FPS, is one of them. The arrows in the Order column set DayZ’s left-to-right mod load order; Essential rows are padlocked in place. 6. Restart, then publish your mod list Nothing on this tab is live until the server relaunches, because the list only becomes command-line arguments at start. Use Start on Overview, or Controlled Restart if players are on, and watch the Live Logs card on the rpt stream. A first boot with new mods is slower than usual. Then deal with the client side, because this is where the complaints come from: every mod not marked server-only must be installed on each player’s PC too, or they cannot join. Build a Steam Workshop collection with exactly your client-side mods and pin it in your Discord and server description.Share the List on DZSA Launcher link from Overview — launcher users are least likely to get this wrong.Announce every client-side mod you add or remove. Players joining with a stale mod set get bounced and will blame the server. Mod settings live in the mod’s own config files, usually under profiles — the Settings editor still governs vanilla options only. See every serverDZ.cfg setting explained. 7. Keep mods up to date The panel polls Steam for new versions. When it finds one, the pill turns to Update available, the Mod cell shows the newer publish date in amber, and the row’s button changes from Reinstall to Update. Sync all updates in the header queues every out-of-date enabled mod at once; the number in brackets is how many it will touch.Update on a row does that one only.Auto-update on a row means you do nothing: the panel warns players, stops, updates and starts the server itself, and logs each step in the Audit Log.Verify Files is the repair tool — it discards the cached copy, re-downloads from Steam and prunes files the item no longer ships, so disk matches the Workshop exactly. Use it when a mod is installed but misbehaving. Careful: All four rewrite files inside the server’s directory, so they are disabled while it is running and a banner on the tab says so. Stop the server first. If a mod update coincides with a DayZ update, do the game update first, then the mods. An Update available pill and the Sync all updates button, which queues every out-of-date mod in one go. 8. Remove a mod safely Stop the server, then click Remove on the row. The Remove mod dialog offers Also delete the mod files from this instance's directory, ticked by default; clearing it drops the row but leaves the files. If other mods declare this one as a dependency, the dialog becomes Other mods depend on this one, names them, and makes you choose Remove anyway deliberately. Data loss risk: Removing a mod that placed objects in the world cannot be undone from the panel. Bases, storage and vehicles belonging to that mod are gone from persistence the moment the server starts without it, and inventories holding its items can be damaged. Back up first and restore Players DB and World Data together if it goes wrong — see automatic backups and restore. The reverse holds too: adding a large content or map mod to a server that already has bases can change which stored objects are valid. Schedule that kind of change for a quiet hour with a fresh backup. The panel blocks a removal that would break another mod until you confirm it explicitly. Troubleshooting My server will not start after I added a mod Why it happens. Usually one of three things: the mod is still NotInstalled or Failed so its files are not on disk, a dependency was never added, or the load order puts a mod ahead of something it needs. How to fix it. Check Status and Folder first — a dash in Folder means that mod was excluded from the launch line. Clear any Missing dependencies card, then read the tail of Live Logs on the rpt stream: the first missing class or file named there tells you which mod loaded too early. Players cannot join my modded server Why it happens. Their client is not running the same client-side mods as the server, or a mod that needs to run on both was flagged Server-only so clients are never told about it. How to fix it. Publish your client-side list as a Workshop collection and share the List on DZSA Launcher link from Overview. Then review the Server-only column, untick anything whose Workshop page does not explicitly say server-side only, click Save on that row and restart. Reinstall, Update, Verify Files and Remove are greyed out Why it happens. The server is running and holds its mod files open, so they cannot be rewritten underneath it. A banner at the top of the tab explains this. How to fix it. Stop the instance from Overview, or use Controlled Restart to warn players first. Adding a new mod still works while it runs, and the three toggle columns can still be drafted and saved. A mod is stuck on "Installs on restart" Why it happens. It was added while the server was up. The download finished into the node’s Workshop cache, but copying into a live instance is not safe, so the install waits for a stop or restart. How to fix it. Restart the server — pending mods are installed immediately before it launches and the pill flips to Installed. If it is still pending after a full restart, run Install on the row with the server stopped and read the progress strip. The panel warns that Extra args already contains -mod= or -servermod= Why it happens. Launch arguments were set manually on your instance and duplicate what the Workshop manager already builds from this table, so DayZ is told to load the same mods twice and your load order stops being authoritative. How to fix it. Open a support ticket asking for the manual -mod= and -servermod= entries to be stripped from the instance’s extra launch arguments, and manage the whole list from Workshop Mods instead. Frequently asked questions Do my players need to install the same mods? Yes, for every mod not flagged Server-only — those are the ones DayZ passes in -mod=, and a client without them cannot join. Server-only mods travel in -servermod= and are never downloaded by players, which is why admin tools and server-side economy mods belong in that column. Do I have to add a mod’s dependencies myself? No. The Add Workshop Mod panel lists every dependency the mod declares, pre-ticked, and adds them ahead of the parent in load order so they install and load first. Anything you skip, or that an author never declared, appears afterwards as a Missing dependencies card with an Add it button. Why does load order matter for DayZ mods? DayZ processes -mod= left to right, so a mod can only build on classes already loaded, and when two mods define the same thing the later one wins. That makes the Order column functional rather than cosmetic: frameworks and dependencies at the top, content mods next, override mods last. Where do the mod files actually live? Each mod installs into its own @ModName folder inside the mods share, reachable from File Browser or over SFTP. Treat it as read-only: the installer mirrors the Workshop item and prunes files it no longer ships, so hand edits are removed on the next install, update or Verify Files. Will adding or removing a mod wipe my players or their bases? It does not wipe anything by itself, but it can destroy specific objects. Structures, containers and vehicles from a removed mod disappear from persistence the first time the server starts without it, and inventories holding its items can be damaged. Always back up before a mod change on a populated server. Does auto-update restart my server on its own? Yes, when the mod is flagged Auto-update and a newer Workshop version appears. If the server is running the panel broadcasts a short warning, stops it, installs the update and starts it again, logging every step in the Audit Log. Leave it off for mods you would rather test first. Related guides Getting started with the control panelevery serverDZ.cfg setting explainedAutomatic backups and restore
 -
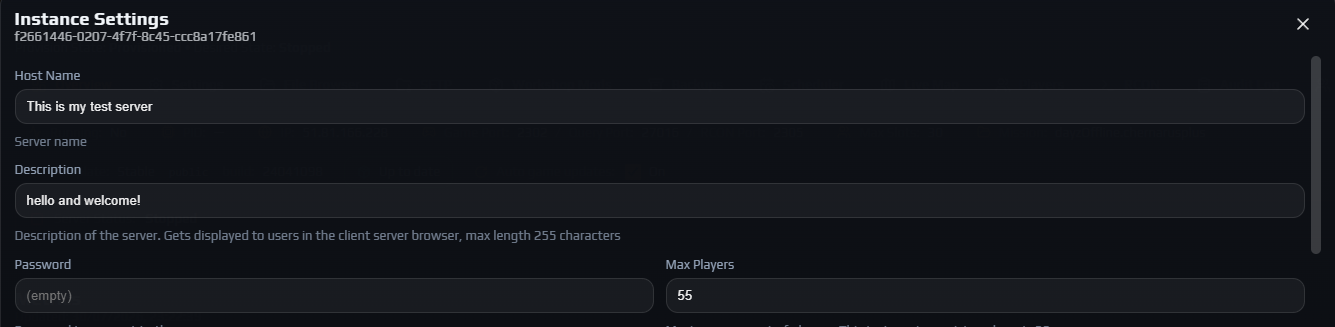 Every serverDZ.cfg value you are likely to want is already a typed field in the panel: open Instances → your server → Settings and the Instance Settings editor lists all thirty of them, each with its own help line underneath. This guide documents every field — the serverDZ.cfg key it writes, its accepted range and a recommended value — plus the two things people get wrong most often: how time acceleration maps to real day length, and what changing the map does to your persistence. The editor only saves while the instance is Stopped, so plan a stop or a Controlled Restart before you start editing. Nothing here takes effect until the server boots again. On this page Stop the instance and open the editorIdentity and access: name, description, password and slotsTime of day, and how long a day actually lastsGameplay restrictionsAdmin logging: what lands in the ADM logNetworking, view distance and object streamingEnable CfgGameplay File, and changing the mapSave, start and check your workTroubleshootingFrequently asked questions Before you start An instance you can stop. Save is disabled while the status pill reads Running.The Edit settings permission. Sub-users without it do not see the Settings button at all, and changing the map needs the separate Change mission permission — see staff permissions and API keys.Nothing else. You never need to open serverDZ.cfg by hand for any field listed below, although you can read it in File Browser under the config share if you want to check the panel’s work. 1. Stop the instance and open the editor On Overview, click Stop and wait for the status pill to read Stopped. With players online, warn them with a Controlled Restart first — see restarting without rollbacks — then stop it. Now click Settings in the tab bar. A dialog opens titled Instance Settings with your instance id beneath it. It contains, in order: A two-column grid of all thirty serverDZ.cfg fields, each with its help text under it.Edit Mission — the map selector, covered in step 7.Server & RCON Authentication — the admin and RCON password, covered in getting started with the control panel. Two behaviours are worth knowing before you touch anything. Grey placeholder text in a numeric or text box is DayZ’s own default, not a value you have set. And clearing a field removes that key from serverDZ.cfg entirely, which hands the setting back to the engine default rather than writing a zero. That is the correct way to undo a change you no longer want. Careful: Save sends only the fields you actually changed, so leaving the rest untouched is safe. A successful write shows Changes Saved!; if you changed nothing you get No changes required. While the instance is running you get a red Stop the instance to change settings. banner and a dead Save button. Note: Three things people look for here are deliberately elsewhere: whitelist enforcement is on Players → Whitelist, mods are on Workshop Mods, and BattlEye filter files are not exposed at all. The Instance Settings editor is a typed front end for serverDZ.cfg — every field writes one real config key. 2. Identity and access: name, description, password and slots These four are the only fields most servers ever change, and they are what a player sees before deciding whether to join. Treat Host Name as a search result rather than a title: the map name and your headline features earn far more clicks than decoration. FieldserverDZ.cfg keyLimitsWhat to setHost NamehostnameText, 96 charactersThe name in the server browser. Lead with the map and your two biggest selling points.DescriptiondescriptionText, 255 charactersOne line of extra detail shown in the client server browser. Optional.PasswordpasswordTextThe join password. Leave it empty for a public server — empty means the key is removed, not set to blank.Max PlayersmaxPlayers1–127, capped at your slot countYour purchased slot count, or lower if you want to run smaller for a while. Careful: Host Name lets you keep typing past 96 characters but the save is rejected with 'hostName' too long (max 96). Count it, or paste it somewhere that shows a character count first. Max Players is the one field with a hard ceiling above it. Its help line tells you yours — Maximum amount of players. This instance's provisioned cap is 60. with your own number. Anything from 1 up to that cap is allowed; above it the save fails. The agent also re-checks the value before every launch and clamps it back down, so editing serverDZ.cfg by hand will not get you extra slots. 3. Time of day, and how long a day actually lasts This is the group that generates the most confusion, because the two acceleration fields multiply together rather than acting independently. FieldserverDZ.cfg keyRangeRecommendedWhat it doesServer TimeserverTimeSystemTime or YYYY/MM/DD/HH/MMSystemTimeThe in-game time the server starts at. SystemTime uses the host machine’s local clock; a literal value looks like 2015/4/8/17/23.Server Time AccelerationserverTimeAcceleration0.1–644 to 12Multiplier for the passage of in-game time. At 1 a full day takes 24 real hours; at 24 it takes one.Server Night Time AccelerationserverNightTimeAcceleration0.1–642 to 6A second multiplier applied on top of the first, during night only. Use it to keep nights short without speeding up the whole day.Server Time PersistentserverTimePersistentCheckbox (0 or 1)OnSaves the clock to storage, so the next start resumes where the last one stopped instead of jumping back to Server Time. Work the arithmetic through once and it stops being mysterious. Take a 24-hour in-game cycle split evenly into 12 hours of daylight and 12 of night; the real split shifts with the map and the date, but even is close enough to plan with. With Server Time Acceleration at 8 and Server Night Time Acceleration at 4: Daylight runs at 8×, so 12 in-game hours take 90 real minutes.Night runs at 8 × 4 = 32×, so 12 in-game hours take 22.5 real minutes.A full cycle is therefore just under two real hours, of which players spend about 20 minutes in the dark. The general form: real minutes per cycle = (daylight hours × 60 ÷ acceleration) + (night hours × 60 ÷ (acceleration × night acceleration)). Written into the file, that example is: serverTime = "SystemTime"; serverTimeAcceleration = 8; serverNightTimeAcceleration = 4; serverTimePersistent = 1; Careful: These two fields are the only numbers in the editor with no enforced ceiling — the box will accept 500. DayZ only honours 0.1 to 64, so keep yourself inside that range. Values under 1 slow time down instead of speeding it up. Server Time Persistent matters more than it looks. With it off, every restart re-reads Server Time, so a server pinned to a literal timestamp lands on the same hour forever. With it on, the clock carries across restarts and keeps moving through the week. Time acceleration and night acceleration multiply together — 8 and 4 gives a 32x night. 4. Gameplay restrictions Every field in this group is a checkbox that writes 0 or 1. Read the labels carefully: most of them are phrased as disable, so ticking the box removes the feature rather than adding it. FieldserverDZ.cfg keyRecommendedWhat it doesDisable 3rd Persondisable3rdPersonOff, unless you want a first-person serverTicked forces every player into first person. This is the setting that defines a hardcore or first-person-only server.Disable CrosshairdisableCrosshairOff for a public server, on for hardcoreTicked removes the centre crosshair, so players must use weapon sights.Disable Personal LightdisablePersonalLightOn for real darknessTicked removes the faint light that follows every player, which is what makes DayZ nights genuinely dark.Disable Base DamagedisableBaseDamageOffTicked makes fences and watchtowers indestructible. Popular on PvE; on a PvP server it means no one can ever be raided.Disable Container DamagedisableContainerDamageOffTicked makes tents, barrels, wooden crates and sea chests indestructible.Disable Respawn DialogdisableRespawnDialogOffTicked removes the spawn-choice dialog, so new characters always spawn at a random point.Shot ValidationshotValidationOnTicked makes the server reject shots that arrive in an impossible state, such as from a client whose connection briefly froze.Enable Mouse And KeyboardenableMouseAndKeyboardOffA console-platform option that permits mouse and keyboard input on Xbox and PlayStation servers. It changes nothing on a PC server.Disable Multi Account MitigationdisableMultiAccountMitigationOffAnother console-only option, which turns off the platform’s multi-account protection. No effect on PC. Note: The help line under Enable Mouse And Keyboard describes a character debug window. That text belongs to a neighbouring key in Bohemia’s own annotated serverDZ.cfg and travelled with it; the key itself is the console input option above, so ticking it will not give you a debug overlay. Building a first-person server? Tick Disable 3rd Person and Disable Crosshair together and say so in Host Name — players searching for first person read the browser text, they do not filter on the key. 5. Admin logging: what lands in the ADM log These four checkboxes control how much detail the engine writes to its admin log. The panel always launches your server with -adminlog and a profiles directory, so the .ADM file always exists — you can read it live from the Live Logs card on Overview by setting the Stream dropdown to adm, or open it in the profiles share. FieldserverDZ.cfg keyRecommendedWhat it doesAdmin Log: Player Hits OnlyadminLogPlayerHitsOnlyOnTicked logs only hits that involve players. Unticked logs every hit including animals and infected, which buries the PvP you were looking for.Admin Log: PlacementadminLogPlacementOnLogs placement actions such as traps and tents. Useful for tracing who put a bear trap in a loot room.Admin Log: Build ActionsadminLogBuildActionsOnLogs base building: build, dismantle and destroy. Your evidence trail for raid and griefing disputes.Admin Log: Player ListadminLogPlayerListOnWrites a list of connected players and their positions every five minutes. Invaluable after the fact; it also grows the log steadily. Turn all four on. The log is the only record of what happened once players have logged off, and it cannot be reconstructed retroactively — a setting you left off yesterday tells you nothing about yesterday. Note: The ADM log answers “what did this player do”. For “who is on right now and where”, use the live player map instead, and for kicks and bans use RCON, bans and the whitelist. All four admin log options on — the log is the only record of what happened while you were away. 6. Networking, view distance and object streaming Everything in this group trades server CPU and bandwidth for what players can see and how quickly the world appears around them. The defaults are Bohemia’s and they are well chosen; change them one at a time and watch Server FPS on Overview afterwards. FieldserverDZ.cfg keyRangeRecommendedWhat it doesNetwork Range ClosenetworkRangeClose0–220020Distance in metres at which objects that contain items, such as backpacks, are spawned for a client.Network Range NearnetworkRangeNear0–2200150Distance in metres at which loose inventory items are spawned for a client. Despawn happens 10% further out.Network Range FarnetworkRangeFar0–22001000Distance in metres at which everything other than inventory items is spawned. Raising this is the usual way to see distant vehicles — and the usual way to wreck server FPS.Network Range Distant EffectnetworkRangeDistantEffect0–80004000Distance in metres at which effects are spawned. Currently sound effects only, so this is what governs how far away gunshots can be heard.Default VisibilitydefaultVisibility0–50001375Highest terrain render distance the server permits. A client asking for less than this gets what it asked for; a client asking for more is capped here.Default Object View DistancedefaultObjectViewDistance0–50001375The same ceiling for objects rather than terrain.Network Object Batch SendnetworkObjectBatchSend1–50010How many objects the server may send for creation in one go. Higher values populate the world faster and cost more frame time.Network Object Batch ComputenetworkObjectBatchCompute100–80001000How many entries in the create and destroy lists the server checks per frame. Careful: Raising the network ranges is the most common self-inflicted performance problem on a DayZ server. Every metre you add is more objects the server tracks and streams for every connected player, and the cost scales with player count. If Server FPS drops after a change, put it back. Heavily modded servers are usually better served by leaving these alone and managing mod load order instead. Loot volume belongs in types.xml and the loot economy, not here. Network ranges and view distance ceilings, at the stock DayZ values. 7. Enable CfgGameplay File, and changing the map Two controls reach outside serverDZ.cfg, so they behave a little differently. Enable CfgGameplay File is the last checkbox in the grid and writes enableCfgGameplayFile = 1;. With it on, the engine also reads gameplay values from cfggameplay.json inside your mission folder — things serverDZ.cfg cannot express, such as stamina and base-building rules. The panel neither edits nor validates that file, so check it exists in File Browser → mpmissions → your mission before ticking the box, and read the rpt stream on the next start. It is JSON: one stray comma is enough to break it. Edit Mission sits under the field grid and is how you change map. Pick from the Preset dropdown or type into the Value box: PresetMapdayzOffline.chernarusplusChernarus — the defaultdayzOffline.enochLivoniadayzOffline.sakhalSakhal Then click Save mission. Clear only empties the box on screen; you still have to save, and a blank value resolves back to dayzOffline.chernarusplus. Both buttons are disabled while the server is running, and this one save is governed by the Change mission permission rather than Edit settings. Data loss risk: A mission name is a persistence world. Characters, bases, vehicles and the loot economy all live under mpmissions/<mission>/storage_*/, so switching map converts nothing — it starts a fresh world and leaves the old one untouched on disk. Switching back later brings the old world with it. Take a backup first regardless: see automatic backups and restore. Careful: Whatever you type must match a folder that exists under mpmissions, because the launch command points straight at it. A mission name with no matching folder means the server will not start. Edit Mission changes the map — and with it the entire persistence world. 8. Save, start and check your work Click Save at the bottom of the dialog. You want Changes Saved! in a green banner. Anything else is telling you something: No changes required. — the editor compared your fields against what it loaded and found nothing different.Stop the instance to change settings. — the instance is not stopped.A red message naming one field, such as 'hostName' too long (max 96). — fix that field and save again. Nothing was written. Edit Mission and Server & RCON Authentication have their own buttons and save independently of the main Save, so if you changed the map or the password, make sure you pressed Save mission or Save password too. Close the dialog with Cancel, the Close icon in its top corner, or the Escape key. Now go back to Overview and click Start. Watch the Live Logs card with Stream on rpt through the first boot — a bad value that the panel accepted will show up there rather than in the panel. Once it is up, your changes are live: check the day length against the clock, or open config/serverDZ.cfg in File Browser and read the keys back. Note: Every save is attributed. Audit Log records a Configuration entry of Settings Update for the field grid and Mission Change for the map, with the account that did it — useful when several staff share access. Troubleshooting The Save button in Instance Settings is greyed out Why it happens. Save, Save mission, Regenerate and Save password are all disabled unless the instance is stopped, and a red Stop the instance to change settings. banner appears at the bottom of the dialog. serverDZ.cfg is read once at boot and the engine holds the file open while it runs, so a write underneath a live server would be discarded or fail outright. How to fix it. Click Stop on Overview, wait for Stopped, then reopen Settings. If the Settings button is missing altogether rather than Save being dead, your account lacks the Edit settings permission on this instance. Saving fails with hostName too long (max 96) Why it happens. The Host Name box does not stop you typing, but the API caps the value at 96 characters and rejects the whole save if you exceed it. Names padded with tags, brackets and separators hit that faster than you would expect. How to fix it. Shorten Host Name to 96 characters or fewer and save again — nothing was written on the failed attempt, so no other field was lost. Move the extra detail into Description, which allows 255. Max Players will not go above my slot count Why it happens. maxPlayers is capped at the slot count your instance was provisioned with. Above it the save is rejected with maxPlayers cannot exceed this instance's cap (60). carrying your own number, and the agent re-clamps the value in serverDZ.cfg before every launch. How to fix it. Set it at or below the cap shown in the field’s help line. Raising the ceiling means more slots on the service itself, which is a Billing change rather than a config one. Editing the file over SFTP will not work — the clamp runs pre-launch, after your edit. The server will not start after I changed the map Why it happens. The mission value is used verbatim as a path: the server launches against mpmissions/<your value>. If that folder does not exist — a typo, or a mission you have not uploaded — there is nothing to load. How to fix it. Open File Browser, look in mpmissions and compare the folder names against what you typed. Correct the Value box and press Save mission, or press Clear then Save mission to fall back to dayzOffline.chernarusplus. Uploading a custom mission is a job for SFTP, not the browser upload. The in-game clock jumps back to the same time after every restart Why it happens. Server Time is set to a literal timestamp and Server Time Persistent is unticked, so every boot resets the world clock to that exact moment. A nightly restart then drops players into the same hour every night. How to fix it. Tick Server Time Persistent so the clock is saved and resumed, or set Server Time back to SystemTime so it follows the host machine. Either way the new behaviour begins at the next start. Frequently asked questions How long is a DayZ day at serverTimeAcceleration 12? Two real hours for a full 24-hour in-game cycle, assuming Server Night Time Acceleration is left at 1. The multiplier divides straight into real time: 24 in-game hours ÷ 12 = 2 real hours, of which roughly one is night. Raise the night multiplier to shorten only the dark half — at 12 and 4 the same cycle takes about 75 minutes with just 15 of them at night. Do I need to edit serverDZ.cfg by hand? No, and it is worth avoiding. Every field in Instance Settings writes the real key for you, and clearing a field removes the key so the engine default returns. The file is readable in File Browser under config if you want to verify a value, but hand edits to keys the panel manages can be overwritten — maxPlayers is re-checked before every launch. Where is the whitelist setting? It is not in Instance Settings — whitelist enforcement lives on Players → Whitelist, where an Enable whitelist button toggles it and a banner shows whether enforcement is currently ON or OFF. It writes the same serverDZ.cfg key behind the scenes and takes effect at the next server restart. Details are in RCON, bans and the whitelist. Does changing the map delete my bases? No. Each mission has its own persistence world under mpmissions/<mission>/storage_*/, so switching from Chernarus to Livonia starts a fresh world and leaves the Chernarus one sitting on disk. Switch the mission back and the old characters and bases come back with it. Nothing is converted between maps, so a base cannot follow you across. Why does the server have to be stopped to save settings? Because DayZ reads serverDZ.cfg once, at boot, and keeps the file open while it runs. A change written to a live server would at best be ignored until the next restart and at worst collide with the engine’s file handle, so the panel refuses the write rather than pretending it worked. That is why Save stays disabled until the status pill reads Stopped. Which of these settings apply without a restart? None of them. Every field in this editor is a serverDZ.cfg key, and the whole file is consumed at startup, so the earliest any change can take effect is the next boot. That is also why the editor is stop-gated: by the time you can save, a restart is already part of the process. Related guides Getting started with the control panelEditing types.xml safelyinstalling Steam Workshop mods